
Laser File Bigger Than Your Bed? How to Split It Across Sheets
A laser file bigger than your bed can still be cut if every single part fits the bed. Check the largest part (usually the base, close to the box's outer width and depth), then move the parts into groups that each fit one sheet and cut them as separate jobs. Our 800–1300 mm box layouts typically need two or three runs on a 400 × 400 mm bed and three to five on 300 × 300 mm.
You download a box file, import it, and the layout stretches 1340 mm across the screen while your bed is 400 mm wide. Half the parts hang off the edge of the work area in angry red. Before you close the file and look for something smaller, take a breath: a laser file bigger than your bed is usually not a problem at all. It is just a different puzzle.
Box and organizer files are drawn as a flat row of parts so you can see every piece at once. The layout is not the thing you cut in one go. What has to fit your bed is each single part, and the job is to regroup those parts into sheets your machine can handle. This guide shows how, with real numbers from our files and step by step in LightBurn and xTool Creative Space.
Why box layouts are longer than your bed
Our organizer files lay out every part of the 3 mm version in a row with 4 mm gaps. That is why most of them come out between 800 and 1300 mm long, and the longest jewelry trays reach about 1740 mm. Nobody expects you to own a bed that long. The question is only whether the biggest part fits.
| File | Layout, 3 mm | Parts | Largest part, mm | 300 × 300 bed | 400 × 400 bed | 495 × 279 bed |
|---|---|---|---|---|---|---|
| Condiment caddy, 3 sections | 740 × 232 | 7 | Base 240 × 120 | Yes | Yes | Yes |
| Sliding lid tea box | 926 × 416 | 10 | Base 280 × 160 | Yes | Yes | Yes |
| Sliding lid cutlery box | 1140 × 636 | 9 | Base 280 × 280 | Yes, barely | Yes | No, 280 mm is too deep |
| Eight-compartment tea chest | 1224 × 416 | 12 | Base 320 × 220 | No | Yes | Yes |
| Five-slot silverware organizer | 1340 × 436 | 9 | Base 360 × 300 | No | Yes | No |
| Long jewelry tray, 6 sections | 1744 × 252 | 10 | Base 460 × 170 | No | No | Yes |
The 495 × 279 mm column is a Glowforge-sized work area of about 19.5 × 11 inches; the bed size guide lists other common machines. Across all 241 organizer files in the library, with about 10 mm to spare on each bed, 69 fit a 300 × 300 mm bed, 225 fit 400 × 400 mm and 228 fit 495 × 279 mm.
Step 1: check the largest part, not the layout
The quickest check needs no software. The base of a box is almost always its largest part, and it is roughly the outer width × depth shown on the file page. If that outer size fits your bed with about 10 mm to spare, every part fits. Tall stands are the exception: their side panels can be longer than the base, so check those parts after import.
If one part is too big, do not cut it in two. A base made of two pieces loses its strength and its slots no longer line up. Pick a smaller file, or cut that box on a friend's bigger machine.
Step 2: plan your sheets
Think of each sheet as a separate small file. A few rules make the puzzle easy:
- Biggest parts first. Place the base and the lid, then fill the strips around them with walls, dividers and rails.
- Keep gaps. Leave about 3–5 mm between parts and 5 mm from the sheet edge. Thin slivers of wood between cuts can scorch or flap in the air assist.
- Rotate freely. Turning a part by 90° does not weaken plywood, because its layers already run crosswise. Only the direction of the face grain changes, so keep the walls of one box turned the same way if you care about looks.
- One box, one batch of plywood. Every sheet for a box should come from the same pack. Sheets can differ by a tenth of a millimetre, and that is enough to make one wall rattle while the next one jams, as the tab and slot guide explains.
Here is how two real files split up:
| File and bed | Sheet 1 | Sheet 2 | Sheet 3 |
|---|---|---|---|
| Sliding lid tea box, 300 × 300 | Base, front, both rails | Lid, back | Both sides, both dividers |
| Sliding lid tea box, 400 × 400 | Base, lid, both rails, one divider | Front, back, both sides, one divider | Not needed |
| Five-slot silverware, 400 × 400 | Base, front | Back, both sides, three dividers | Last divider from any 310 × 70 mm offcut |
| Five-slot silverware, 300 × 300 | The 360 × 300 base does not fit: choose a narrower tray |
As a rough guide, most of our box layouts need two or three runs on a 400 × 400 mm bed and three to five on a 300 × 300 mm bed.
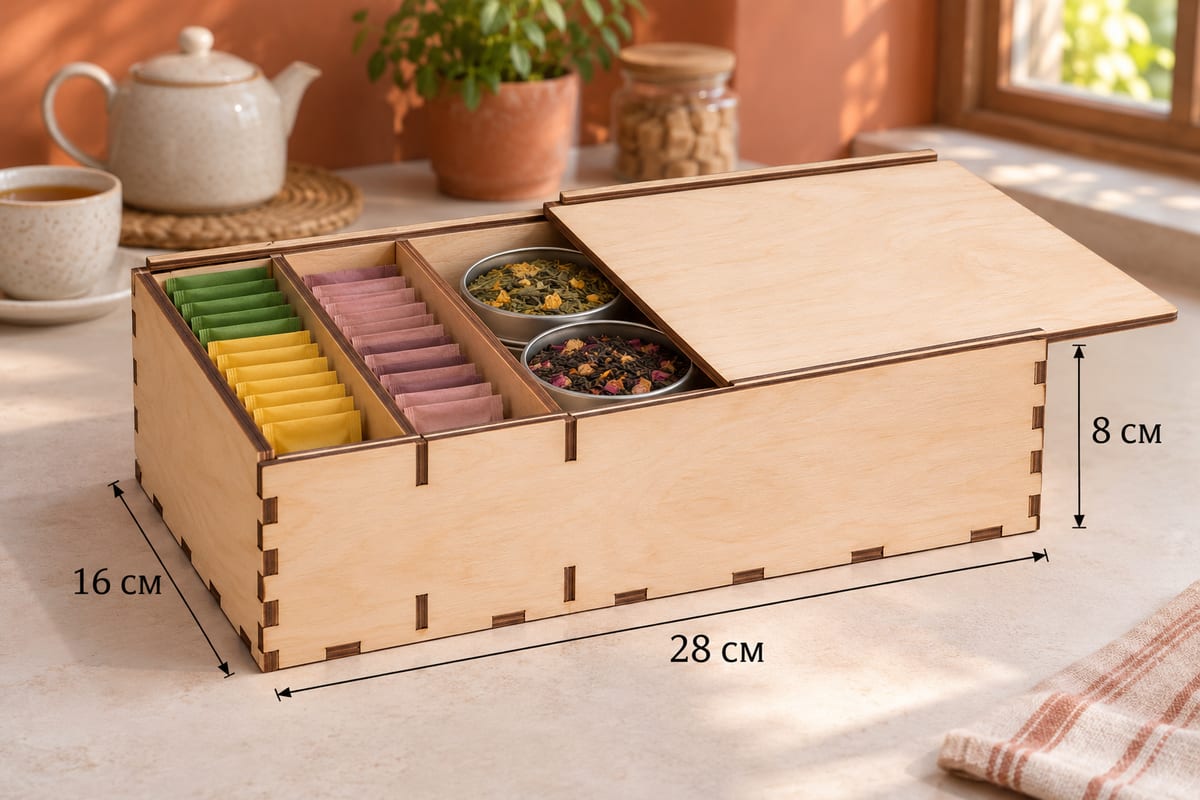 Sliding Lid Tea Box, 3 SectionsOuter size (W × D × H) 280 × 160 × 80 mm (11.02 × 6.30 × 3.15 in)Parts 10Est. time, 10 W diode (3 mm) 23 min 50 sEst. time, 40 W CO2 (3 mm) 9 min 56 sSVG · DXF →
A good first file to split: ten parts, nothing bigger than 280 × 160 mm, so it works even on a small bed. The thin rails are perfect gap fillers next to the base.
Step 3: split the file in LightBurn
- Import the SVG or DXF with File > Import and check the size. The tea box layout should read about 926 × 416 mm. If it does not, see why an SVG comes in at the wrong size.
- Draw a rectangle the size of your sheet and put it on a tool layer (T1 or T2). Tool layers show on screen but never burn, so the rectangle works as a stencil.
- Drag the parts for sheet 1 into the rectangle. Rotate with the rotate tool and keep the gaps from Step 2.
- Select only the parts for sheet 1. In the Laser window, tick Cut Selected Graphics so LightBurn sends just those shapes.
- Frame the job, check it clears the edge of your sheet, and cut.
- Load sheet 2, select the next group, frame again and cut. Repeat until the pile on the table matches the part count on the file page.
If you prefer clean files, save a copy per sheet instead (tea-box-sheet-1, tea-box-sheet-2) and delete the parts that are not on it. It takes a minute longer and is very hard to mix up. Our LightBurn beginner guide covers layers and framing if they are new to you.
Step 4: split the file in xTool Creative Space
- Import the SVG or DXF and check the size and the units. Importing SVG and DXF into XCS covers the common problems.
- The canvas shows your machine's work area. Move the parts for sheet 1 inside it and arrange them with the same gaps.
- Save the project as a copy for each sheet and delete the parts that belong to other sheets. One project per sheet is the most reliable way to avoid cutting a part twice.
- Set the cut settings for your plywood, frame, and cut. Then open the next project and repeat.
You can also do the split before you open your laser software at all. Our SVGs name every part (Front, Back, Base, Divider, Lid and so on), and Inkscape shows those names in its Objects panel, which makes it easy to build one SVG per sheet.
Pro tip: write the part name on each piece in pencil as it comes off the bed. Ten loose rectangles of plywood look very alike at assembly time, especially dividers that differ by 3 mm.
Common mistake: scaling the whole layout down until it fits the bed. The parts shrink but the plywood does not, so every slot ends up narrower than your sheet and nothing goes together. Always keep the scale at 100% and move parts instead. More in how to scale laser files.
When something goes wrong
| Problem | Likely cause | Fix |
|---|---|---|
| Parts hang outside the work area after import | The layout is bigger than the bed | Group the parts by sheet as above |
| One part never fits | That part is bigger than the bed | Choose a smaller file or a bigger machine |
| Everything imports tiny or huge | Units read as inches or pixels | Check the import units and the layout size |
| A part is missing at assembly | Skipped while moving groups | Count parts against the file page before the last run |
| Walls from different runs fit differently | Sheets from different packs | Cut one box from one batch of plywood |
| Cuts overlap an earlier hole | Reused a sheet without framing | Frame every run, start each group on fresh material |
Splitting also opens a door: once the parts are loose, you can combine parts of two boxes on one sheet and fill the gaps with small dividers. That is the idea behind nesting, and it is the easiest way to waste less plywood.
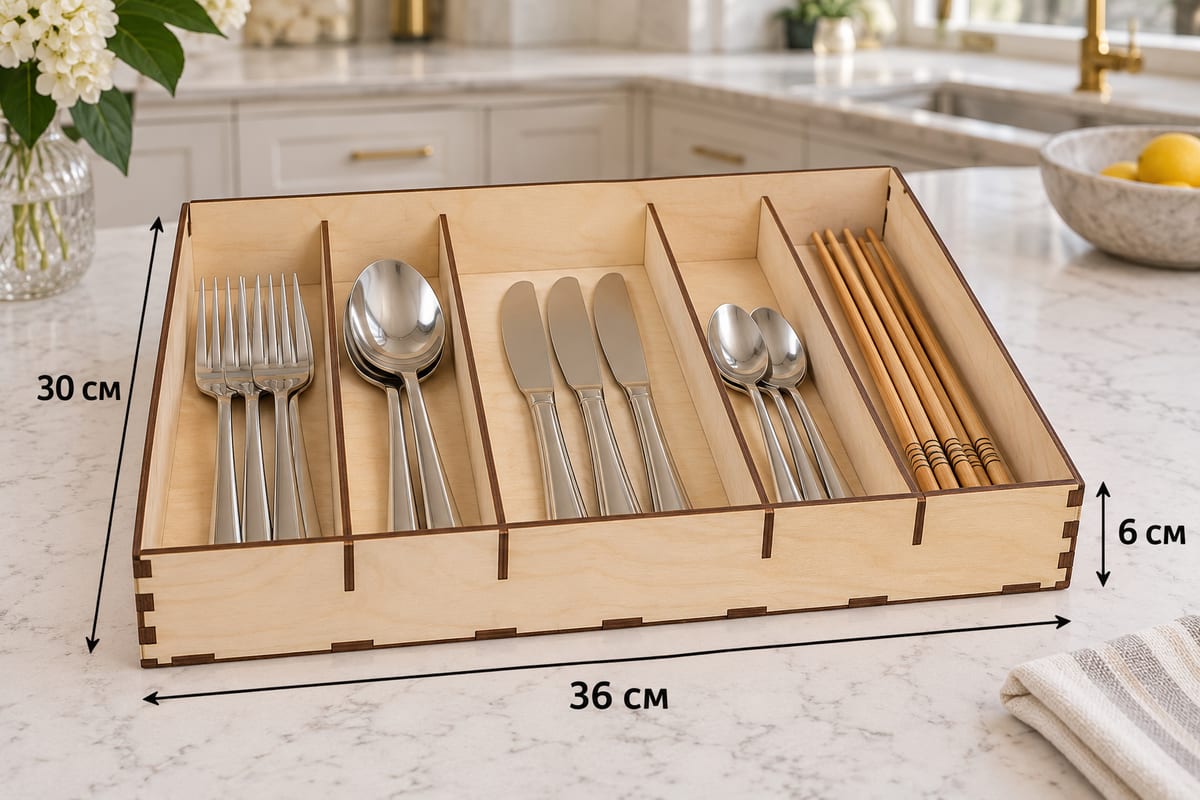 Silverware Organizer, 5 Long SlotsOuter size (W × D × H) 360 × 300 × 60 mm (14.17 × 11.81 × 2.36 in)Parts 9Est. time, 10 W diode (3 mm) 29 min 11 sEst. time, 40 W CO2 (3 mm) 12 min 10 sSVG · DXF →
The 1340 mm layout from the intro. Nine parts, all 60 mm strips apart from the 360 × 300 mm base, so it packs neatly onto two 400 × 400 mm sheets plus one offcut.
Next step: open the box file you have been putting off, find its largest part, and sketch the sheets on paper before you touch the software. Five minutes of planning, and a "too big" file becomes two or three ordinary runs. Browse the library for a box that fits your bed today.
Read next: Laser Cut Cutlery Tray and Easy Laser Cut Projects for Beginners.
Questions and answers
Can I laser cut a file that is bigger than my bed?
Yes, as long as every single part fits the bed. Move the parts into groups that fit one sheet each and cut them as separate jobs.
How do I know if the parts of a box fit my laser?
Compare the outer width and depth on the file page with your bed, leaving about 10 mm to spare. The base is usually the largest part; for tall stands, also check the side panels after import.
Does rotating parts weaken plywood?
No. Plywood layers already run crosswise, so a part turned by 90° is just as strong. Only the direction of the visible face grain changes.
How many sheets does one of your boxes need?
As a rough guide, two or three runs on a 400 × 400 mm bed and three to five on a 300 × 300 mm bed, depending on the box.
Can I just scale the file down to fit my laser?
No. Scaling shrinks the slots while your plywood stays the same thickness, so the joints will not fit. Keep 100% scale and split the parts across sheets instead.