
Tab and Slot Joints in Laser Cutting: Fit, Kerf and Glue
A tab and slot joint fits when the cut slot is about as wide as your real plywood. Slots are usually drawn at the nominal thickness, the laser widens them by the kerf (typically 0.1–0.25 mm), and real 3 mm plywood often measures 2.7–3.2 mm, so cut one test slot from the same sheet first. Fix loose joints with glue or a positive kerf offset, tight ones with light sanding or a negative offset.
You cut all the parts, peel them off the honeycomb and push the first wall into the base. It drops straight back out. Or the opposite happens: the tab sits on top of the slot and refuses to go in, and you start looking around for a mallet. Every tab and slot laser cut box lives or dies on a few tenths of a millimetre. Once you know where those tenths come from, a good fit stops being luck.
This guide covers how a tab and slot joint works, why the same file fits one sheet and not the next, a two-minute test that saves a whole box, and how to rescue joints that are too loose or too tight. If kerf is new to you, read what kerf is first.
How a tab and slot joint works
A tab is a tongue sticking out of one part. A slot is a rectangular hole, or a notch at the edge, in the part it joins. Here is the key point: the tab is exactly as thick as your plywood, because it is the plywood. So the only width that matters is the width of the cut slot against the real thickness of the sheet.
The length of the tab matters much less. In our organizer files, tabs are 20 mm long and their slots are drawn 20.4 mm long, 0.2 mm of play at each end, so they line up easily. The slot width is drawn at the nominal thickness: 3.0 mm in the 3 mm file, 4.0 mm in the 4 mm file, and so on up to 6 mm. That leaves two numbers in your hands: how thick your sheet really is, and how much the laser burns away.
Why plywood thickness varies
"3 mm" on the label is a name, not a measurement. Plywood is several thin veneers glued together, and each layer, the glue and the final sanding all add their own small error. Humidity swells the sheet a little, and the next batch from the same supplier can be different again.
| Sold as | Nominal | What you often get | Notes |
|---|---|---|---|
| 3 mm birch plywood | 3.0 mm | About 2.7–3.1 mm | Varies by batch and brand |
| 1/8 in plywood | 3.175 mm | About 2.5–3.2 mm | Close to 3 mm, but measure it |
| 4 mm plywood | 4.0 mm | About 3.7–4.1 mm | Less common, check each delivery |
| 6 mm plywood | 6.0 mm | Usually close to 6 mm | Can still vary across one sheet |
| 1/4 in plywood | 6.35 mm | Often 5.5–6.0 mm | Rarely the full quarter inch |
These are typical spreads, not guarantees, and the 1/8 inch versus 3 mm guide goes deeper. Measure your sheet with calipers in four or five spots away from the edges, and write the result on its corner in pencil.
Kerf: why the slot comes out wider than drawn
The laser beam has width. On a slot it removes half a kerf on each side, so the cut slot ends up one full kerf wider than the line you drew. On a tab, the length shrinks by one kerf too, but that only adds a little play in the long direction, which does no harm.
Here is what that means for a slot drawn at 3.0 mm and cut with a kerf of 0.15 mm, so it comes out about 3.15 mm wide:
| Your plywood measures | Gap in the slot | How it feels | What to do |
|---|---|---|---|
| 2.80 mm | About 0.35 mm | Rattles, falls out | Glue, or a positive kerf offset |
| 2.95 mm | About 0.20 mm | Slides in, slides out | Glue the outer corners |
| 3.05 mm | About 0.10 mm | Firm push by hand | Nothing, this is the sweet spot |
| 3.15 mm | About 0 mm | Needs real pressure | Sand the tab faces lightly |
| 3.25 mm | About −0.10 mm | Will not go in, veneer may split | Negative kerf offset or a thinner sheet |
In birch plywood, roughly 0.05–0.1 mm of total gap usually feels like a solid push fit, because the wood squeezes a little. Your plywood, laser and focus may shift that, so treat the table as a map and your test slot as the answer. The kerf measuring guide shows how to find your exact number.
The test slot: two minutes that save a sheet
- Measure the sheet you will actually cut the box from.
- Pick the file version closest to that measurement.
- Cut a small test piece from an offcut of the same sheet: either one divider and the small part it slots into, or a strip with a few slots drawn 0.1 mm apart, for example 2.9, 3.0, 3.1 and 3.2 mm.
- Push a strip of the same sheet into each slot. The right one goes in with firm thumb pressure and stays put when you shake it.
- If the slot drawn at the nominal width is the right one, cut the whole file as it is. If not, apply the difference as a kerf offset, below.
Pro tip: test with an offcut from the sheet you are about to cut, not from last month's stack. Two sheets from the same pack can differ by a tenth of a millimetre, and that is a whole fit class in the table above.
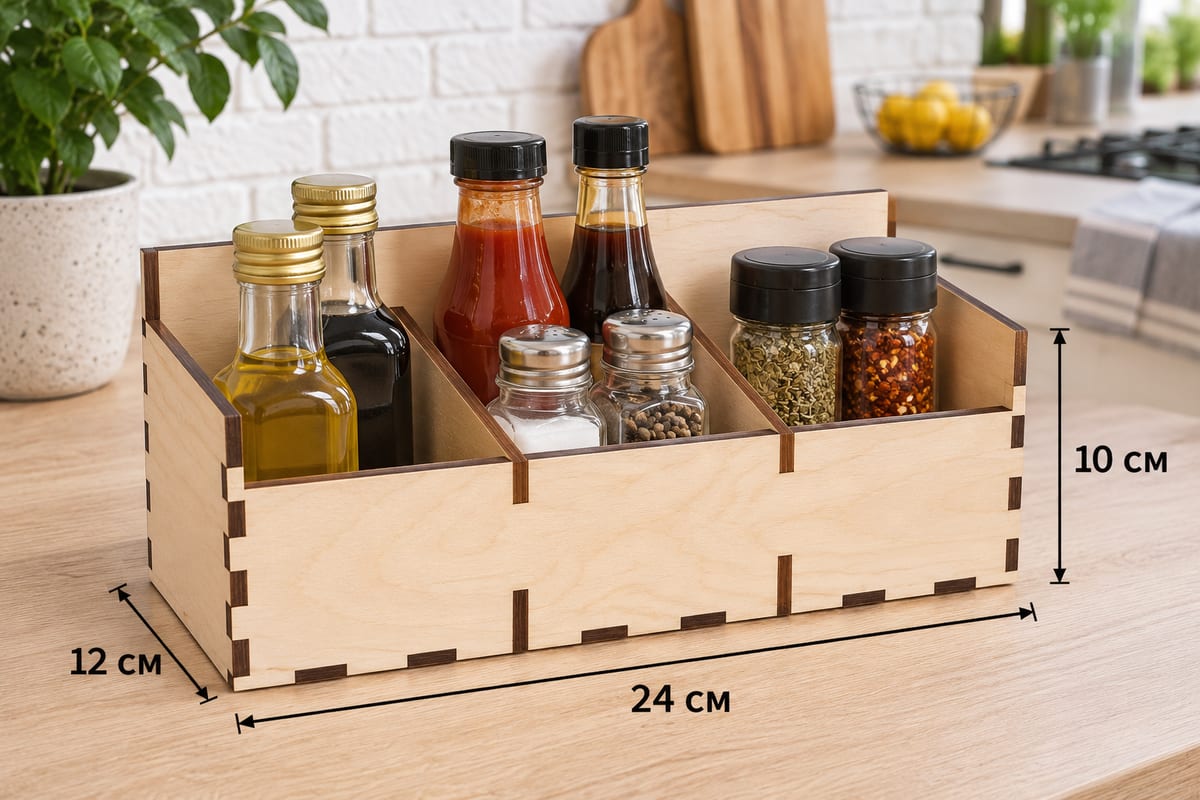 Condiment Caddy, 3 SectionsOuter size (W × D × H) 240 × 120 × 100 mm (9.45 × 4.72 × 3.94 in)Parts 7Est. time, 10 W diode (3 mm) 13 min 56 sEst. time, 40 W CO2 (3 mm) 5 min 48 sSVG · DXF →
Seven parts, the smallest box in the kitchen set and about 14 minutes on a 10 W diode in 3 mm. It is a cheap way to learn how your plywood and laser behave before you commit a whole sheet to a big grid.
Fixing loose and tight joints
| Symptom | Likely cause | Fix this box | Fix the next cut |
|---|---|---|---|
| Tabs fall out | Slot wider than the plywood | Wood glue in the joints, or a paper shim | Positive kerf offset, about half the gap |
| Tab will not enter | Slot narrower than the plywood | Sand the tab faces with a flat block | Negative kerf offset |
| Fits at one end of the sheet, not the other | Sheet thickness varies | Sand the thick spot | Measure several spots, cut one box from one sheet |
| Face veneer splits | Joint too tight, tapped in hard | Glue the split and clamp it | Widen the slot by 0.05–0.1 mm |
| Box rocks or is out of square | Loose slots everywhere | Glue and tape it square on a flat surface | Tighten the fit before cutting |
| Fit was fine, now it binds | Finish swelled the slot | Scrape the finish out of the slot | Dry-fit before finishing |
In LightBurn, each layer's cut settings include a Kerf Offset value. A positive value makes holes smaller and parts slightly bigger, which tightens a loose fit. A negative value does the opposite. Change it in small steps of 0.02–0.05 mm and cut a test slot after each change. Other programs have similar offset tools under different names.
Common mistake: scaling the whole file to fix a tight joint. Scaling a 300 mm wall by 2% makes it 6 mm longer but widens a 3 mm slot by only 0.06 mm, and the 3 mm tab depth no longer matches your sheet, so corners stick out. Fix the fit with kerf offset; keep the scale at 100%. More in how to scale laser files.
Glue or no glue?
Our organizer boxes are designed to hold together without glue: the walls lock into the base and into each other, and the dividers drop into their slots last. Whether you add glue depends on how the box will be used.
- No glue: dividers you may want to move later, sliding lids, and lids that pivot on plywood pins. Glue in a moving joint locks it for good.
- Wood glue (PVA) on the outer corners: cutlery trays, oil caddies and any box people lift when it is full. A thin bead is enough; hold the corners with masking tape for half an hour and give it about a day to reach full strength, or whatever your bottle says.
- Instant glue (CA): a quick rescue for one loose tab, not a whole box, because it sets before you can square things up.
Wipe squeeze-out with a damp cloth straight away. Dried glue on the face looks shiny and blocks any finish you put on later, so it shows as a pale patch. If the box goes into a kitchen, glue first and finish after, as explained in our food safe finish guide.
Pro tip: masking tape across each corner holds thin plywood walls better than clamps do, and it never dents the face.
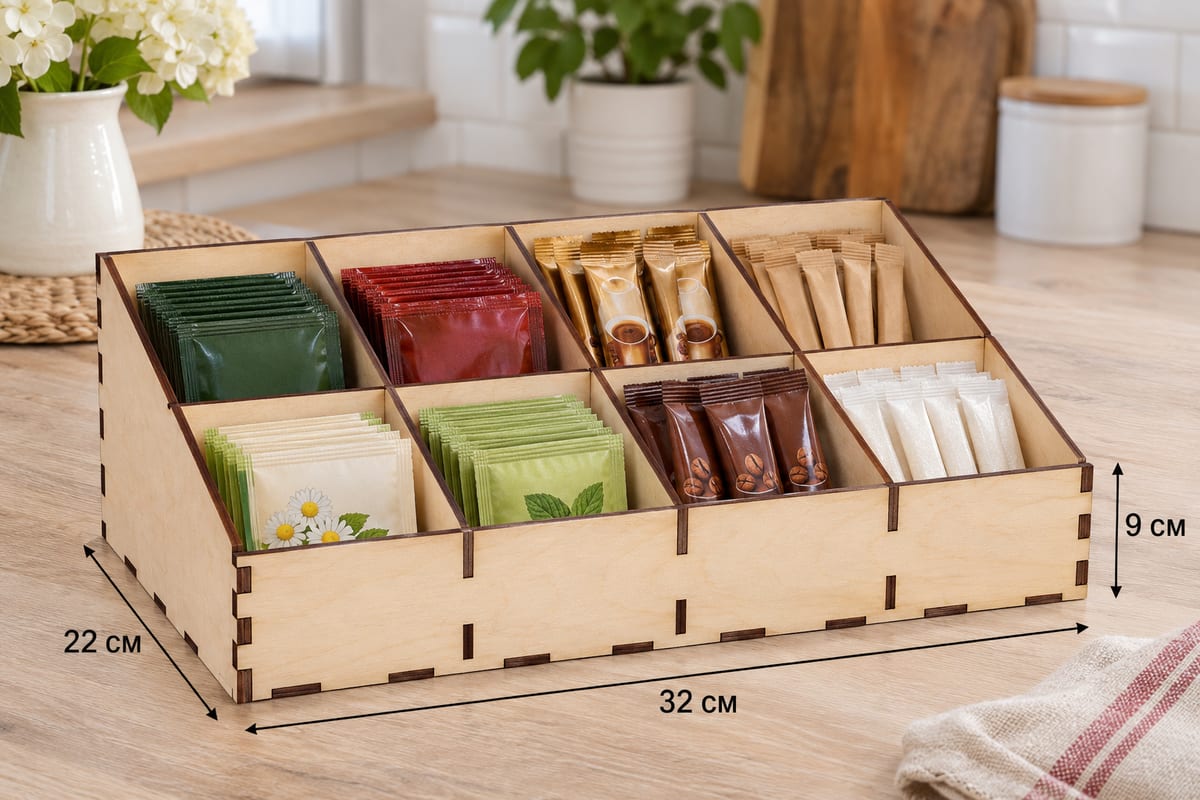 Tea Bag Chest, 8 CompartmentsOuter size (W × D × H) 320 × 220 × 90 mm (12.60 × 8.66 × 3.54 in)Parts 12Est. time, 10 W diode (3 mm) 26 min 43 sEst. time, 40 W CO2 (3 mm) 11 min 08 sSVG · DXF →
Twelve parts and six short dividers in two depths and two heights. In a grid like this a loose fit shows at once, because every divider leans a little. Get your test slot right first, and pencil-mark the front and back divider sets before assembly.
Tab and slot versus finger joints
Tab and slot boxes have flat walls standing in a base, with short tabs at the corners. Finger joints interlock along the whole edge, so they are stronger and look more like classic woodwork, but they take longer to cut. If you want a finger joint box in your own size, our box generator takes your measured thickness and a kerf value from 0 to 0.4 mm, and the finger joint box guide walks through it.
Next step: measure the sheet on top of your stack, cut one test slot from its offcut, and write the result on the sheet. Then cut the condiment caddy above. If it goes together with a firm push and stands square without glue, every box in the library will behave the same way on that sheet.
Read next: Sliding Lid Box Laser Cut and Laser File Bigger Than Your Bed? Split It Across Sheets.
Questions and answers
How tight should a tab and slot joint be?
The tab should go in with firm thumb pressure and stay put when you shake the part. If you need a mallet it is too tight; if it falls out it is too loose.
What slot width should I use for 3 mm plywood?
Draw slots at your measured thickness and let the kerf of about 0.1–0.25 mm add the clearance. Our files draw slots at the nominal 3.0 mm, so cut a test slot first and adjust with kerf offset if needed.
Why does the same file fit one sheet but not the next?
Real plywood thickness varies between batches, brands and even across one sheet, often by 0.1–0.3 mm. That is as much as the kerf, so measure every new sheet.
Do tab and slot boxes need glue?
Our organizer boxes hold together without it. Add wood glue to the outer corners of boxes that are lifted when full, and never glue sliding lids, pivot pins or dividers you want to move.
Can I use the 3 mm file for 1/8 inch plywood?
Usually yes, because 1/8 inch sheets often measure close to 3 mm. Measure your sheet and cut a test slot; if it is tight, use a small negative kerf offset.