 Visualization
Tiered Napkin Stand SVG, Three Step Six Bin Table Organizer Laser Cut File, Coffee Station Rack DXF
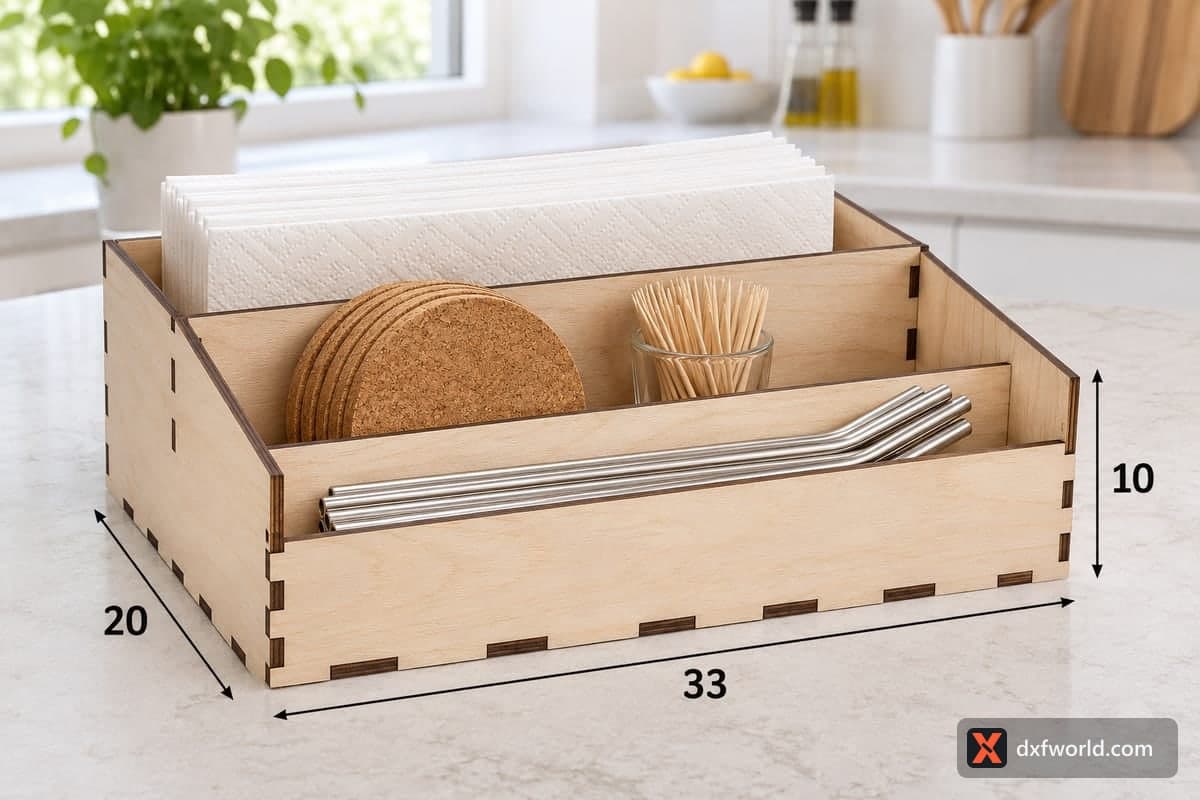
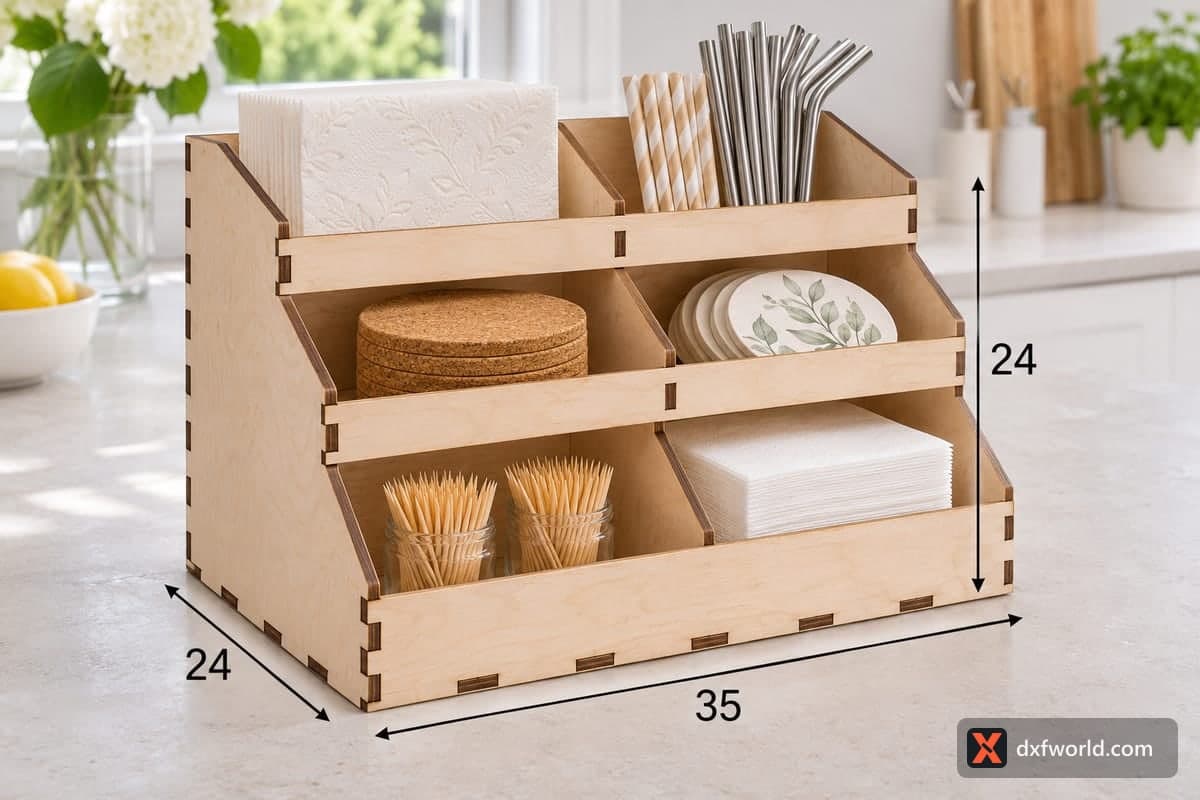
A free three-step napkin stand whose tiers rise toward the back, each step split by one divider into two bins, six in total, for napkins, coasters, straws and toothpicks on a counter or coffee station. The download has SVG and DXF files for 3, 4, 5 and 6 mm plywood; the stand measures 350 × 240 × 240 mm (13.78 × 9.45 × 9.45 in), is cut as 12 pieces that join with tabs and slots, and has small part numbers engraved to help with assembly.
- Formats
- SVG, DXF
- Outer size (W × D × H)
- 350 × 240 × 240 mm (13.78 × 9.45 × 9.45 in)
- Parts
- 12
- Material thickness
- 3, 4, 5 or 6 mm plywood (a file for each)
- Layout size (3 mm file)
- 1,420 × 376 mm
- Cut length
- 10.89 m
- Est. time, 10 W diode (3 mm)
- 36 min 17 s
- Est. time, 40 W CO2 (3 mm)
- 15 min 07 s
- Layers
- CUT only, no engraving
Free account required to download
How to make it
- 01Choose the file that matches your plywood and cut one test slot to confirm the tabs fit before running the full stand.
- 02Cut the 12 pieces, splitting the 1420 mm layout into two or three jobs on a smaller machine, and keep the pieces sorted by their engraved numbers.
- 03Join the three shelves, front board, step boards and brace to one stepped side, close with the other side, then slot in one divider per step.
- 04Sand the edges, apply a clear coat, and load napkins and straws on top, coasters in the middle and toothpicks with spare napkins at the bottom.
Six bins on three steps
Two stepped side panels carry three shelves, each one higher and further back than the last. A front board and two step boards form the lip of each tier, and a brace stiffens the stand from behind. A single divider halves every shelf, so you get two wide bins per step. In the photo the top step holds a tall stack of embossed paper napkins next to striped paper straws and steel straws; the middle step keeps cork coasters and a set of leaf-print coasters; the bottom step has two jars of toothpicks beside a pile of white napkins. Because each tier sits higher than the one in front of it, everything stays in view from across the counter.
Bed size and cutting time
The 12 parts come on a 1420 × 376 mm layout, so most hobby lasers will need it split into two or three jobs: the side panels together, then shelves and boards, then the brace and dividers. Estimated time for the 3 mm file: about 36 min 17 s on a 10 W diode, about 15 min 07 s on a 40 W CO2 and about 7 min 15 s on a 100 W CO2. Plan one or two diode passes for 3 mm and more passes, or a CO2 laser, for 5 to 6 mm. The engraved part numbers are the only marks besides the cut lines.
Assembly and uses
Follow the part numbers: fix the shelves and boards into one side panel, add the brace, close with the second side, then push the three dividers into their slots. The stand holds dry, but glue makes sense for a rack that is loaded and emptied every day. Sand the shelf edges smooth and brush on a clear lacquer. Ideas: a self-serve coffee or tea corner for an office, a condiment rack for a food truck window, or a wedding buffet stand with napkins and favours.
Questions about this file
What size are the bins?
Each step is 350 mm wide and halved by one divider, so every bin is a little under half that width. Folded paper napkins fit lying flat or standing on edge, as on the top step in the photo.
Why are there small numbers on the parts?
They are part numbers engraved by the file so you can match each shelf and board to its slots. Sand them lightly if you do not want them to show.
Can I make it wider for a buffet?
Scale it, then reset the slot widths to your material thickness. Widening alone also widens the slots, and the shelves would sit loose.
Will it carry heavier glass jars?
Toothpick jars, sugar packets and coaster stacks are no problem in 3 or 4 mm. For heavier glass jars, 5 or 6 mm plywood and glued shelves give a stiffer stand.
Can I brand it for my cafe?
Add your logo to the front board as an engrave layer in your laser software; it is the widest flat face at the bottom of the stand.
Similar files