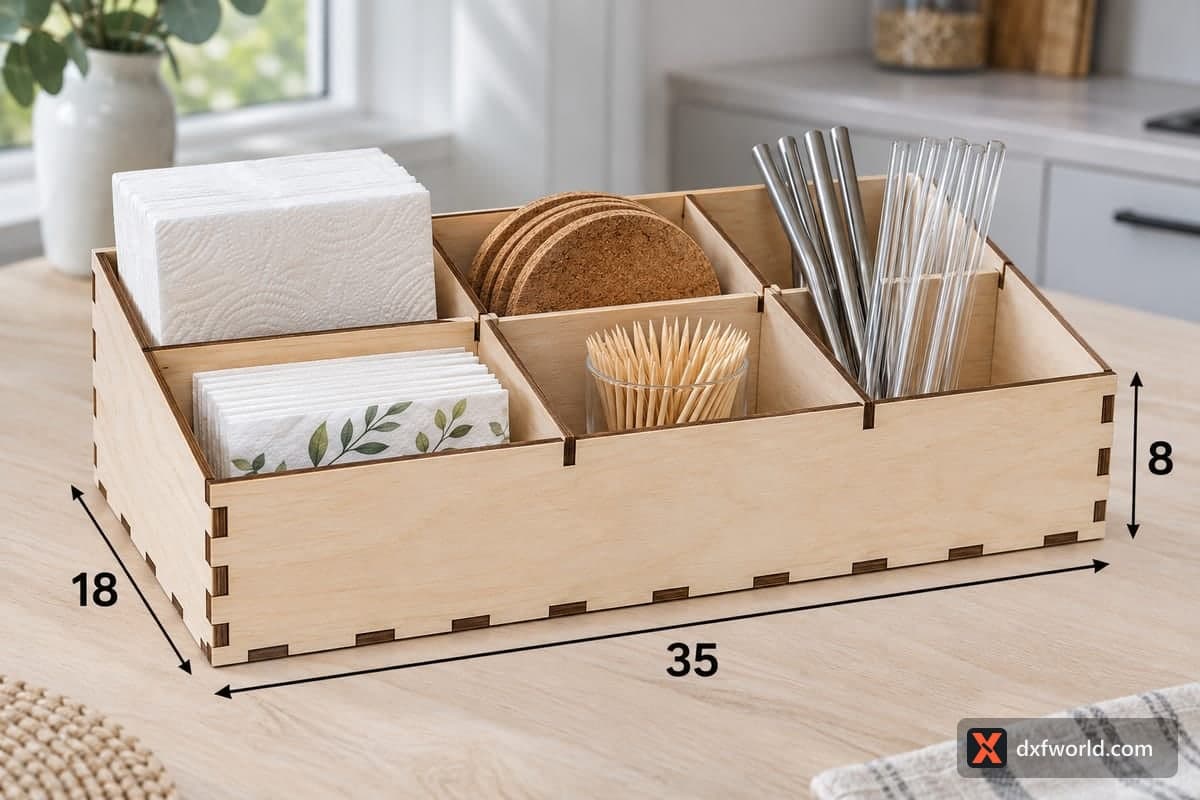
 Visualization
Napkin Table Organizer SVG, Six Section 3x2 Napkin and Coaster Box Laser Cut File, Kitchen Island Caddy DXF
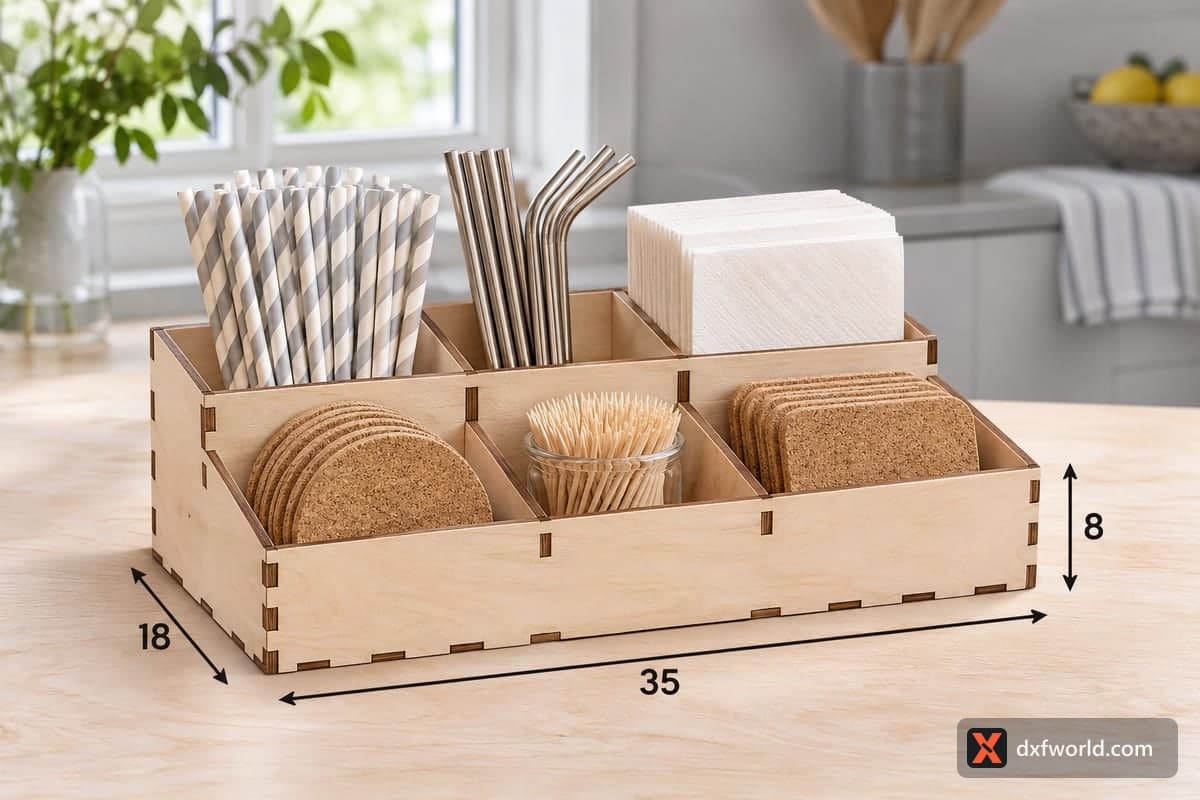
A free open napkin and table organizer with straight 80 mm walls and six sections in a three-by-two grid, sized for paper napkins, coasters, toothpicks and straws. The download includes SVG and DXF files for 3, 4, 5 and 6 mm plywood; the box measures 350 × 180 × 80 mm (13.78 × 7.09 × 3.15 in) and is made from 8 pieces joined with tabs and slots, with dividers that slot together.
- Formats
- SVG, DXF
- Outer size (W × D × H)
- 350 × 180 × 80 mm (13.78 × 7.09 × 3.15 in)
- Parts
- 8
- Material thickness
- 3, 4, 5 or 6 mm plywood (a file for each)
- Layout size (3 mm file)
- 1,080 × 272 mm
- Cut length
- 8.44 m
- Est. time, 10 W diode (3 mm)
- 28 min 08 s
- Est. time, 40 W CO2 (3 mm)
- 11 min 43 s
- Layers
- CUT only, no engraving
Free account required to download
How to make it
- 01Choose the SVG or DXF that matches your sheet and test one tab in a slot cut from scrap.
- 02Cut all 8 pieces; on a small bed, run the base and long walls as one job and the rest as another.
- 03Join the long walls and ends to the base, set the long divider in, then press the two short dividers down so the slots lock into each other.
- 04Smooth the edges, seal with oil or clear lacquer, and sort napkins, coasters, toothpicks and straws into the six sections.
The grid inside
One long divider runs the length of the box and two short dividers cross it, so the dividers slot together into six equal sections, three at the back and three at the front. All walls and dividers share the same 80 mm height, which gives the box a tidy, flat top line on a kitchen island or buffet. In the photo the back row holds embossed white paper napkins, a stack of cork coasters standing on edge and a mix of steel and glass straws, while the front row has leaf-print napkins laid flat and a small glass of toothpicks.
Cutting notes
With only 8 parts this is a quick box to cut. The layout is 1080 × 272 mm, and the estimated time for the 3 mm file is about 28 min 08 s on a 10 W diode, about 11 min 43 s on a 40 W CO2 or about 5 min 38 s on a 100 W CO2. Most diode lasers cut 3 mm plywood in one or two passes, but plan several passes, or use a CO2, for 5 and 6 mm sheets. On a 400 mm bed, cut the base and the two long walls first and the shorter panels in a second job. There is no engraving in the download, only cut lines.
Assembly and finishing
Start with the base and the two long walls, add the ends, then lower the long divider into place and drop the two short dividers over it so their slots interlock. No glue is required, but a bead along the base keeps the box rigid when it is lifted full. Sand lightly, then oil or lacquer it so it wipes clean after a meal.
Ideas: make a matching pair for the two ends of a long dining table, use it as a wedding table caddy for napkins and favours, or offer it at a market stall in three different wood stains.
Questions about this file
What can go in the six sections?
Each section takes about a sixth of the 350 × 180 mm footprint: folded paper napkins, round coasters standing on edge, a toothpick glass or a bundle of straws.
Can I resize the box?
Yes. After scaling, correct the slot width to your material thickness, because a scaled slot no longer matches the plywood and the grid will wobble.
Do the grid dividers need glue?
No. The long and short dividers interlock through their slots and their ends sit in the walls, so the grid stays upright. Glue only if you want the box permanent.
Does it work in MDF?
MDF of 3 or 4 mm cuts well and takes paint nicely, which is handy for a coloured table set. Seal it, as raw MDF swells with moisture.
Can I personalise the front with a name?
The file has cut lines only, but you can place your own lettering on the front panel in your laser software and engrave it before the cut.
Similar files