 Visualization
Tiered Coffee Pod Stand SVG, Coffee Station Display Laser Cut File, Capsule and Sugar Stick Rack DXF
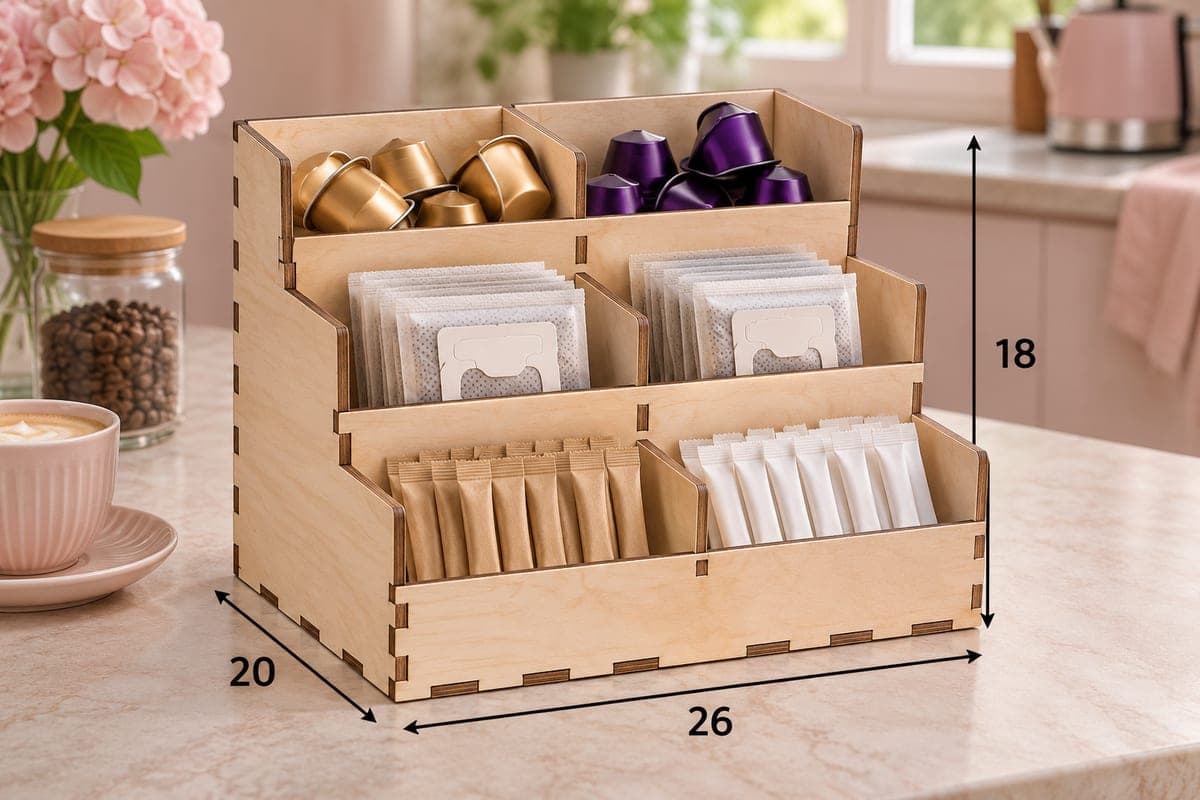
A free laser cut file for a three-step coffee stand with two pockets on every step, six in total, rising toward the back so each row stays in sight. The download includes SVG and DXF for 3, 4, 5 and 6 mm plywood; the stand measures 260 × 200 × 180 mm (10.24 × 7.87 × 7.09 in) and is built from 12 pieces that lock together with tabs and slots. Small part numbers are engraved on the pieces to help with assembly.
- Formats
- SVG, DXF
- Outer size (W × D × H)
- 260 × 200 × 180 mm (10.24 × 7.87 × 7.09 in)
- Parts
- 12
- Material thickness
- 3, 4, 5 or 6 mm plywood (a file for each)
- Layout size (3 mm file)
- 1,060 × 313 mm
- Cut length
- 8.55 m
- Est. time, 10 W diode (3 mm)
- 28 min 30 s
- Est. time, 40 W CO2 (3 mm)
- 11 min 52 s
- Layers
- CUT only, no engraving
Free account required to download
How to make it
- 01Pick the file for the plywood you have and cut a shelf corner first to check that its tabs seat in the side panel.
- 02Run the full layout, split over two or three sheets if needed, and keep the numbered parts in order.
- 03Join the shelves, step boards and front board to one side, close with the second side, slide in the brace, then add the three dividers.
- 04Sand any scorch marks off the edges, apply lacquer, and stock the six pockets from the top step down.
A café-style display for six kinds of coffee
Pods in a drawer get forgotten. This stand puts them on show instead, the way a café lays out sachets by the till. It has three steps, each a little higher and further back than the one in front, and a single divider splits every step into a left and a right pocket. The photo puts gold and violet espresso capsules on the top step, two stacks of drip coffee sachets in the middle and brown sugar and white creamer sticks along the bottom. Since each row sits above the one in front of it, every pocket is visible from across the kitchen.
At 260 mm wide and 180 mm tall it fits under most wall cabinets, and the 200 mm depth leaves room for a cup in front of it on a standard worktop.
Building the steps
There are 12 parts: two stepped side panels, a front board, two step boards, three shelves, a brace and three short dividers. Each piece carries a small engraved number, so lay them out in order before you start. Fit the shelves and step boards between the sides first, add the brace at the back for stiffness, then drop the dividers into their slots.
The 3 mm layout is 1060 × 313 mm, longer than most hobby beds, so split it across two or three sheets. Expect about 28 min 30 s for the 3 mm file on a 10 W diode, about 11 min 52 s on a 40 W CO2 and about 5 min 42 s on a 100 W CO2. A diode will need extra passes on 5 or 6 mm stock.
For hosts and small cafés
Guest houses and holiday rentals can set it beside the kettle so visitors help themselves. A coffee cart or a small office can use it as a self-serve point. Seal it with clear lacquer if it will stand near a sink or a steaming machine.
Questions about this file
What fits on each step?
Each pocket is half the 260 mm width, wide enough for a cluster of espresso capsules, a row of drip coffee sachets or a bundle of sugar sticks. Sachets stand upright and lean on the step behind them.
What are the small engraved numbers for?
They are part numbers that let you tell the two step boards and three shelves apart while assembling. Sand lightly if you want them fainter afterwards.
Can I scale the stand up for larger coffee pods?
You can enlarge the drawing, but every slot has to stay the thickness of your plywood. Resize the outline, then reset the slot widths, or the steps will not lock.
Will the stand work in acrylic?
Yes, clear or tinted acrylic cuts well on a CO2 laser. Measure the sheet, pick the nearest thickness file and join the parts with acrylic cement.
Do the steps need glue?
They hold by friction, but a stand that is loaded and emptied every day benefits from a drop of wood glue in the side-panel slots.
Similar files