 Visualization
Tall 3 Tier Tea Stand SVG, Stepped Tea Bag Display Laser Cut File, Wooden Tea Jar Shelf DXF, Counter Tea Rack
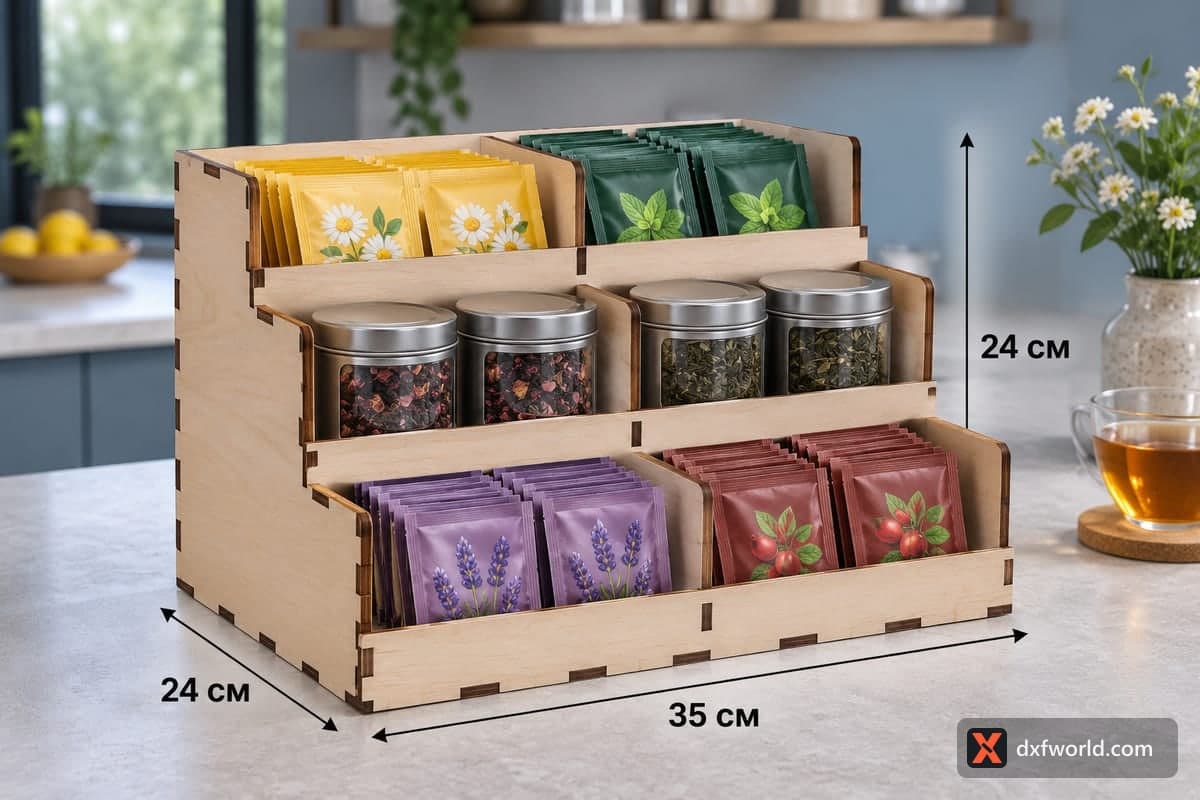
A free three-tier tea stand laser cut file in SVG and DXF, with separate versions for 3, 4, 5 and 6 mm plywood. The stand is 350 × 240 × 240 mm (13.78 × 9.45 × 9.45 in) and has three steps rising to the back, each split by one divider into two bays, six in all. It is cut as 12 pieces that join with tabs and slots, and small part numbers are engraved on the pieces to guide assembly.
- Formats
- SVG, DXF
- Outer size (W × D × H)
- 350 × 240 × 240 mm (13.78 × 9.45 × 9.45 in)
- Parts
- 12
- Material thickness
- 3, 4, 5 or 6 mm plywood (a file for each)
- Layout size (3 mm file)
- 1,420 × 376 mm
- Cut length
- 10.89 m
- Est. time, 10 W diode (3 mm)
- 36 min 17 s
- Est. time, 40 W CO2 (3 mm)
- 15 min 07 s
- Layers
- CUT only, no engraving
Free account required to download
How to make it
- 01Choose the file for your sheet thickness and cut one shelf slot on scrap to make sure the tab drops in snugly.
- 02Cut the 12 numbered parts across two or three sheets, keeping the engraved numbers face up.
- 03Lay a side panel flat, fit the three shelves, two step boards, front board and brace by number, then add the other side and push in the three dividers.
- 04Sand the shelf lips, apply oil or lacquer, and arrange tea bags on the top and bottom steps with jars in the middle.
Six bays on three steps
At 240 mm this stand is as high as it is deep, so the back row sits well above the front and every label faces you. Each step is a shelf with a low front lip and a single divider down the middle. In the photo the top step carries chamomile and mint tea bags standing upright, the middle step holds four glass jars of loose tea, two per bay, and the bottom step has lavender and rosehip sachets. Wide bays like these also take coffee pods, honey sticks or small jars of sugar.
Parts and cutting
The 12 parts are two side panels, a front board, two step boards, three shelves, a back brace and three dividers. Each part has a small engraved number, which makes it easy to match the shelves to their slots. For the 3 mm file the job takes about 36 min 17 s on a 10 W diode, about 15 min 07 s on a 40 W CO2 and about 7 min 15 s on a 100 W CO2. The layout measures 1420 × 376 mm; most hobby beds will need it spread over two or three sheets, which is simple because the long boards all share the 350 mm width.
Stand one side panel on the bench, plug in the shelves, step boards, front board and brace, then press the second side on top. Slide the dividers in last. Glue is optional, but a stand loaded with heavy jars benefits from a few drops in the shelf joints.
Cafe and gift use
A tea shop or hotel breakfast bar can brand the top step board with an engraved logo. At home, finish it with hardwax oil so steam from the kettle does no harm, and give it filled with six favourite teas.
Questions about this file
How much does each step hold?
Each step is split into two bays of about 17 cm wide and about 9 cm deep, enough for two medium jars or a row of upright tea bags.
Why are numbers engraved on the parts?
The shelves and step boards look alike, so the small numbers show which slot each piece belongs in. They are shallow and can be sanded away after assembly if you prefer.
Is the tall stand steady with heavy jars?
The side panels give it a 240 mm deep footprint, so it stands firmly; glue the shelf joints if you plan to load it with glass jars.
Can the tall stand be cut from 6 mm plywood?
Yes, the 6 mm file has slots sized for that sheet and makes a heavier stand, but a 10 W diode will need several passes or you will need a stronger laser.
Can I shrink the stand for a small counter?
Only if the slot widths stay equal to your plywood thickness; scaling the whole drawing shrinks the slots and the tabs no longer fit.
Similar files