 Visualization
Hinged Box SVG, Six Compartment Napkin Box Laser Cut File, Wooden Coaster and Straw Storage DXF
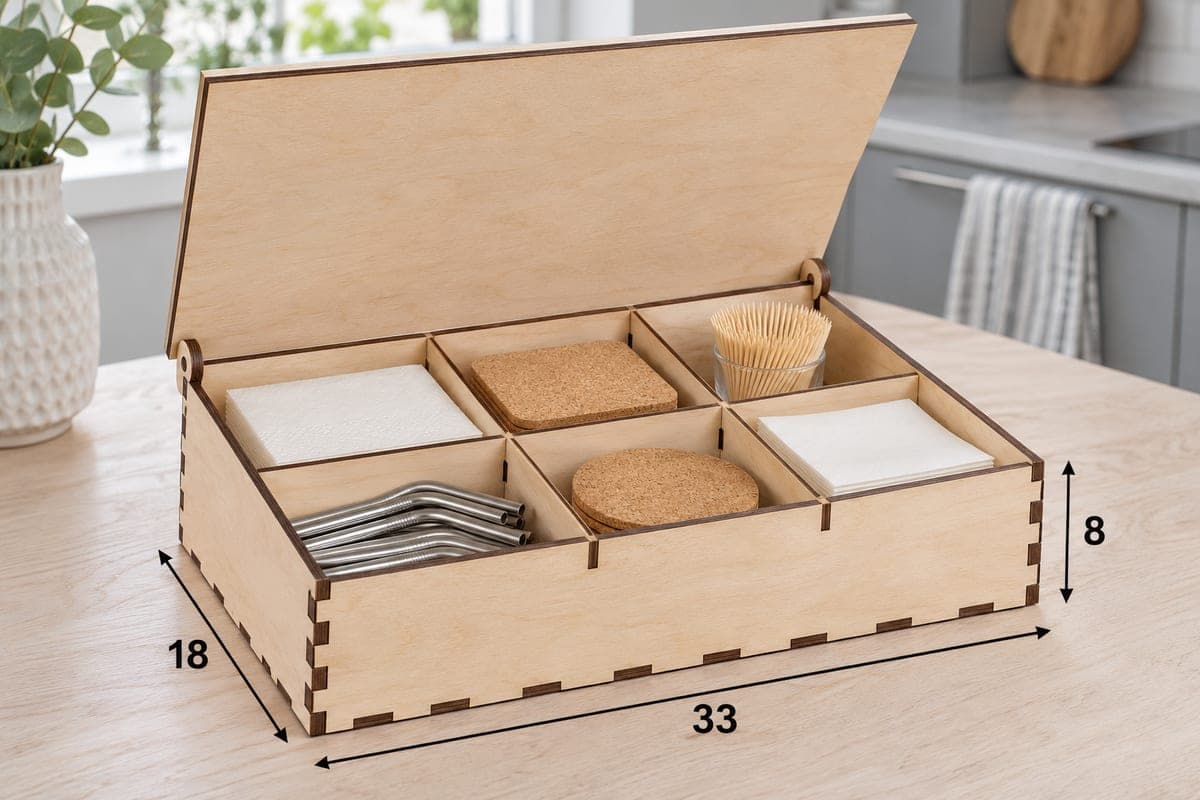
A free hinged box whose lid pivots open at the back on pins cut into the plywood, covering six compartments in three columns and two rows for napkins, coasters, straws and toothpicks. The download holds SVG and DXF files for 3, 4, 5 and 6 mm plywood; the box is 330 × 180 × 80 mm (12.99 × 7.09 × 3.15 in) and has 9 pieces that fit together with tabs and slots.
- Formats
- SVG, DXF
- Outer size (W × D × H)
- 330 × 180 × 80 mm (12.99 × 7.09 × 3.15 in)
- Parts
- 9
- Material thickness
- 3, 4, 5 or 6 mm plywood (a file for each)
- Layout size (3 mm file)
- 1,040 × 457 mm
- Cut length
- 8.63 m
- Est. time, 10 W diode (3 mm)
- 28 min 46 s
- Est. time, 40 W CO2 (3 mm)
- 11 min 59 s
- Layers
- CUT only, no engraving
Free account required to download
How to make it
- 01Measure your plywood, pick the nearest of the four files and test a single slot so the joints and the pivot will fit.
- 02Cut all 9 pieces; if the 1040 mm layout is too big for your bed, run the sides and lid separately from the base and dividers.
- 03Join the front, back and dividers to the base, then add the two taller sides so the lid pivot sits between them.
- 04Swing the lid open and shut, sand any spot that rubs, finish with oil and fill the six cells.
A lid that stays with the box
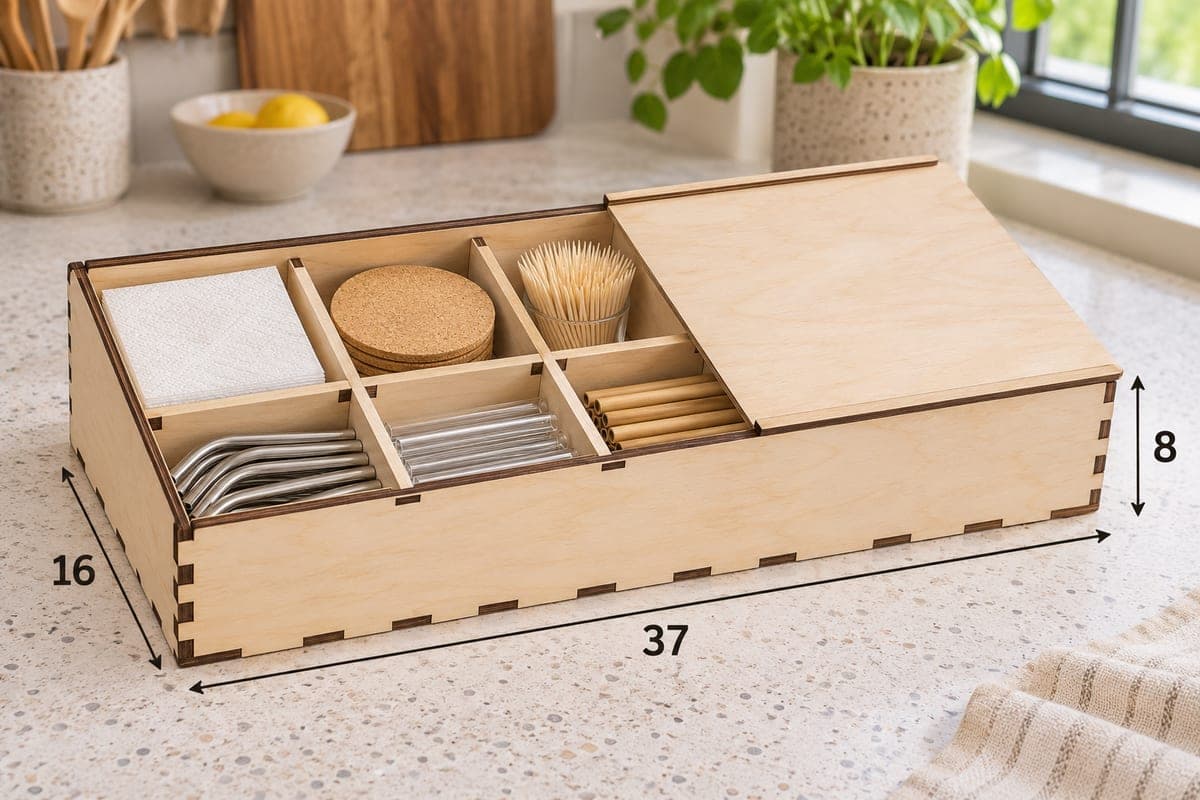
The two side panels are cut a little taller than the walls, 84.2 mm against 80 mm, and the lid turns on round pins at the back between them. It swings up and back, so it never gets lost or set down in a spill, and the whole pivot is part of the plywood pieces, with nothing extra to buy. Inside, one long divider and two short ones form a grid of six cells. The photo uses them for white paper napkins in two corners, square and round cork coasters, a glass of toothpicks and a bundle of bent steel straws.
Cutting notes
The 3 mm layout is a compact 1040 × 457 mm, so it suits more beds than the long organizers in this category, although a 400 mm machine still needs two jobs. For the 3 mm file expect about 28 min 46 s on a 10 W diode, about 11 min 59 s on a 40 W CO2 and about 5 min 45 s on a 100 W CO2. The pivot is the part most sensitive to sheet thickness, so measure your plywood with calipers and use the file closest to it. A 10 W diode gets through 3 mm in one or two passes; leave the 6 mm version to a CO2 laser.
Fitting the lid
Assemble the base, front, back and dividers first, then add the two taller sides so the lid pivot sits between them. Open and shut the lid a few times before gluing anything; if it rubs, sand its back edge. Glue the base joints if you like, but keep glue well away from the pivot. Oil or wax keeps the box looking clean on a dining table.
The plain lid has room for your own engraved family name or a dinner-party date, which turns the box into a wedding or housewarming gift. Bundled with a set of cork coasters, it makes a tidy item for a craft fair table.
Questions about this file
Does the hinge need any hardware?
No, the lid turns on pins cut from the same plywood, so the cut pieces and, if you like, a little glue for the base are all you need.
What fits in each compartment?
Folded cocktail napkins, a stack of small coasters, toothpicks in a short glass or a bundle of bent straws. Long straight straws may need to lie at an angle.
Which plywood thickness gives the smoothest lid?
3 or 4 mm birch swings most freely and cuts fast on a diode. Thicker sheet works too, but test the pivot fit with an offcut first.
Could it be a tea box instead?
Yes, six cells suit sorted tea bags just as well, and the closed lid keeps dust off them on an open shelf.
How do I add a name to the lid?
Put your text on a separate engrave layer over the lid piece in your laser software. The download itself contains cut lines only.
Similar files