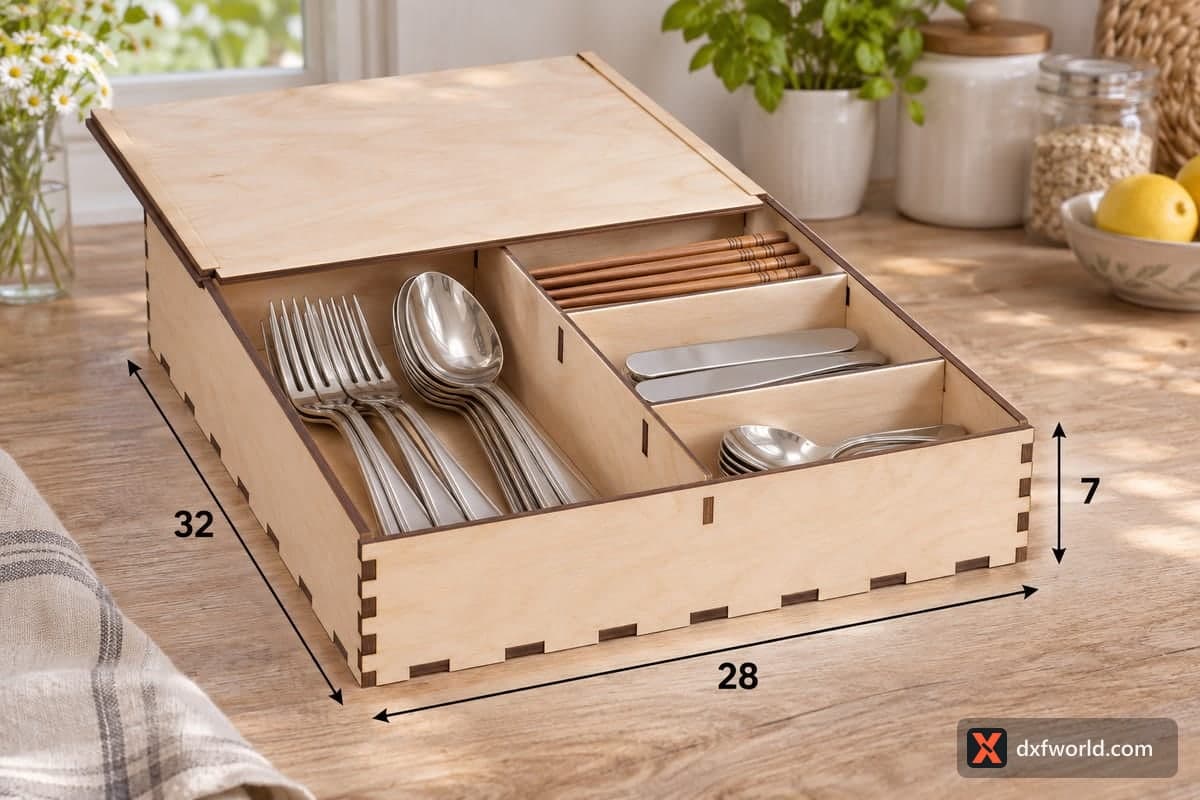
 Visualization
Compact Sliding Lid Flatware Box SVG, Dessert Fork Storage Laser Cut File, Small Lidded Silverware Case DXF
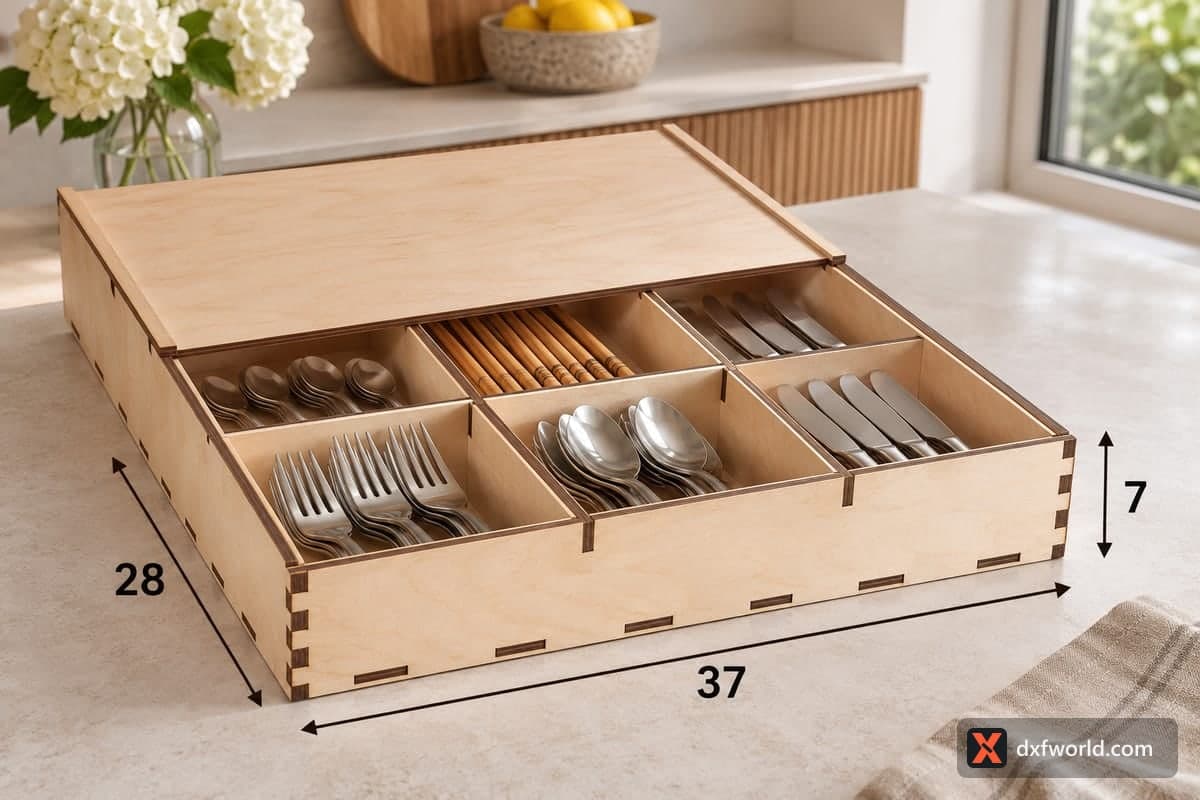
A free laser cut file for a compact flatware box with a sliding lid and six cells in two columns of three, 280 × 320 × 70 mm (11.02 × 12.60 × 2.76 in) outside. The download holds SVG and DXF files for 3, 4, 5 and 6 mm plywood; its 11 pieces lock together with tabs and slots and the lid runs in on two rails, with no hinge and no lock.
- Formats
- SVG, DXF
- Outer size (W × D × H)
- 280 × 320 × 70 mm (11.02 × 12.60 × 2.76 in)
- Parts
- 11
- Material thickness
- 3, 4, 5 or 6 mm plywood (a file for each)
- Layout size (3 mm file)
- 1,220 × 726 mm
- Cut length
- 11.53 m
- Est. time, 10 W diode (3 mm)
- 38 min 25 s
- Est. time, 40 W CO2 (3 mm)
- 16 min 01 s
- Layers
- CUT only, no engraving
Free account required to download
How to make it
- 01Select the SVG or DXF for your plywood thickness and test-cut one rail and a short strip of lid edge to check the sliding fit.
- 02Cut all 11 pieces, keeping the lid and both rails on the same sheet so their thickness matches.
- 03Assemble base, back, sides and lower front, interlock the long divider with the two cross dividers, then glue the rails along the inside of the side walls.
- 04Sand and wax the lid edges, finish the box with oil, then fill the six cells and slide the lid home.
Six small cells under one lid
One long divider splits the box into two columns, and two cross dividers cut each column into three cells of roughly 13 × 10 cm on 3 mm plywood. That size suits the small pieces that get lost in a big drawer: teaspoons, coffee spoons, cake and dessert forks, butter spreaders, sugar tongs, chopstick rests and napkin rings. The dividers stand 60.7 mm tall, a little below the walls, so the lid can pass over them.
The photo shows the left column opened into one long bay for dinner forks and spoons, with knives, chopsticks and teaspoons in the three right cells. In the file both cross dividers run the full width; if you want that long bay, trim the cross dividers to the right column in your editor before cutting.
The lid is a flat panel that slides in from the front along two narrow rails glued inside the side walls. The front wall is lower (63.7 mm) to let it pass.
Cutting and fitting the lid
For the 3 mm file, expect about 38 min 25 s on a 10 W diode, about 16 min 01 s on a 40 W CO2 and about 7 min 41 s on a 100 W CO2. The layout is 1220 × 726 mm, which a large CO2 cuts in one go; a desktop diode needs it split over three or four sheets. Cut the lid and rails from one sheet so they match in thickness, and sand the lid edges until it glides without wobbling.
Where it earns its place
- A dessert set box for the sideboard, kept apart from everyday cutlery
- A coffee corner box for spoons, stirrers and sugar packets
- A wedding cake fork box with names you engrave on the lid yourself
Questions about this file
Do dinner forks fit in the cells?
Not lying flat, since each cell is about 13 × 10 cm. Use the cells for teaspoons and dessert pieces, or shorten the cross dividers to create one long bay as shown in the photo.
Why does the front wall stand lower than the sides?
The lid slides in over the front wall. Its lower height leaves the gap the lid needs to enter the rails.
Can I make the box bigger for a full set?
Lengthen the walls, base, lid and rails in your editor and keep every slot at your plywood thickness. Scaling the whole file would make the slots and rails too wide or too narrow.
The lid feels loose. How do I fix it?
Cut the rails from slightly thicker stock or add a strip of veneer under them. A tight but smooth lid stays put better than a loose one.
Which finish keeps it looking clean in a kitchen?
Two thin coats of water-based lacquer resist fingerprints and splashes. Keep wax only on the rails and lid edges so it does not attract dust inside.
Similar files