
Laser Cut Hinged Box Without Hardware: Pin Hinges and Other Wooden Hinges
A laser cut hinged box without hardware usually pivots on round pins cut into the lid that sit in holes in the side walls, so the lid swings up with no screws or metal hinges. As a typical start, make the holes 0.2-0.5 mm larger than the pins after cutting and leave 0.5-1 mm of side play, then test on scrap. Fit the lid while assembling the sides and never glue the pins.
There is a small moment of magic the first time a laser cut lid swings up on its own wooden pins. No screws, no tiny brass hinges rolling under the workbench, just plywood turning on plywood with a soft, dry click. Then you close it, and it lies flat as if it had always been one piece.
A laser cut hinged box without hardware gets its hinge straight from the sheet. In our library the lid has small round pins at its back corners that sit in holes in the side walls, so the whole box, hinge included, comes off the laser bed. This guide explains how that pivot works, which other no-metal hinges you can cut, how much clearance to leave, how to test it on scrap, and the one assembly step that catches almost everyone.
How a laser cut hinged box pivots on plywood pins
Look at one of our hinged boxes from the side and you see the trick. The two side walls are a little taller at the back than the back wall, and near their top corner each has a round hole. The lid is one flat panel, and at its two back corners it has round pins that sit in those holes. Lift the front edge and the lid turns on the pins, swings up past vertical and rests leaning back against the wall behind. Close it and the front wall, slightly lower than the sides, lets it lie flat.
In the hinged sauce bottle box, for example, the side panels are 84.2 mm high against an 80 mm back wall. That extra height is what carries the pivot above the rim of the box.
There is one bit of geometry worth knowing if you ever design your own. As the lid turns, its back edge sweeps an arc around the pin. If the distance from the pin centre to the far corner of that edge is bigger than the distance from the pin centre to the back wall, the corner hits the wall and the lid jams halfway open. Designers fix this by raising the pivot, rounding the back edge, or leaving a small gap behind the lid.
Other hinges you can cut without metal
Pins in holes are the simplest wooden hinge, but not the only one.
| Hinge | How it works | Best for | Watch out for |
|---|---|---|---|
| Pin pivot (our files) | Round pins on the lid corners turn in holes in the side walls | Tea chests, spice and cutlery boxes | Lid must go in during assembly; pins wear on thin sheets |
| Stacked knuckle hinge | Small round-ended leaves glued alternately to lid and back, with a wooden dowel or bamboo skewer through them | Jewellery and keepsake boxes | Needs careful alignment and a drilled or cut hole in each leaf |
| Living hinge | A pattern of cuts lets the plywood itself bend | Rounded lids, book-style boxes | More fragile; see our living hinge guide |
| Fabric or leather strip | A strip glued along the lid and back wall | Quick fixes and rustic boxes | The glue line must cure fully; cloth wears over time |
| No hinge at all | A sliding lid on rails or a lift-off lid | Kitchen storage that is opened often | The lid can be pulled off or left lying around |
If you just need a covered box and the hinge is not the point, a lift-off or sliding lid is even simpler. Our guide to the laser cut sliding lid box covers the rail version.
Clearance for pins, holes and the swing
A pin hinge has more gaps to get right than a finger joint. The values below are typical starting points, not rules. Your laser, your kerf and your sheet decide the final numbers, so test on scrap.
| Gap | Typical starting point | Too tight | Too loose |
|---|---|---|---|
| Hole diameter vs pin diameter, after cutting | Hole 0.2-0.5 mm larger | Lid squeaks, binds or cracks the side wall | Lid wobbles and drops to one side |
| Lid width vs space between side walls | 0.5-1.0 mm total | Lid rubs the walls as it turns | Lid slides sideways and a pin can slip out |
| Lid back edge vs back wall during the swing | At least 1-2 mm at the closest point | Lid jams halfway open | Visible gap behind the closed lid |
| Divider tops vs closed lid | Dividers a little below the wall rim | Lid rocks on the dividers | No problem, apart from looks |
Kerf plays a bigger role here than people expect. When a file is cut without compensation, the beam removes wood on both sides of the line, so a round pin comes out a little smaller than drawn and the hole a little bigger. The net clearance grows by roughly one kerf width, typically 0.1-0.25 mm in 3 mm plywood. A pivot that is snug on a fine CO2 beam can feel loose on a wider diode cut, and the reverse.
Pin strength depends on sheet thickness, because the pin is only as thick as the plywood. Our hinged files come in 3, 4, 5 and 6 mm versions; 4 or 5 mm gives sturdier pins for a box that is opened every day, while 3 mm suits a lighter box opened now and then.
Pro tip: If the pin fits well but squeaks, rub a little candle wax into the hole. Do not oil it heavily: wet oil swells the fibres and can make a good fit tight.
Test cuts before you cut the whole box
A hinged box from our library takes roughly 20-34 minutes on a 10 W diode for the 3 mm file. Spending two minutes on a test saves that time and a sheet.
- Measure your plywood with a caliper in several places and choose the file for the nearest thickness. Do not scale the file, because the pins and holes scale with it.
- Copy the hinge area into a test job: the back corner of the lid with one pin, and the top of one side wall with its hole.
- Cut both from the same sheet you will use for the box, with the same settings.
- Push the pin into the hole and turn it. It should rotate smoothly with light finger pressure and not wobble.
- Also cut a test slot for the tabs, since the joints and the hinge both depend on the same thickness.
- Adjust by sanding the pin lightly if it binds, or move to a different thickness file if it is far off.
Assembly order: the step that traps the lid
On a pin hinge, the lid can only go in while one side wall is still loose. Once both sides are fixed, the pins are trapped and there is no way to slip the lid in.
- Join the base, front and back.
- Slide in the dividers.
- Fit the first side wall.
- Place the lid with one pin in that wall's hole.
- Bring in the second side wall so its hole catches the other pin, and press its tabs home.
- Open and close the lid several times before any glue.
Common mistake: Gluing both side walls first and then looking at the lid in your hand. The pins cannot be pushed in sideways once the walls are fixed, and taking a glued box apart usually breaks a tab. Fit the lid between the sides during assembly, and keep glue away from the pins and the lid completely.
If the lid still does not behave, this table usually finds the reason:
| Problem | Likely cause | Fix |
|---|---|---|
| Lid rubs on the way up | Back edge hits the back wall | Sand the back edge of the lid a touch |
| Lid rocks when closed | Divider tops are too high | Sand the top of the dividers, not the lid |
| Lid falls to one side | Holes too big, or walls splayed outward | Square the box, or use the next thicker file |
| Squeak or stiff turn | Tight pin, or char inside the hole | Wipe out the soot, sand the pin lightly, wax |
| Pin cracked off | Pin too thin for daily use, or forced in | Recut the lid; consider the 4 or 5 mm version |
Free hinged box files to cut
All of these use a lid on plywood pins, join with tabs and slots, and come as SVG and DXF for 3, 4, 5 and 6 mm plywood.
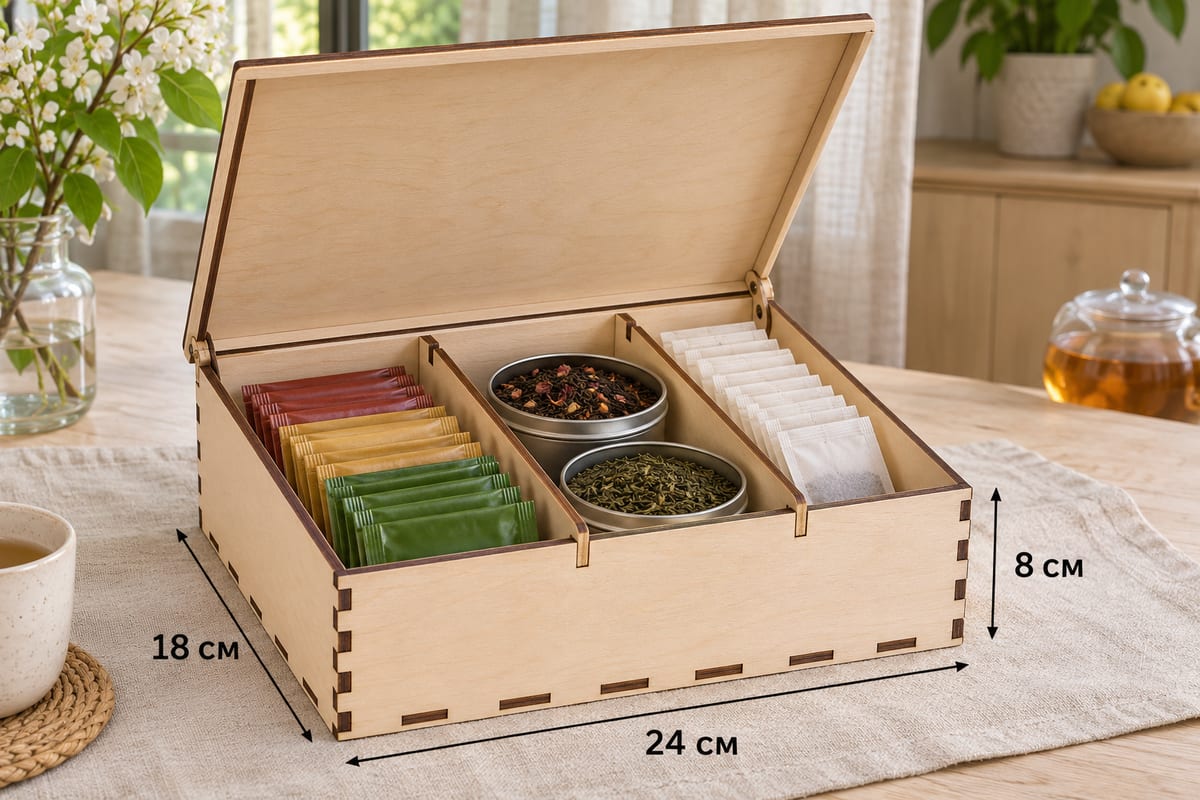 Hinged Lid Tea Chest, 3 SectionsOuter size (W × D × H) 240 × 180 × 80 mm (9.45 × 7.09 × 3.15 in)Parts 8Est. time, 10 W diode (3 mm) 20 min 42 sEst. time, 40 W CO2 (3 mm) 8 min 37 sSVG · DXF →
The tea chest is a good first hinged box: 240 × 180 × 80 mm, 8 parts and three sections. The same body appears as the hinged spice box, the sauce bottle box and the napkin and coaster box.
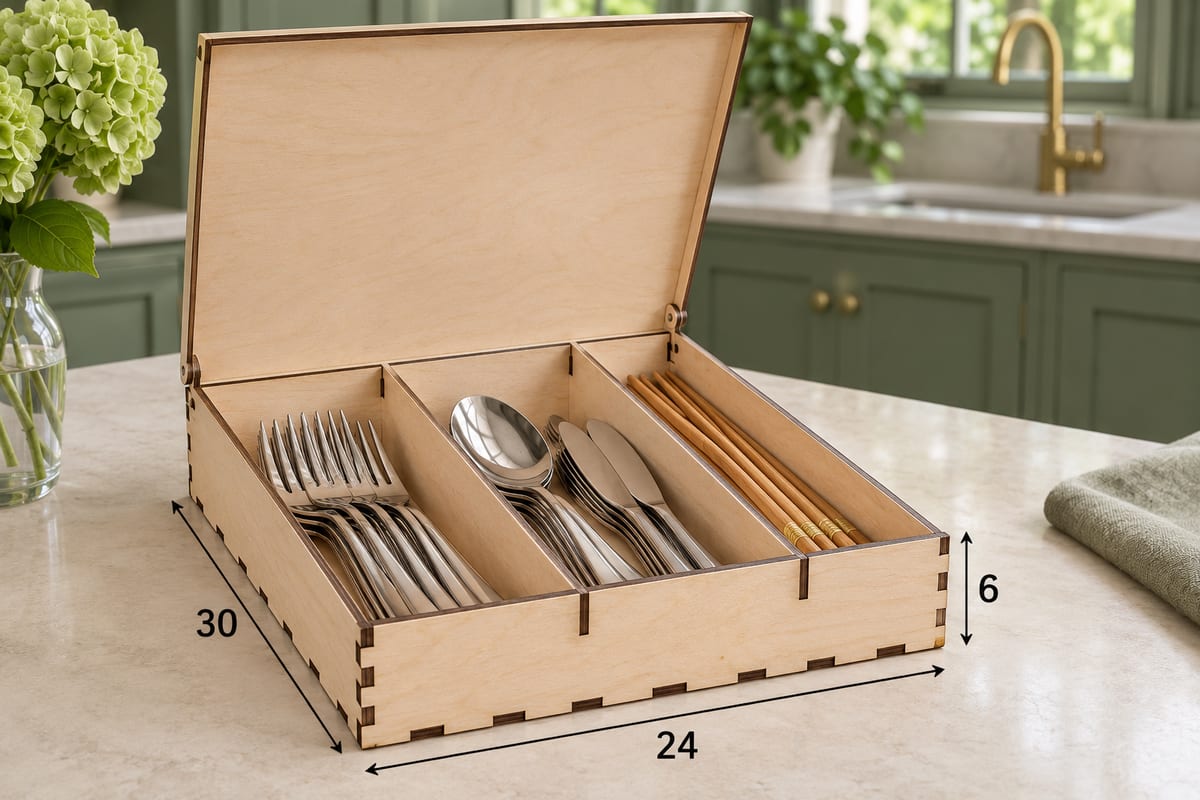 Hinged Lid Cutlery Box, 3 SectionsOuter size (W × D × H) 240 × 300 × 60 mm (9.45 × 11.81 × 2.36 in)Parts 8Est. time, 10 W diode (3 mm) 25 min 42 sEst. time, 40 W CO2 (3 mm) 10 min 43 sSVG · DXF →
The cutlery box is 240 × 300 × 60 mm, longer front to back, with three sections for forks, spoons, knives and chopsticks. The lid swings up and stays standing when opened all the way.
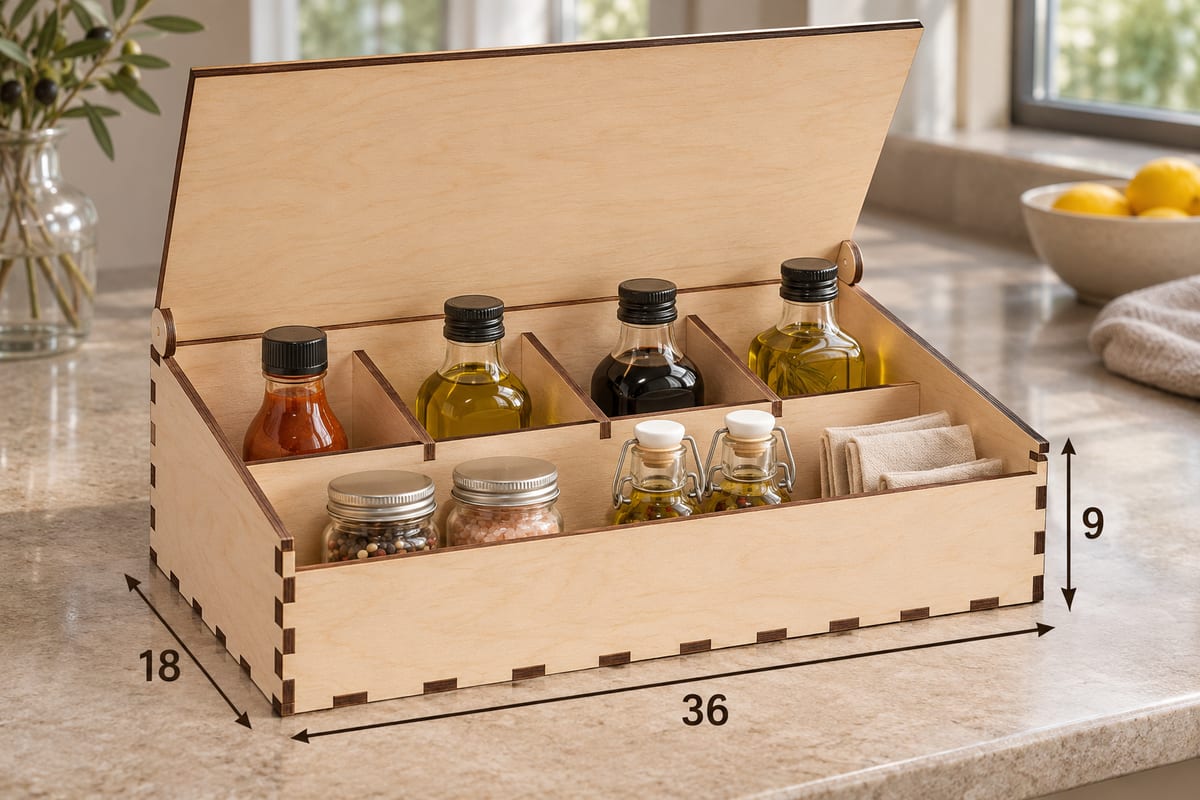 Hinged Condiment Chest, 8 SectionsOuter size (W × D × H) 360 × 180 × 90 mm (14.17 × 7.09 × 3.54 in)Parts 10Est. time, 10 W diode (3 mm) 34 min 00 sEst. time, 40 W CO2 (3 mm) 14 min 10 sSVG · DXF →
The condiment chest is the big one: 360 × 180 × 90 mm, 10 parts and eight sections in two rows of four. Its 3 mm layout is 1284 × 467 mm, so most hobby lasers will cut the base and lid on their own sheets.
Pro tip: Engrave the lid before you assemble. A flat lid is easy to hold down on the bed; a finished box with a swinging lid is not.
Next step
Download the hinged tea chest in the thickness that matches your sheet, cut one lid corner and one side wall top as a test, and check the pin turns freely. Then cut the full box, fit the lid between the sides as you build, and enjoy that first quiet swing.
Read next: Living Hinge Laser Cut Guide and Sliding Lid Box Laser Cut.
Questions and answers
Can a laser cut box have a hinge without metal parts?
Yes. The simplest way is a pin pivot: round pins on the lid corners turn in holes in the side walls. Knuckle hinges with a wooden dowel, living hinges and glued fabric strips are other options.
How much clearance should the pin hinge have?
A typical starting point is a hole 0.2-0.5 mm larger than the pin after cutting, plus 0.5-1 mm of total side play for the lid. Kerf and plywood thickness vary, so test on scrap first.
Why can't I get the lid into my finished box?
On a pin hinge the lid has to be placed while one side wall is still loose. Once both sides are fixed, the pins are trapped outside the holes.
Should I glue the hinge pins?
No. Glue only the fixed corner joints, if you glue at all, and keep glue well away from the pins, holes and lid.
Which thickness makes the strongest pin hinge?
Thicker plywood gives thicker pins, so the 4 or 5 mm versions wear better on a box that is opened every day. 3 mm works fine for a lighter box.