
Living Hinge Laser Cutting: Patterns, Spacing and How Far It Bends
A living hinge is a pattern of staggered cuts that lets a stiff sheet of plywood or MDF bend. Typical starting values for 3 mm plywood are cut lines about 15-30 mm long, bridges of about 2-4 mm between line ends and rows about 1-2 mm apart, but every laser and sheet behaves differently, so test on scrap. Bend slowly and keep the bend inside the patterned zone.
The first time you bend a living hinge, your brain protests a little. A second ago it was a stiff, flat sheet of 3 mm plywood; now it curls in your hand like thick leather, and the rows of tiny cuts open into a pattern of light. Then you push a bit too far, hear a dry crack, and learn the other half of the lesson.
Living hinge laser cutting, also called kerf bending, turns a rigid sheet into a flexible one by cutting a dense pattern of short, staggered lines through it. It lets you make rounded box corners, book-style covers and lids that fold over the back without a single metal part. This guide covers the numbers that control a pattern, how plywood and MDF behave, how far a hinge typically bends, why hinges break, and how to plan your first one.
Our file library does not include a living hinge design at the moment. Our boxes use plywood pin hinges, sliding lids on rails and lift-off lids instead. So treat the values here as typical starting points to test on scrap, not as settings from a tested file.
What a living hinge is and why it bends
Plywood is stiff because a thick beam resists bending. A living hinge cuts that thick beam into many thin strips, joined to each other only by short bridges where the cut lines stop. When you bend the panel, each strip flexes and twists a little, and the small movements add up to a smooth curve.
The pattern is almost always staggered, like bricks in a wall. Each row of lines is shifted by about half a line length against the row before, so the bridges never line up. That stagger is what stops a crack from running straight across the hinge.
Living hinge pattern: the numbers that matter
Four numbers control a straight-line pattern:
- Cut length: how long each cut line is.
- Bridge: the uncut gap between the ends of two lines in the same row.
- Row spacing: the distance between rows, which is also the width of each flexible strip.
- Zone length: how much of the panel carries the pattern.
| Parameter | Typical starting range for 3 mm plywood | Larger value | Smaller value |
|---|---|---|---|
| Cut length | 15-30 mm | More flexible | Stiffer |
| Bridge between line ends | 2-4 mm | Stronger, stiffer | More flexible, breaks more easily |
| Row spacing (strip width) | 1-2 mm | Stiffer, less burning | More flexible, more heat, more fragile |
| Zone length | Arc length plus 5-10 mm | Bend spreads gently | Strips at the ends get overloaded |
These ranges are typical values that makers start from, not proven limits. Your kerf, which is typically 0.1-0.25 mm in 3 mm plywood, eats into every strip, so a 1.5 mm spacing can leave much less solid wood after a wide diode cut. Cut a test strip, bend it, and adjust.
Pro tip: Change one number at a time. If you change the spacing and the bridge together and the hinge breaks, you will not know which one did it.
How long the hinge zone needs to be
The bend happens only where the pattern is, so the zone has to be at least as long as the curve it forms. That length is simple geometry: arc length = radius × angle in radians. For a 90° bend that is about 1.57 × radius, and for 180° about 3.14 × radius.
| Bend radius (inside) | 90° arc length | 180° arc length |
|---|---|---|
| 10 mm | about 15.7 mm | about 31.4 mm |
| 20 mm | about 31.4 mm | about 62.8 mm |
| 30 mm | about 47.1 mm | about 94.2 mm |
| 40 mm | about 62.8 mm | about 125.7 mm |
Add a few millimetres on each side so the strips at the edges of the zone are not forced into the sharpest part of the bend. A gentle 90° corner with a radius of 20-30 mm is a sensible first target in 3 mm plywood; tighter curves need a finer pattern and more testing.
Plywood vs MDF and other materials
The material matters as much as the pattern.
| Material | How it bends | Typical problems | Notes |
|---|---|---|---|
| Birch plywood, 3 mm | Flexes well with a fine pattern | A strip splits along a weak veneer or a hidden void | Good grade sheets with few voids work best |
| MDF, 3 mm | Even, no grain to worry about | Short fibres, more brittle in tight bends; raw edges soak up moisture | Fine for gentle curves; seal it after cutting |
| Plywood, 4-6 mm | Much stiffer | Needs a denser pattern and a larger radius; many diode passes | Test thoroughly; a thin skin often works better |
| Acrylic | Possible on a CO2, but brittle | Cracks at the bridges, especially when cold | Diode lasers cannot cut clear acrylic well |
With plywood, direction also matters. Many makers find the hinge more reliable when the cut lines run along the grain of the face veneer, so the strips are long-grain wood. Cut one strip each way from the same sheet and bend both; you will feel the difference.
How far a living hinge bends
There is no single answer, because the limit depends on the pattern, the thickness, the material, the grain direction and the radius. As a rule of thumb:
- A denser pattern (longer lines, narrower strips, shorter bridges) bends further but is more fragile.
- A thinner sheet bends further than a thicker one with the same pattern.
- A bigger radius is always kinder than a smaller one.
- Bending slowly and evenly is safer than folding fast.
A hinge also springs back. Plywood has a memory, so a box with a living hinge corner usually needs glue or a frame to hold the curve, while a hinged lid simply rests where gravity puts it.
Cutting a living hinge without burning it
A living hinge is a lot of cutting in a small area. Take a zone 60 mm wide and 100 mm long with 20 mm lines, 3 mm bridges and 1.5 mm row spacing: that is about 66 rows of roughly 52 mm of cut each, or about 3.4 m of cutting. Our reindeer ornament has a cut length of 0.47 m, so this one small hinge is about seven times as much cutting.
All that heat in one spot chars the thin strips and weakens them. A few habits help:
- Use air assist to clear smoke and reduce charring. See do you need air assist.
- Cut the hinge lines before the outline, so the part stays held in the sheet while the pattern is cut. Most laser software can cut inner shapes first; in LightBurn this lives in the optimization settings.
- Use the lowest power that still cuts through. Overburned strips are thinner than you drew them.
- Check every line is cut through before you pop the part out. One uncut line makes a stiff spot that kinks.
- Mask the surface with paper tape if smoke stains matter on the visible side.
Common mistake: Drawing the pattern with the bridges lined up in a straight row across the zone. It looks tidy on screen, but every bridge then sits on one line, and the first hard bend snaps the panel exactly there. Offset each row by about half a line length so the bridges sit like bricks.
Why living hinges break and how to fix them
| What happens | Likely cause | Fix |
|---|---|---|
| Snaps at the first row of the zone | Zone too short, or bend forced at its edge | Lengthen the zone and start bending in its middle |
| Crack runs straight across | Bridges lined up instead of staggered | Offset every second row by half a line length |
| Strips feel crumbly and dark | Too much power or too narrow spacing | Lower power, widen spacing slightly, use air assist |
| One strip splits along its length | Void or weak glue line in the plywood | Use a better grade of birch plywood |
| Bends with a kink | A line not cut through, or uneven pattern | Check the cut, keep line length and spacing constant |
| Springs back flat | Normal wood memory | Glue the ends to a frame or ribs |
Making a box with a living hinge
Our box generator makes finger joint boxes with straight panels and an optional flat lid; it does not draw living hinge patterns. You can still combine the two:
- Generate the box body without a lid and export SVG.
- Open it in your editor and draw a separate lid strip long enough to cover the top and run down the back wall.
- Add a hinge zone where the strip turns the back corner. In Inkscape, tiled clones can repeat one line into a grid; LightBurn has an array tool that does the same job.
- Cut a short test strip with the same pattern, bend it, and adjust.
- Glue only the back flap to the back wall, so the top part lifts as a lid.
For a box that opens without any flexing parts, our hinged files use round plywood pins instead. Read about them in laser cut hinged box without hardware.
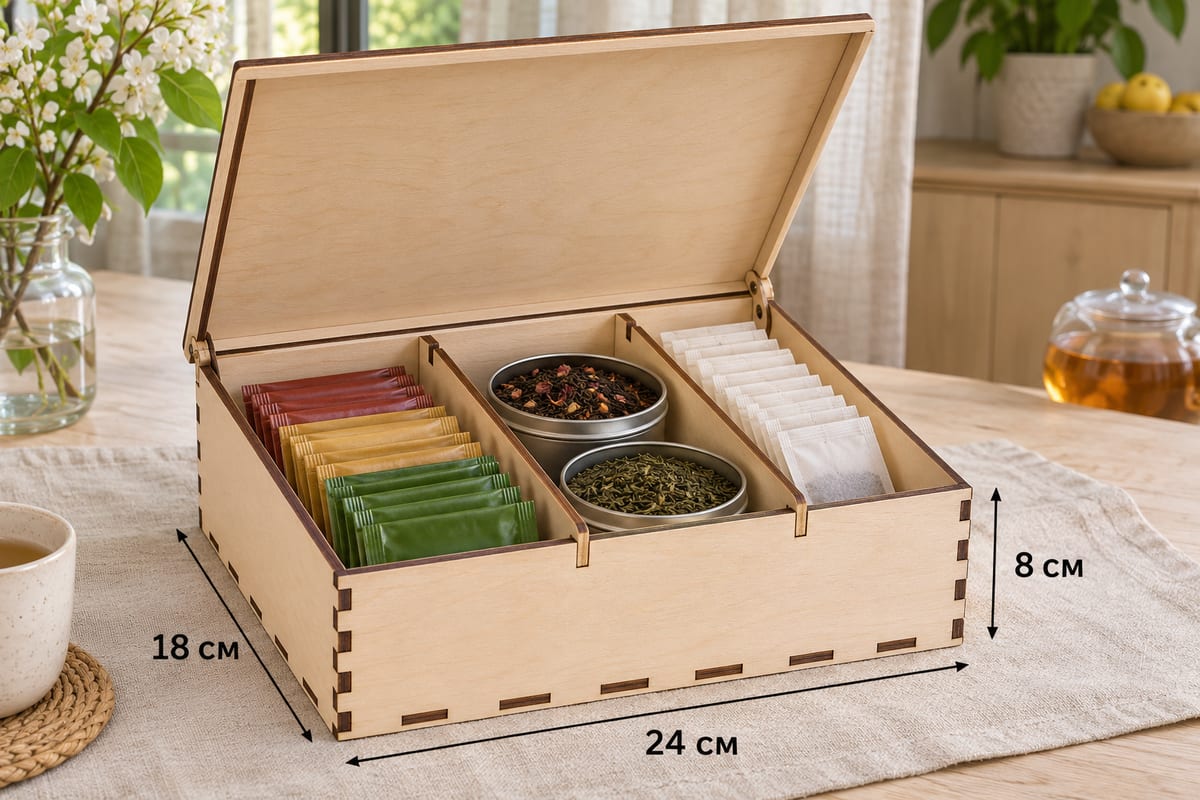 Hinged Lid Tea Chest, 3 SectionsOuter size (W × D × H) 240 × 180 × 80 mm (9.45 × 7.09 × 3.15 in)Parts 8Est. time, 10 W diode (3 mm) 20 min 42 sEst. time, 40 W CO2 (3 mm) 8 min 37 sSVG · DXF →
The tea chest lid pivots on pins cut into the plywood, so you get a swinging lid with no pattern to tune. If you prefer a lid that slides, see the guide to the laser cut sliding lid box.
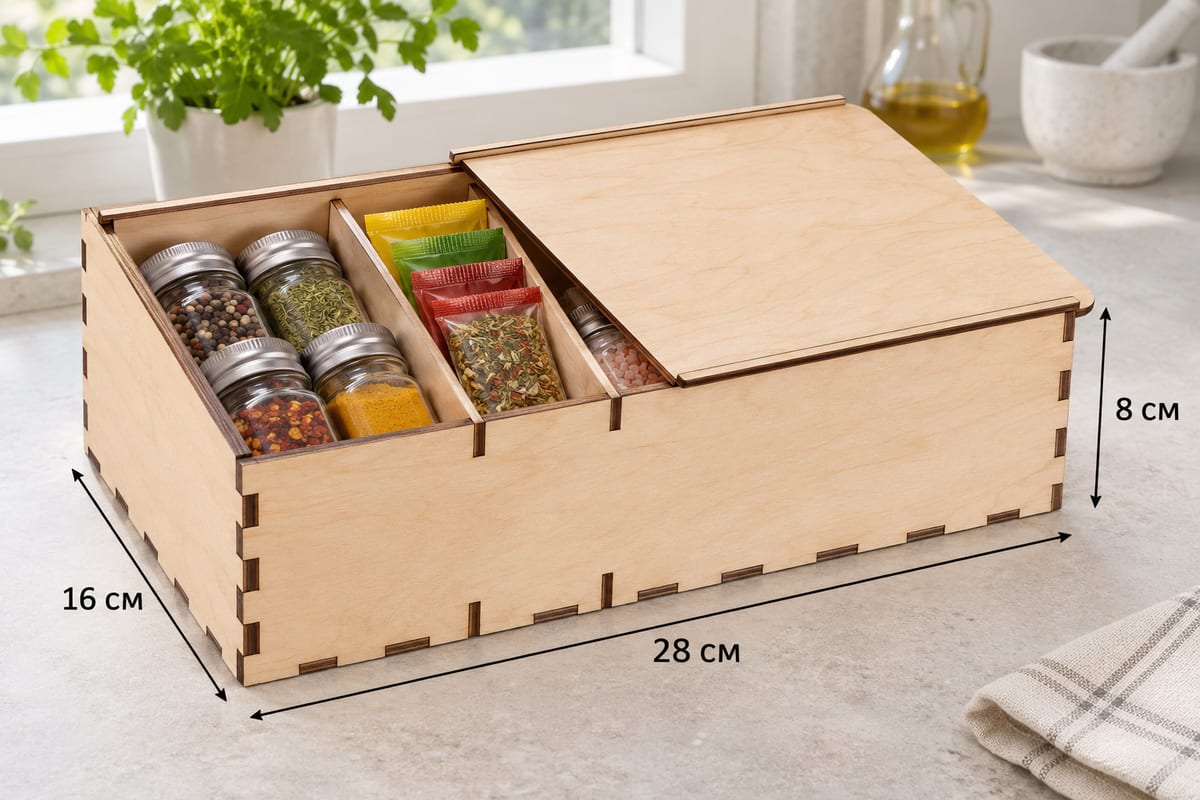 Sliding Lid Spice Box, 3 SectionsOuter size (W × D × H) 280 × 160 × 80 mm (11.02 × 6.30 × 3.15 in)Parts 10Est. time, 10 W diode (3 mm) 23 min 50 sEst. time, 40 W CO2 (3 mm) 9 min 56 sSVG · DXF →
Next step
Cut a strip of 3 mm plywood 40 × 150 mm with three hinge zones side by side: one at 1 mm row spacing, one at 1.5 mm and one at 2 mm, all with the same line length and bridge. Bend each zone slowly around a jar or a pipe and write the result on the strip. That one scrap teaches you more than any table, including this one. Then build your box body in the box generator and add the hinge you liked best.
Read next: Laser Cut Hinged Box Without Hardware and Tab and Slot Laser Cut Joints.
Questions and answers
What spacing should I use for a living hinge in 3 mm plywood?
Typical starting points are rows about 1-2 mm apart, cut lines about 15-30 mm long and bridges about 2-4 mm. These are values to test on scrap, not fixed settings.
Is MDF or plywood better for a living hinge?
Both work. MDF bends evenly with no grain to worry about but is more brittle in tight bends, while good birch plywood flexes well but can split at voids or weak veneers. Test both on your laser.
How tight can a living hinge bend?
It depends on the pattern, thickness, material and grain direction. A 90° corner with a 20-30 mm radius is a sensible first target in 3 mm plywood; tighter bends need finer patterns and testing.
Why did my living hinge snap?
The usual causes are bridges lined up across the zone, a zone that is too short for the bend, overburned strips or a void in the plywood. Stagger the rows, lengthen the zone and lower the power.
Can a diode laser cut a living hinge?
Yes, in thin plywood or MDF, but the many close lines create a lot of heat. Use air assist, the lowest power that cuts through, and check every line is cut before bending.