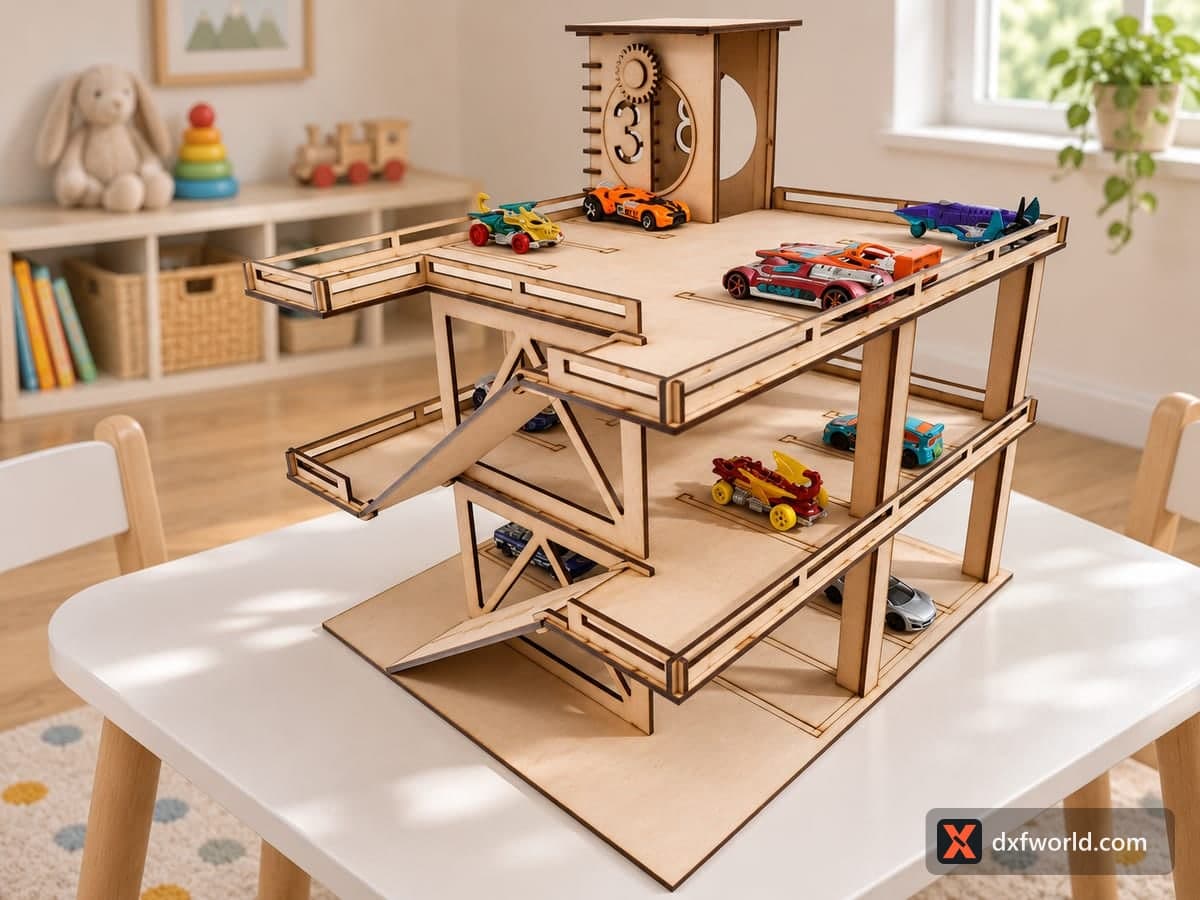
 Visualization
Toy Car Garage SVG, Wooden Parking Garage Laser Cut File, Kids Car Ramp Toy DXF, Play Garage
A slot-together wooden parking garage for small die-cast toy cars, with three parking decks, ramps between them, railings, a corner tower with level numbers 1 to 3 and a gear, and a round helipad. The free download is one SVG and one DXF file with all parts laid out on 1187.2 × 605.8 mm (46.74 × 23.85 in), cut lines only, with slots drawn for 3 mm plywood.
- Formats
- SVG, DXF
- Size
- 1,187 × 606 mm (46.74 × 23.85 in)
- Material
- Plywood, MDF, acrylic or metal (scale to your piece)
- Cut length
- 51.39 m
- Est. time, 10 W diode (3 mm)
- 171 min 17 s
- Est. time, 40 W CO2 (3 mm)
- 71 min 22 s
- Layers
- CUT only, no engraving
Free account required to download
How to make it
- 01Cut one slot and tab from your 3 mm sheet and adjust the kerf until they fit snugly.
- 02Split the layout over several sheets to suit your laser bed and cut all parts.
- 03Assemble the base, side frames and decks from the bottom up, then fit the ramps.
- 04Add the railings, tower and helipad, sand sharp edges and apply a toy-safe finish.
What you build
Three large deck plates stack on posts and cross-braced side frames, with rows of slots in each floor that lock the posts and frames in place. Ramps run from deck to deck, long rail strips with window cut-outs go around the edges, and a tall corner tower carries the level number plates 1, 2 and 3 plus a small gear wheel. A round disc with a large H sits on top as a landing pad. The photo shows it standing on a kids' table with small toy cars on every level.
Material and bed size
The slots are drawn for 3 mm material, as the file name says. Plywood varies, so cut one joint first and check the fit; if it is loose or tight, adjust the kerf offset rather than scaling the file, because scaling changes every slot. The full layout is about 1.19 m long, so on a typical hobby laser you will split it across three or four sheets. The deck plates are the largest parts and set the minimum bed size. Birch plywood is the best choice for a toy; MDF is cheaper but chips on the rail strips.
Assembly and finishing
Sort the parts before you start: decks, side frames, posts, ramps, rails, tower pieces. Build the ground floor and its frames first, then add each deck from the bottom up, then the ramps, then the railings and the tower. The joints hold on their own; a little wood glue on the posts makes the whole stack rigid for rough play. Sand every rail edge for small hands, and use a water-based clear coat or toy-safe paint. Drawing parking lines on the decks with a paint pen before assembly is much easier than afterwards.
Questions about this file
What thickness are the slots made for?
3 mm. Test one joint first, since real plywood is often 2.7 to 3.2 mm thick.
Can I make it bigger for larger toy trucks?
Only if you also use thicker material in the same ratio, because scaling widens the slots too. For example, scale by 133 percent for 4 mm sheet and test a joint.
Will it fit on a small laser bed?
Not in one go. Move the parts onto three or four smaller sheets; each deck plate needs to fit on its own.
Which toy cars fit the parking bays?
Small die-cast cars like the ones in the photo. Measure the deck height and ramp width in the file against your own cars before cutting.
Is it safe for young children?
Sand all edges, glue the joints and use a toy-safe finish. The small gear and rail pieces are not for children who still put things in their mouths.
Similar files