
Food Safe Finish for Plywood and Laser Cut Wood: What to Use
For laser cut plywood in the kitchen, food-grade mineral oil, beeswax or board butter, shellac and water-based lacquer are the common choices. Pick a product whose label says the cured finish suits food contact, apply thin coats, and wait for the full cure (from a day for oil and wax to one to three weeks for many lacquers and hard wax oils) before food or packaging goes in.
Picture your first oil caddy, fresh off the laser, the birch still pale and smelling faintly of campfire. A week later a bottle of olive oil drips down its side, and the bare plywood drinks it like a sponge. The dark, greasy halo never sands out. That box teaches two lessons at once: kitchen wood needs a finish, and the finish has to be one you are happy to have near food.
This guide is about choosing a food safe finish for plywood and other laser cut wood: the common options, how long they really take to cure, how to tell when the smell has gone, and which parts of a kitchen organizer actually touch food. It is general workshop advice, not a certification. One rule never changes: read the label on the can you buy.
What "food safe" means for a finish
Two words get mixed up all the time: dry and cured. A finish is dry when it stops feeling tacky, often within an hour or a few hours. It is cured when the solvents have left and the film or oil has fully hardened, which can take days or weeks. When finish makers talk about food contact, they almost always mean the cured finish, not the wet one.
So in a workshop, "food safe" usually comes down to three things:
- The maker of the product says on the label or data sheet that the cured finish is suitable for food contact, or the product is sold specifically for wooden kitchen items such as boards, spoons and bowls.
- You applied it the way the label says, in thin coats, on clean wood.
- You waited for the full cure before the box met food or food packaging.
If a tin says nothing about food contact, do not assume. Pick another product, or keep that finish for boxes that will never see the kitchen.
Food safe finishes for plywood compared
These are the finishes makers reach for most often on laser cut kitchen pieces. Times are typical at room temperature; your can is the final word.
| Finish | Protection | Dry to touch | Full cure (typical) | Food contact notes | Good for |
|---|---|---|---|---|---|
| Food-grade mineral oil | Low, needs re-oiling | Wipe off excess after a few hours | Does not cure, stays in the wood | Sold for boards and utensils; buy one labelled food grade | Cutlery trays, solid wood trays |
| Beeswax or board butter (wax plus mineral oil) | Low to moderate, water beads up | Buff after 10–20 minutes | No real cure | Products made for cutting boards are a common pick | Tea boxes, spice trays, a soft satin feel |
| Shellac | Moderate; dislikes alcohol and heat | 30–60 minutes | A few days | The resin is also used as a glaze on some sweets; check the product for additives | Sealer coat, display and gift boxes |
| Water-based lacquer or polyurethane | High, wipes clean | 1–2 hours | About 1–3 weeks | Many makers state the cured film is fine for food contact; check yours | Oil caddies, sink caddies, napkin boxes |
| Hard wax oil | High, natural look | Several hours to overnight | About 1–3 weeks | Some tins carry a food-contact or toy-safety statement; check | Counter organizers, lids |
| Pure tung oil or raw linseed oil | Moderate after many coats | A day or more per coat | Several weeks | Pure oils are common on kitchen wood; "tung oil finish" and boiled linseed oil often contain other ingredients, so read the label | Slow projects with no deadline |
Pro tip: for most kitchen organizers, a water-based lacquer gives the best mix of protection, clarity and short smell. Keep wax and mineral oil for pieces that stay dry and that you are happy to re-wax now and then.
What actually touches food in a kitchen organizer
Most laser cut kitchen organizers never touch bare food. Tea bags are wrapped, spices sit in jars, cutlery is washed and dried, and oil bottles have glass between the oil and the wood. That changes the real question from "can I eat off this finish?" to "will this finish survive drips, wiping and steam?"
| Organizer | What touches the wood | Main risk | Suggested finish |
|---|---|---|---|
| Tea and coffee boxes | Sealed bags, sachets, tins | Dust, fingerprints, trapped smell under a lid | Wax, shellac or water-based lacquer |
| Spice trays | Glass or plastic jars | Spilled powder, oily fingers | Water-based lacquer or hard wax oil |
| Oil and sauce caddies | Bottle bottoms, drips | Oil stains that never come out | Two or three coats of water-based lacquer |
| Cutlery trays | Washed, sometimes damp cutlery | Water spots, swelling | Lacquer or hard wax oil |
| Sink and sponge caddies | Wet sponges, soap | Standing water, swollen plies | Several coats of water-based lacquer, never in a puddle |
| Bread or fruit tray | Bare food | Glue lines and charred edges | Solid hardwood with mineral oil, or a removable liner |
For anything where bare food sits on the wood, plywood is the weaker choice. It is held together by glue layers you cannot see, and every laser cut edge is charred. If a customer wants a bread tray, cut it from solid hardwood or put a removable liner such as a cloth or baking paper in the plywood box. The cutting board guide explains the same logic for boards, and best wood for laser cutting compares the materials.
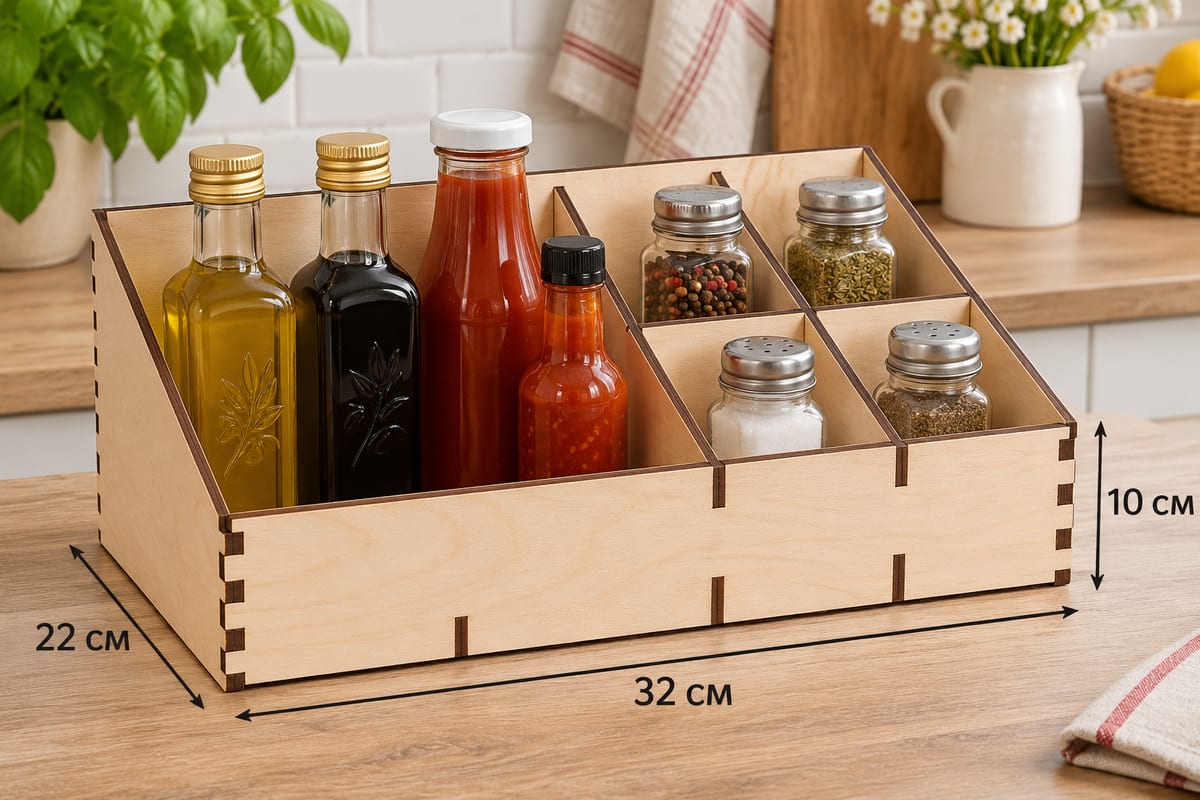 Oil Bottle and Shaker CaddyOuter size (W × D × H) 320 × 220 × 100 mm (12.60 × 8.66 × 3.94 in)Parts 9Est. time, 10 W diode (3 mm) 22 min 00 sEst. time, 40 W CO2 (3 mm) 9 min 10 sSVG · DXF →
Bottles stand in the deep bay, shakers in the small cells in front, and every pour ends with a drip somewhere on this box. Give it two or three coats of a clear film finish, edges included, before the first bottle goes in.
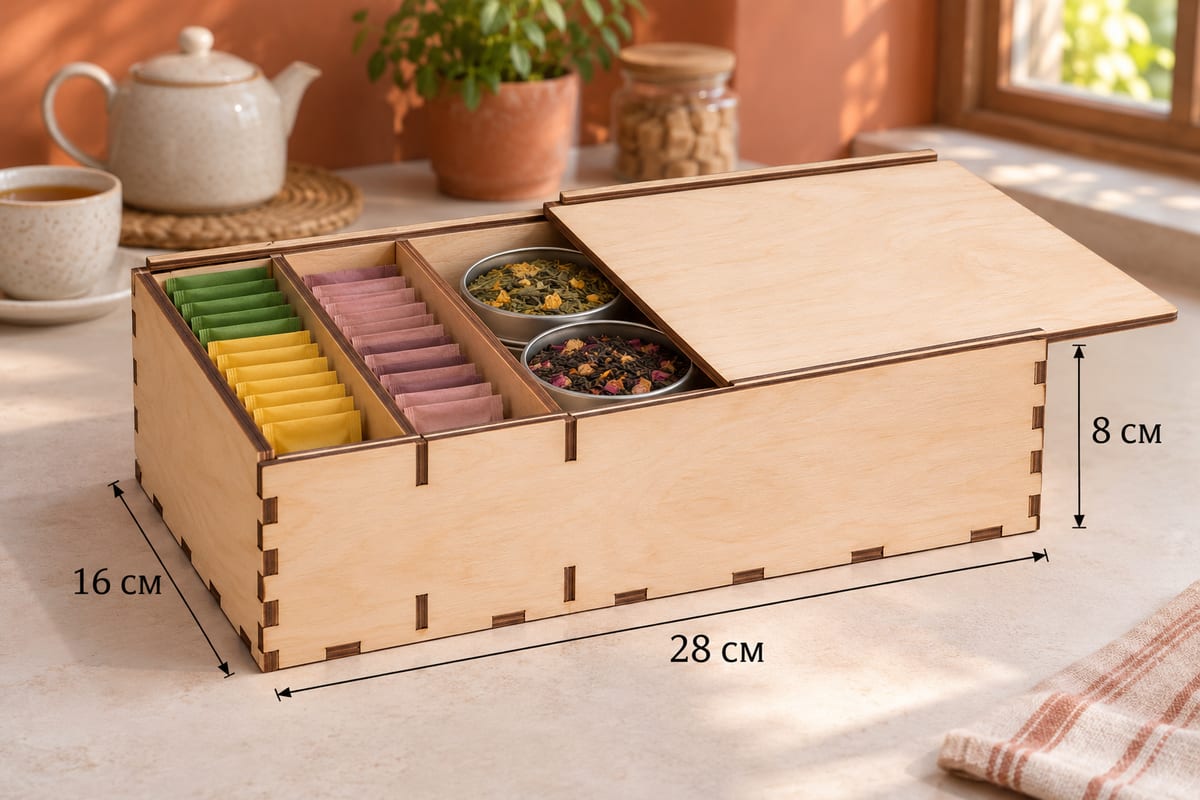 Sliding Lid Tea Box, 3 SectionsOuter size (W × D × H) 280 × 160 × 80 mm (11.02 × 6.30 × 3.15 in)Parts 10Est. time, 10 W diode (3 mm) 23 min 50 sEst. time, 40 W CO2 (3 mm) 9 min 56 sSVG · DXF →
Sealed tea bags never touch the wood, so a light finish is enough here. Leave the rails bare or rub them with a candle stub: a lacquered rail turns sticky and the lid stops gliding.
How to finish laser cut plywood, step by step
- Clean the char. Laser cut edges carry a thin layer of soot. Wipe them with a damp cloth or give them a quick pass with 180–240 grit paper, otherwise the first coat smears black onto the face. Preventing burn marks saves you most of this work.
- Dry-fit the box first. Finish adds thickness. A coat or two inside a tight slot can turn a snug fit into a joint that will not close, so check the fit before anything wet touches the wood. The tab and slot guide covers fit problems.
- Choose flat or assembled. Finishing flat parts is easier and gives even coats, but keep tabs and slots bare. Finishing the assembled box is quicker and seals the joints, but corners collect drips.
- Go thin. Plywood edges are end grain and soak up far more than the faces. Give the edges an extra coat and wipe away any puddles.
- Sand between coats. Water-based finishes raise the grain. A light pass with 320–400 grit after the first coat makes the second one feel smooth.
- Let it cure. Somewhere warm and airy, lids open, away from dust.
Common mistake: filling the box the day after finishing because it "feels dry". Dry is not cured. A closed lid traps the solvent smell, and tea, coffee and spices pick it up fast. Leave lidded boxes open while they cure, and give them extra days.
Curing, smell and how long to wait
The nose is the simplest cure check you own. Put your face close to the inside of the box and breathe in. If you still smell solvent, a sharp "fresh paint" note or an oily tang, it is not ready.
| Finish | Recoat after (typical) | Ready for the kitchen (typical) | Sign it is not ready |
|---|---|---|---|
| Food-grade mineral oil | When the surface looks dry again | Next day, after wiping off excess | Oily film on your fingers |
| Wax or board butter | Buff after 10–20 minutes | After buffing | Smears when you rub it |
| Shellac | 30–60 minutes | A few days | Alcohol smell, soft surface |
| Water-based lacquer | 1–3 hours | About a week, full cure as the label says | Fingerprints stay, plastic smell |
| Hard wax oil | Overnight | About 1–3 weeks | Tacky feel, oily smell |
| Pure tung or linseed oil | 1–3 days per coat | Several weeks | Sticky surface, strong smell |
Cold slows every finish down. A box curing in an unheated garage in winter can take twice as long as one in a warm room.
Pro tip: keep one finished offcut from every batch with the date and the product written on the back. When a customer asks months later what is on their box, you will know, and you can match a repair coat.
One safety note that has nothing to do with food: rags soaked with drying oils such as linseed, tung and many hard wax oils can heat up and catch fire by themselves as they cure. Lay them flat outside to dry, or keep them in a closed metal can with water, the way most labels tell you.
Choosing quickly
- Item stays dry and you like a soft feel: board butter or beeswax.
- Box near the stove or the sink: water-based lacquer, two or three coats.
- Warm, hand-rubbed look and time to wait: hard wax oil or pure tung oil.
- Order due this weekend: a sealer coat of shellac and a coat of wax, or a water-based lacquer, both cure faster than oils.
- Selling the box: tell the buyer which finish you used and how to care for it: wipe clean, never soak, re-wax or re-oil when the wood looks thirsty.
Next step: pick one organizer from our kitchen organizer roundup, cut it, and finish a spare offcut next to it with two different products. A week later, drip some oil and water on both and see which one you trust in your kitchen.
Read next: Laser Cut Cutlery Tray and Laser Cut Condiment Organizer.
Questions and answers
Is mineral oil a food safe finish for plywood?
Food-grade mineral oil is widely used on wooden kitchen items and is sold for that purpose. On plywood it gives little protection, needs regular re-oiling and does not seal the glue lines or charred edges.
Is water-based polyurethane food safe once cured?
Many makers describe their cured water-based polyurethane or lacquer as suitable for food contact. Check the label or data sheet of the exact product and wait the full cure time it gives, often one to three weeks.
How long should a finish cure before food or tea goes in the box?
Wax and mineral oil are ready almost at once, shellac after a few days, and lacquers and hard wax oils often after one to three weeks. If you can still smell the finish, wait longer.
Can I put bread or fruit directly in a plywood box?
It is better not to. Plywood has glue layers and charred laser edges, so use a removable liner or cut the tray from solid hardwood with a food-grade oil.
Is shellac food safe?
Shellac resin is also used as a glaze on some foods, and it is a common finish on wooden kitchen items. Check your product for additives, and remember that shellac marks with alcohol and heat.
Should I finish the parts before or after assembly?
Either works. Finish flat parts for even coats but keep tabs and slots bare, or assemble first for a quicker job; in both cases dry-fit before any finish goes on.