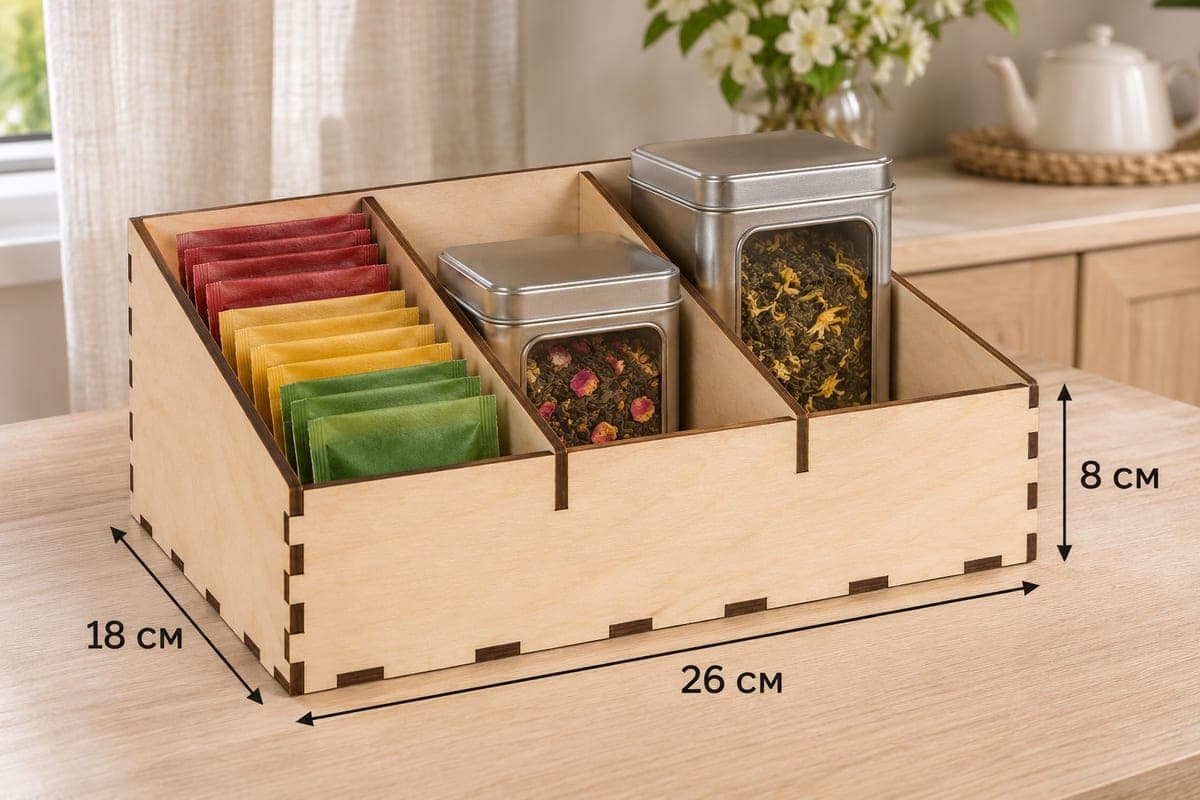
 Visualization
Tea Tin Organizer SVG, Sloped Tea Caddy Laser Cut File, Tea Canister Holder DXF, Countertop Tea Bag Sorter
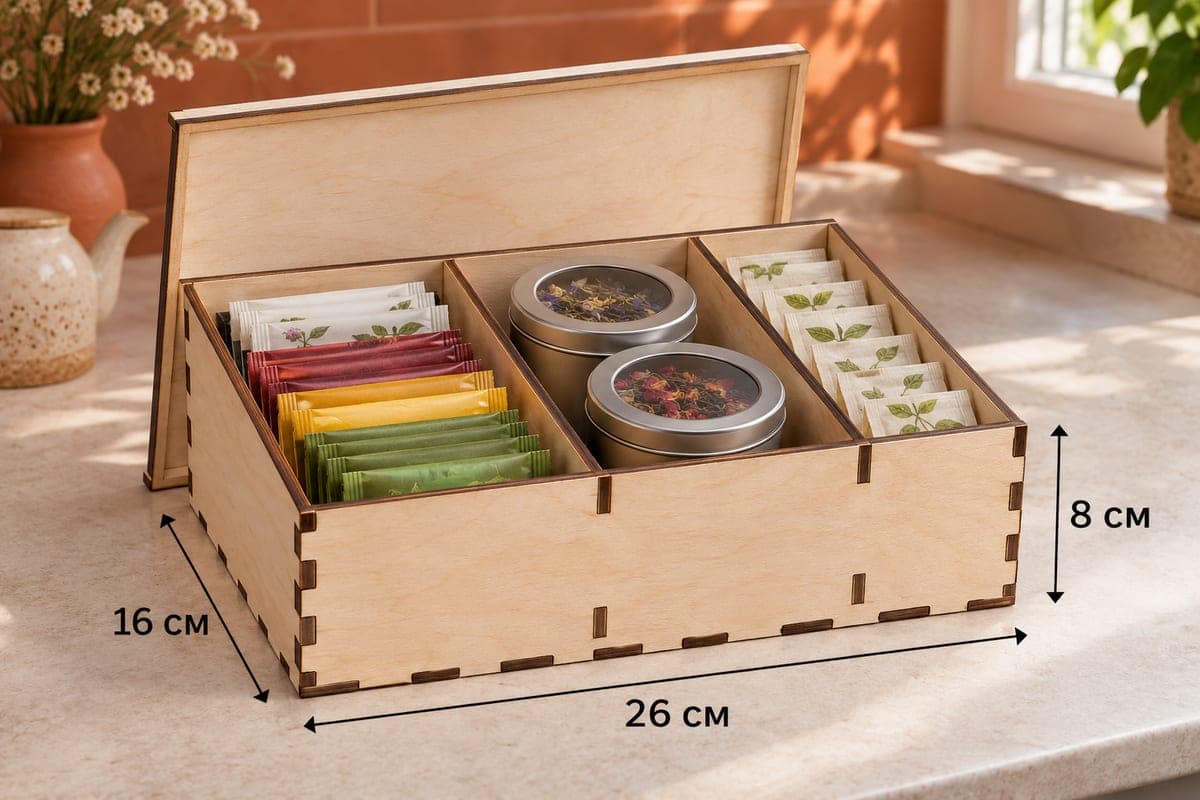
A free open tea organizer with a sloped front and three full-depth columns, 3 sections from left to right, sized for tall square tea tins and rows of tea bags. It is supplied as SVG and DXF in separate files for 3, 4, 5 and 6 mm plywood, measures 260 × 180 × 80 mm (10.24 × 7.09 × 3.15 in) and is made from 7 pieces joined with tabs and slots.
- Formats
- SVG, DXF
- Outer size (W × D × H)
- 260 × 180 × 80 mm (10.24 × 7.09 × 3.15 in)
- Parts
- 7
- Material thickness
- 3, 4, 5 or 6 mm plywood (a file for each)
- Layout size (3 mm file)
- 900 × 272 mm
- Cut length
- 4.70 m
- Est. time, 10 W diode (3 mm)
- 15 min 39 s
- Est. time, 40 W CO2 (3 mm)
- 6 min 31 s
- Layers
- CUT only, no engraving
Free account required to download
How to make it
- 01Choose the file for your plywood thickness and cut a quick slot test so the tabs press in with light pressure.
- 02Cut the low front, the back, two sloping sides, the base and the two full-height dividers.
- 03Fit the dividers and back into the base, add the sloping sides, and close the front last.
- 04Sand the slanted edges, oil the wood, then set your tins in the outer or middle columns and line the remaining one with tea bags.
Built around tea tins
The front wall is just 48 mm high, 60% of the 80 mm back, and the side panels slope down to it. That low front matters here: in the photo the middle and right columns each hold a square metal tea tin with a window, and the cut-away front lets you see the leaves and grab the tin without lifting it over a wall. The left column takes wrapped tea bags in red, yellow and green rows, so the whole set lives in one spot on the counter.
The two dividers run full height and full depth, 180 mm front to back. Tins up to about 80 mm wide fit each column, and taller canisters simply rise above the back wall.
On the laser
The parts fit on a 900 × 272 mm layout; split the base off onto its own sheet if your bed is around 500 mm. Cutting the 3 mm file runs about 15 min 39 s on a 10 W diode, about 6 min 31 s on a 40 W CO2 and about 3 min 08 s on a 100 W CO2. Stick with 3 or 4 mm on a diode, or plan multiple passes for 5 and 6 mm plywood.
Press the joints together dry; a spot of wood glue in each corner is optional but makes it solid if the tins are heavy.
Selling and gifting
- Pair it with two refillable tins and a sample of loose leaf as a ready gift set.
- Tea shops can use it to show a featured blend beside the matching bags.
- Cut a smaller sister piece for coffee pods to sell as a set.
A wipe of food-safe oil keeps fingerprints and tea stains off.
Questions about this file
How big can my tea tins be?
Each column is about a third of the 260 mm width, so square tins up to roughly 75 to 80 mm across fit. Height is no problem because the box is open.
Why such a low front?
The 48 mm front lets you read the tin windows and lift tins out sideways, which a full-height wall would block.
Can I resize it for coffee canisters?
You can scale the design, but bring the slot widths back to your plywood thickness afterwards, otherwise the box will not hold together.
Can this tin organizer live next to the sink?
Seal it with a water-resistant lacquer and wipe up spills. Untreated plywood will stain and may swell.
Can I add my shop logo?
Yes, add an engraving layer to the back panel or the low front before cutting; the file itself has only cut lines.
Similar files