 Visualization
Silverware Tray SVG, Sloped Front Cutlery Organizer Laser Cut File, Low Front Utensil Caddy DXF
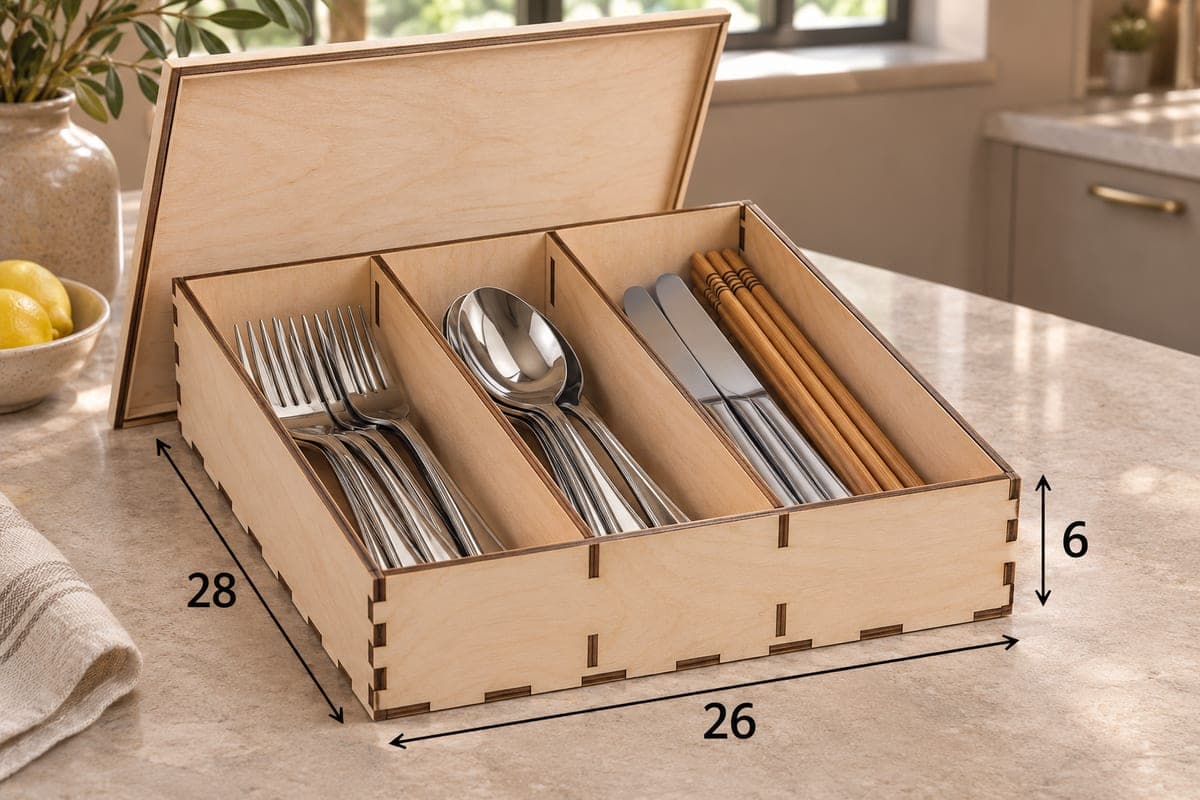
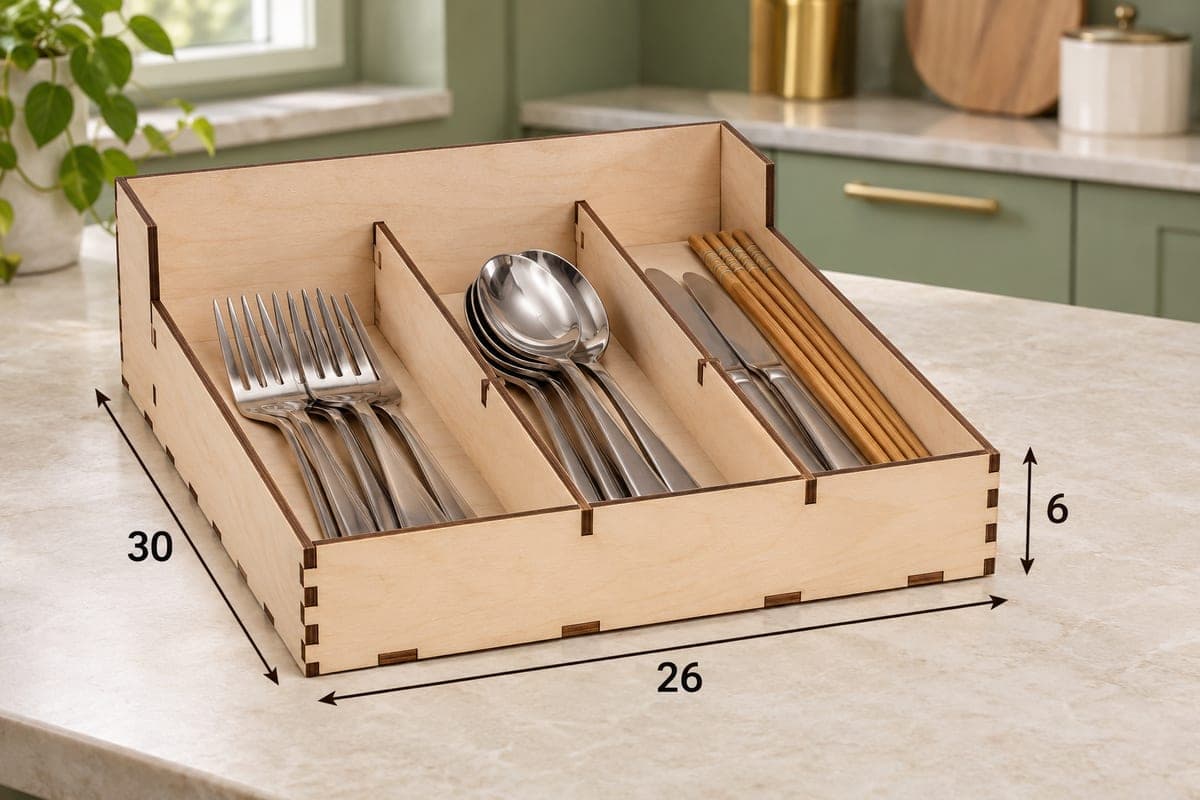
An open silverware tray with three full-depth lanes and a low front wall, so the sides slope down from a 60 mm back to a 36 mm front and the handles are easy to reach. It measures 260 × 300 × 60 mm (10.24 × 11.81 × 2.36 in), has 7 plywood pieces that assemble with tabs and slots, and is a free download in SVG and DXF with a separate file for 3, 4, 5 and 6 mm plywood.
- Formats
- SVG, DXF
- Outer size (W × D × H)
- 260 × 300 × 60 mm (10.24 × 11.81 × 2.36 in)
- Parts
- 7
- Material thickness
- 3, 4, 5 or 6 mm plywood (a file for each)
- Layout size (3 mm file)
- 1,140 × 372 mm
- Cut length
- 5.94 m
- Est. time, 10 W diode (3 mm)
- 19 min 48 s
- Est. time, 40 W CO2 (3 mm)
- 8 min 15 s
- Layers
- CUT only, no engraving
Free account required to download
How to make it
- 01Download the thickness that matches your plywood and test-fit one slot to make sure the tabs are tight.
- 02Cut the base, back, low front, two sloped sides and two dividers, splitting the sheet on a small machine.
- 03Seat the dividers, attach the sloped sides with their tall ends at the back, then fit the back wall and the low front.
- 04Soften the front edge with sandpaper, oil or lacquer the tray, and load it with handles toward the low side.
Why the front is lower
The back wall is 60 mm tall and the front only 36 mm, with the side panels sloping between them. That lower front means you see the handles at a glance and can pick up a fork without lifting the whole bundle. It is handy on an open counter or a sideboard where the tray is looked at from above and slightly in front. The two dividers run all 300 mm from back to front and split the space into three lanes. In the photo they hold forks, a stack of soup spoons, and table knives with a set of chopsticks, all with the handles toward the low side.
Laser settings and layout
The 3 mm file cuts in about 19 min 48 s on a 10 W diode, about 8 min 15 s on a 40 W CO2 and about 3 min 58 s on a 100 W CO2. Its parts need 1140 × 372 mm, so smaller beds will take the base on one pass and the walls and dividers on the next. A diode cuts 3 mm in one or two passes; for 5 or 6 mm, slow down and add passes, or switch to a CO2.
Assembly and finishing
Watch the orientation of the two sloped side panels: the tall end belongs at the back. Set the dividers in the base, add the sides, then the back and finally the low front. Glue is up to you, as the tabs grip well. Break the sharp top edge of the low front with sandpaper, since every hand passes over it. Finish with food-safe oil or water-based lacquer.
Two trays side by side cover a 520 mm drawer. A pair also sells well as a matching set at kitchen craft markets.
Questions about this file
Can this tray go inside a drawer, or is it for the counter?
Both work. The 60 mm back fits under most drawer fronts, and the low front makes it just as comfortable on an open counter.
Which way should the cutlery face?
Put handles toward the 36 mm front. Then you grab the handle, not the tines or blade, which is cleaner at a buffet.
Does the sloped shape make the tray weaker?
No. The sloped sides are full-depth pieces locked into the base and both end walls, and the dividers add stiffness in the middle.
Will 4 mm or 5 mm plywood change the outside size?
Each file is drawn for its own thickness, so the outer size stays 260 × 300 × 60 mm and only the slots change. Just use the file that matches your sheet.
How do I keep a counter tray looking clean?
Seal it with two coats of lacquer and wipe it with a damp cloth. Avoid soaking it or putting it in the dishwasher.
Similar files