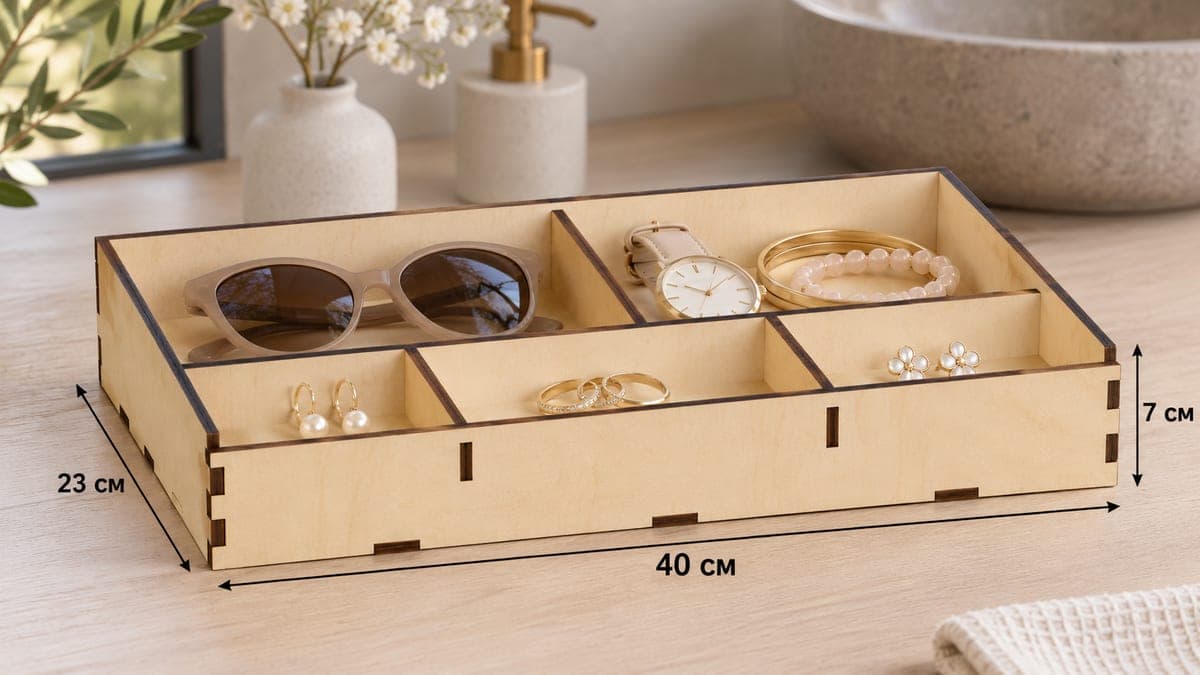
 Visualization
Wide Jewelry Tray SVG, Front Ring Channel Organizer DXF, Two Bay Sunglasses and Watch Tray Laser Cut File
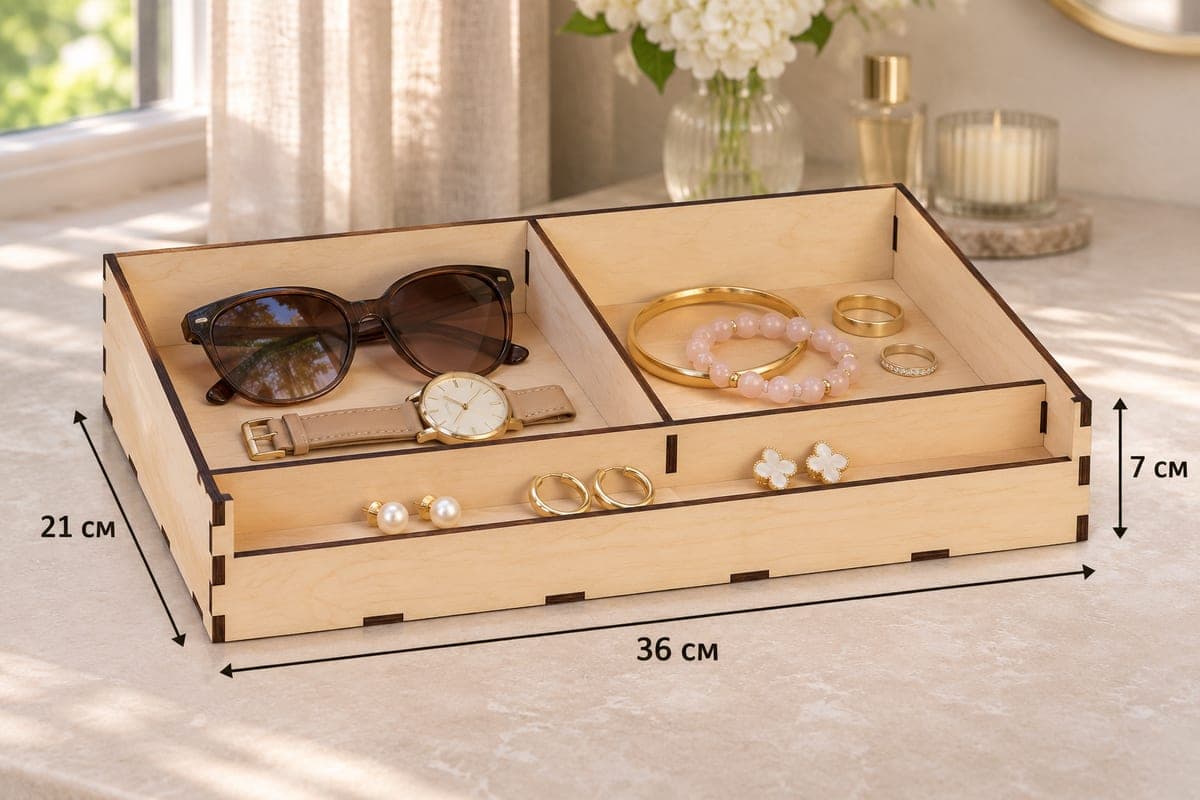
A wide, sloped jewelry tray with two deep bays at the back for sunglasses, a watch and bracelets and one long channel across the front for rings and earrings, three compartments in all. It measures 400 × 230 × 70 mm (15.75 × 9.06 × 2.76 in), is built from only 7 tab-and-slot pieces and comes as a free SVG and DXF download for 3, 4, 5 and 6 mm plywood.
- Formats
- SVG, DXF
- Outer size (W × D × H)
- 400 × 230 × 70 mm (15.75 × 9.06 × 2.76 in)
- Parts
- 7
- Material thickness
- 3, 4, 5 or 6 mm plywood (a file for each)
- Layout size (3 mm file)
- 1,280 × 312 mm
- Cut length
- 6.40 m
- Est. time, 10 W diode (3 mm)
- 21 min 20 s
- Est. time, 40 W CO2 (3 mm)
- 8 min 54 s
- Layers
- CUT only, no engraving
Free account required to download
How to make it
- 01Pick your thickness version and cut one slot in scrap to confirm the tab presses in without play.
- 02Cut the seven parts, making sure the 400 × 230 mm base fits your bed whole.
- 03Join the divider to the back of the cross divider, set both in the base and add the 70 mm back, the sloped sides and the 49 mm front.
- 04Seal the tray, place offcut spacers or felt rolls in the front channel if you like, and fill the two back bays.
A roomy back and a ring channel
This is one of the larger trays in the jewelry set, 400 mm wide and 230 mm deep, yet it needs only seven parts. A cross divider (55.2 mm tall) runs the full width near the front and creates a long, narrow channel. Behind it, one divider splits the deep back area into two bays: a wide one for sunglasses and a smaller one for a watch, bangles and a beaded bracelet.
The front channel is the place for rings and earrings laid in a line. In the photo it is shown with small spacers splitting it into three; the file itself leaves it as one open channel, and you can drop in offcut blocks or felt rolls if you want separate spots. The front wall is 49 mm against a 70 mm back.
Cutting it
Seven pieces: front, back, two sloped sides, base, cross divider and one divider. Cutting estimates for the 3 mm file: about 21 min 20 s on a 10 W diode, about 8 min 54 s on a 40 W CO2 and about 4 min 16 s on a 100 W CO2. The layout is 1280 × 312 mm, and the 400 × 230 mm base is the largest part, so check that your bed takes it in one piece. Everything else spreads over two more sheets.
A diode laser cuts the 3 mm file in one or two passes. For 5 or 6 mm, use a CO2 laser or plan for several passes at reduced speed.
Assembly, finish and uses
Fit the short divider to the back face of the cross divider, place both in the base, then add the back, sides and front. No glue is required. For a bathroom like the one in the photo, seal all faces with polyurethane. As a gift, fill the channel with a few rings for a wedding or engagement, or offer it at craft fairs as a roomy dresser tray.
Questions about this file
Is the front channel divided?
No, in the file it is one open channel across the full width. Small offcut blocks or felt rolls can split it into separate spots for rings and earrings.
Will sunglasses fit in the back bay?
Yes. The back area is deep and the left bay is wide, so a folded pair lies flat with room to spare.
How can I scale it down for a small dresser?
Scale the drawing, then reset each slot to the actual plywood thickness. Otherwise the tabs will be loose or will not fit at all.
Can I make it from MDF?
Yes, with the file for your MDF thickness. Paint or seal it, especially if it will be used in a bathroom.
Is it waterproof enough for a bathroom counter?
Plywood needs protection there. Two coats of polyurethane or hard-wax oil on every face, including under the base, will handle splashes.
Similar files