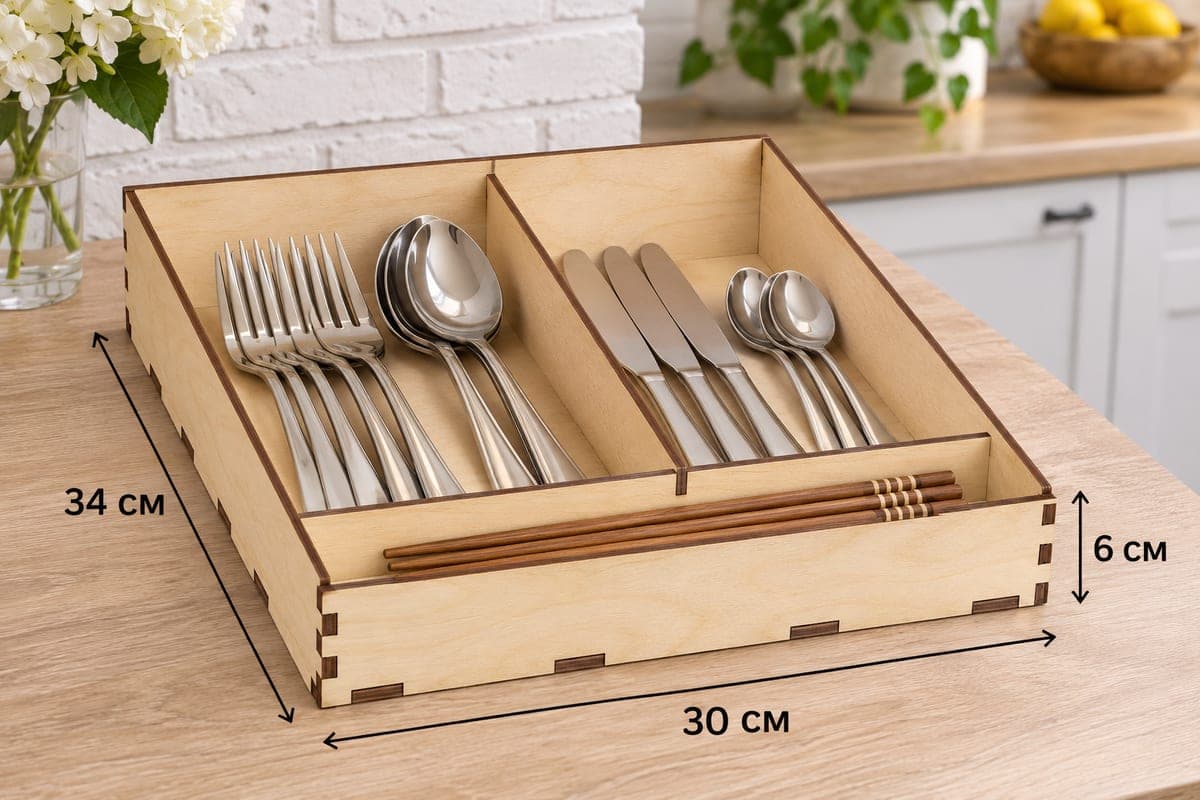
 Visualization
Simple Cutlery Tray SVG, Two Section Flatware Box Laser Cut File, Chopstick Drawer Organizer DXF
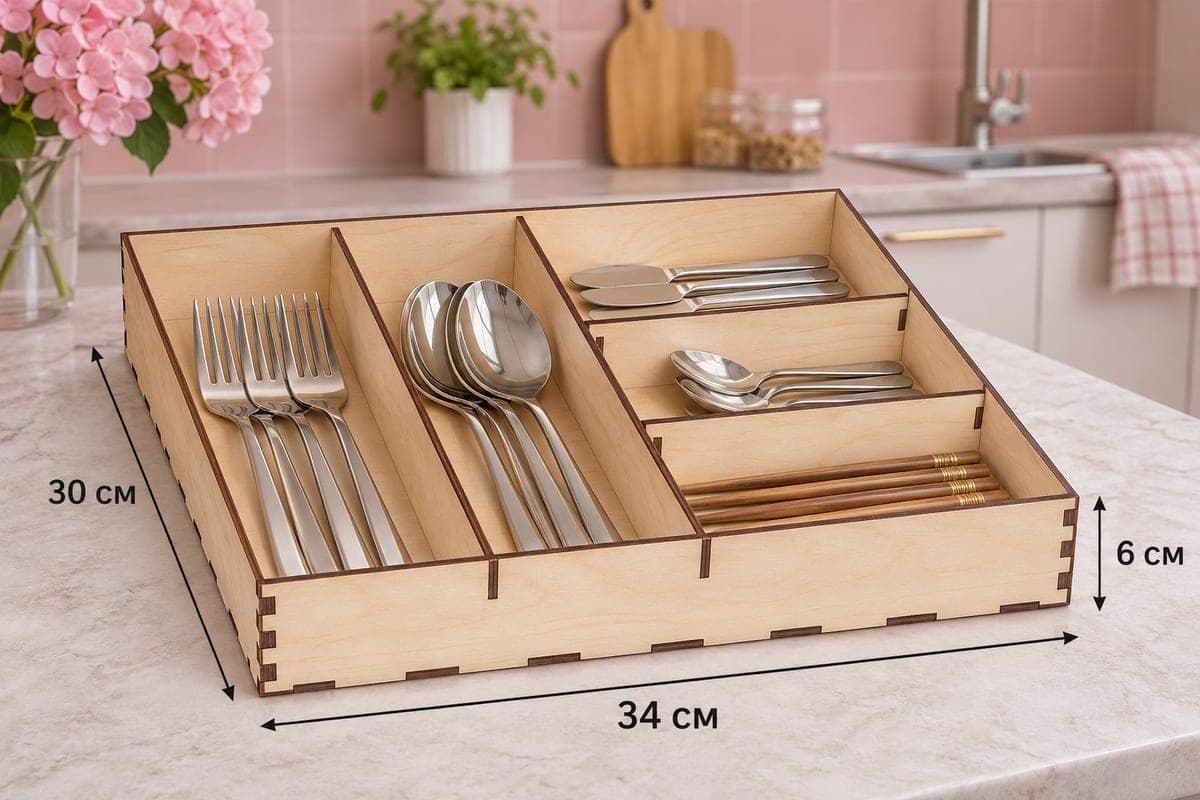
A simple two-bay cutlery tray with a narrow full-width slot at the front for chopsticks, three compartments in total, offered as SVG and DXF in separate files for 3, 4, 5 and 6 mm plywood. It is 300 × 340 × 60 mm (11.81 × 13.39 × 2.36 in), uses only 7 pieces, and locks together with tabs and slots. Free to download.
- Formats
- SVG, DXF
- Outer size (W × D × H)
- 300 × 340 × 60 mm (11.81 × 13.39 × 2.36 in)
- Parts
- 7
- Material thickness
- 3, 4, 5 or 6 mm plywood (a file for each)
- Layout size (3 mm file)
- 1,300 × 412 mm
- Cut length
- 6.49 m
- Est. time, 10 W diode (3 mm)
- 21 min 38 s
- Est. time, 40 W CO2 (3 mm)
- 9 min 01 s
- Layers
- CUT only, no engraving
Free account required to download
How to make it
- 01Choose the 3, 4, 5 or 6 mm file; if this is your first tab-and-slot box, cut a single slot on scrap to check kerf.
- 02Cut all seven pieces: base, four walls, the 300 mm cross divider and the long divider.
- 03Fit the cross divider across the front of the base, slot the long divider into it, then add the sides, front and back.
- 04Sand and finish, then put chopsticks in the front strip and divide forks, spoons, knives and teaspoons between the two bays.
Fewer pieces, bigger bays
With one long divider and one cross divider, this is the quickest tray in the cutlery set to cut and assemble. The two rear bays are wide: in the photo the left one holds forks and dinner spoons together, the right one table knives and teaspoons. A narrow strip runs across the whole 300 mm width at the front, just right for chopsticks, a cake server or a pastry brush laid sideways. The tray is deeper (340 mm) than it is wide (300 mm).
Seven parts and a short cut line make it a sensible first box for someone new to tab-and-slot joints. Cut it in 3 mm first; if the fit feels loose, check your kerf setting before moving to thicker sheets.
Cutting the seven parts
The 3 mm layout is 1300 × 412 mm. The 3 mm file takes about 21 min 38 s on a 10 W diode, about 9 min 01 s on a 40 W CO2, and about 4 min 20 s on a 100 W CO2. A 10 W diode cuts 3 mm in one or two passes; for 5 or 6 mm use several passes or a stronger laser. On a 400 mm bed, cut the base by itself and the walls with the dividers on a second sheet.
Round over the top edges with fine sandpaper so they feel soft in the hand, then oil or lacquer the tray. Glue is optional.
Selling ideas
Offer it as a beginner kit: flat-packed parts, a small bottle of wood glue and a printed guide. It is also a quick add-on item when someone buys a larger tray.
Questions about this file
Is this tray a good beginner project?
Yes. With only 7 pieces and two dividers it is fast to cut and a clear way to learn how tab-and-slot joints go together.
What fits in the narrow front slot?
Chopsticks, a cake server, skewers or a pastry brush lying sideways across the 300 mm width.
Can I scale it up for a bigger drawer?
You can enlarge the panels, but keep each slot equal to your plywood thickness instead of scaling it along with the rest.
Can I use MDF?
Yes, 3 or 6 mm MDF cuts well; seal it on all sides, because raw MDF swells when wet cutlery drips on it.
Does it need glue?
No, the tabs hold it; add wood glue only if you want the tray permanent.
Similar files