 Visualization
Ziplock Bag Organizer SVG, Sloped Food Storage Bag Holder Laser Cut File, Kitchen Drawer Divider Box DXF
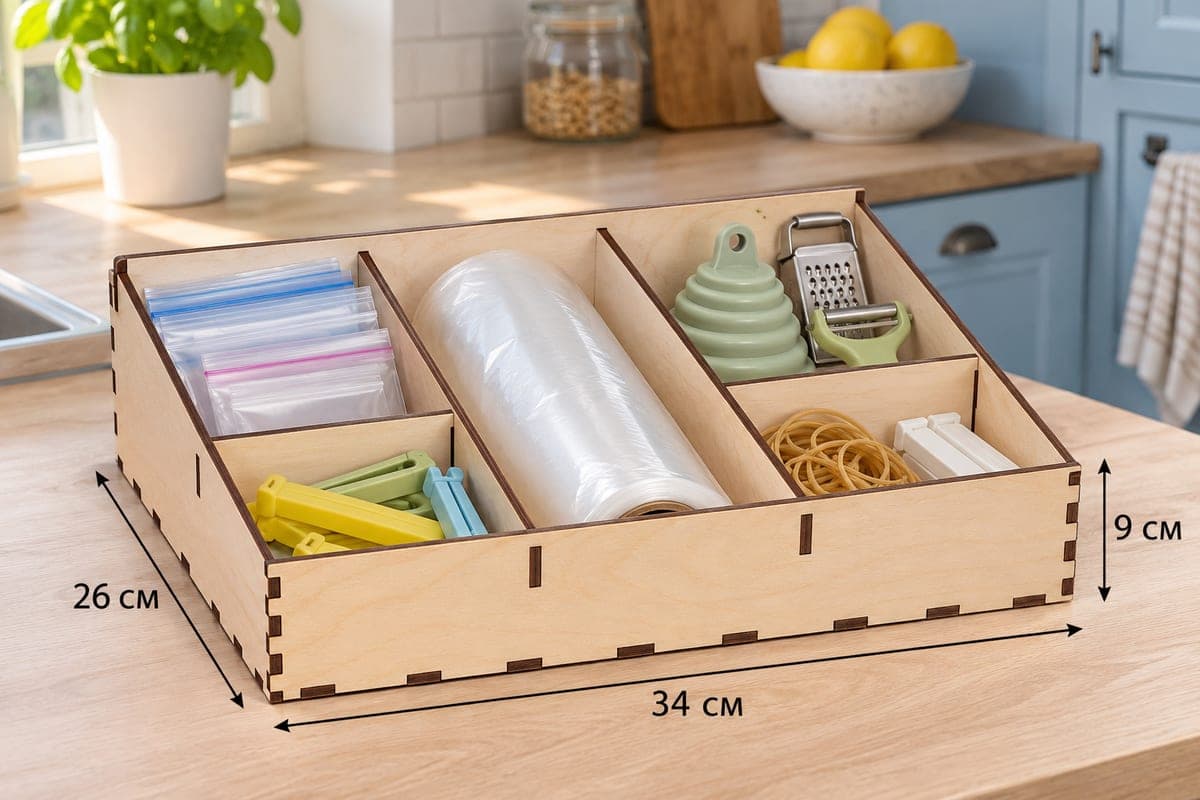
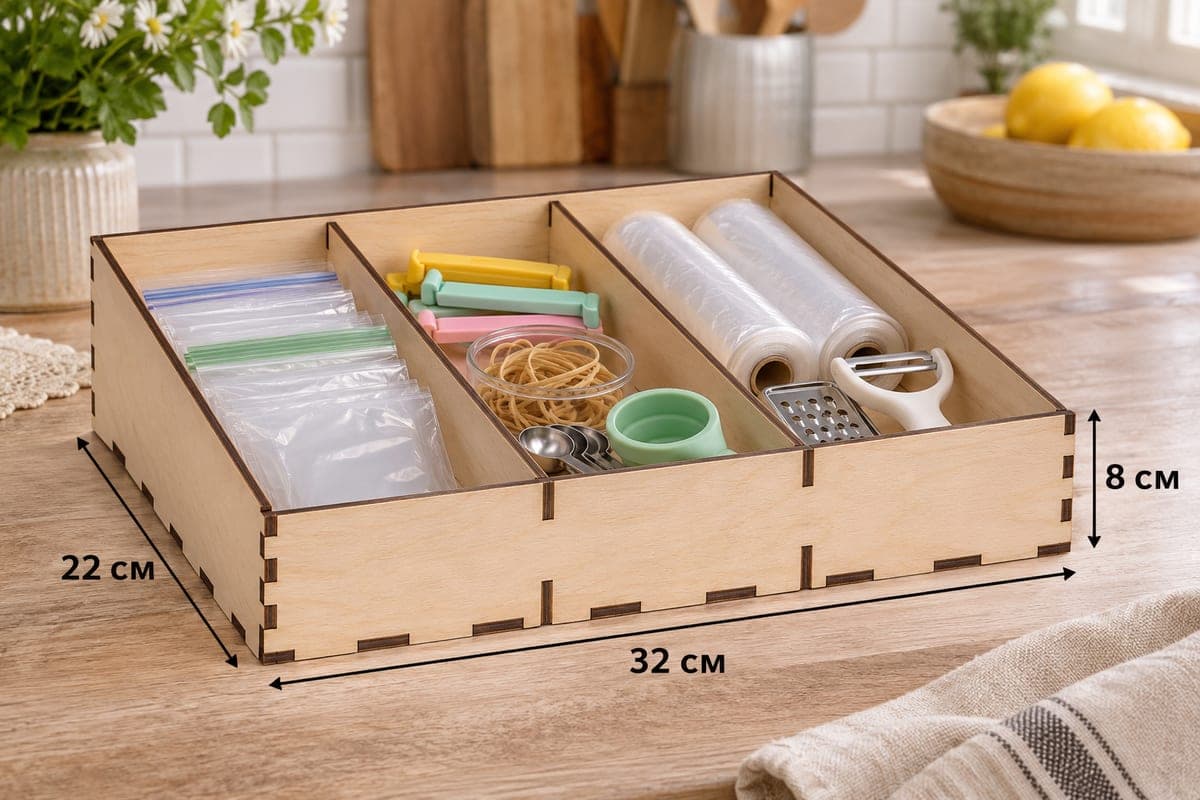
A sloped three-section kitchen organizer for ziplock bags, cling film and small gadgets, supplied as SVG and DXF with separate files for 3, 4, 5 and 6 mm plywood. The box measures 320 × 220 × 80 mm (12.60 × 8.66 × 3.15 in), is cut from 7 pieces into 3 compartments, and its front drops to 44 mm so the bags stay easy to grab. It assembles with tabs and slots and is a free download.
- Formats
- SVG, DXF
- Outer size (W × D × H)
- 320 × 220 × 80 mm (12.60 × 8.66 × 3.15 in)
- Parts
- 7
- Material thickness
- 3, 4, 5 or 6 mm plywood (a file for each)
- Layout size (3 mm file)
- 1,100 × 312 mm
- Cut length
- 5.59 m
- Est. time, 10 W diode (3 mm)
- 18 min 37 s
- Est. time, 40 W CO2 (3 mm)
- 7 min 45 s
- Layers
- CUT only, no engraving
Free account required to download
How to make it
- 01Pick the SVG or DXF that matches your plywood (3, 4, 5 or 6 mm) and cut one divider slot on scrap to check the fit.
- 02Cut the seven pieces; if your bed is shorter than about 1100 mm, move the base and back onto a second sheet.
- 03Join both sloped sides to the base, add the back wall, push in the two dividers and finish with the 44 mm front.
- 04Sand, seal with lacquer or oil, then load bags in the left lane, wrap in the right lane and clips in the middle.
What fits inside
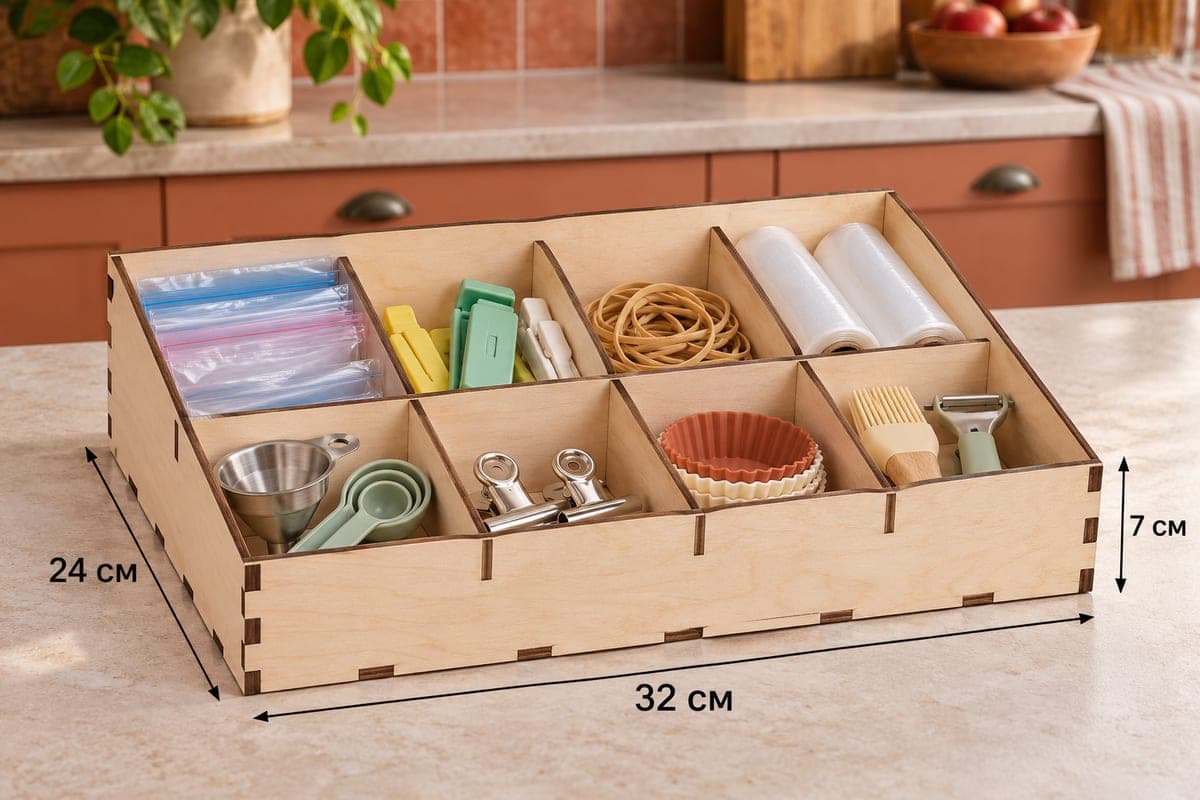
Two full-depth dividers split the base into three equal lanes, each roughly a third of the 320 mm width. In our setup the left lane holds flat zip bags standing on edge, the middle one takes bag clips, a bowl of rubber bands and measuring spoons, and the right lane fits two rolls of cling film next to a peeler and a small grater. The dividers run the full 80 mm height at the back while the side walls slope down to a 44 mm front, so every lane stays open at the front edge and you can read what is inside at a glance.
Cutting and assembly
There are only seven pieces: front, back, two sloped sides, base and two dividers. At 3 mm the whole layout sits on a strip of about 1100 × 312 mm, so on a smaller bed you will need to split it over two or three sheets. A 10 W diode handles 3 mm plywood in one or two passes and needs about 18 min 37 s for the 3 mm file; a 40 W CO2 takes about 7 min 45 s and a 100 W CO2 about 3 min 43 s. The 5 and 6 mm versions are better on a CO2 laser or with extra passes on a diode.
Push the sides into the base, add the back, slide both dividers into their slots, then close the box with the low front. The tab-and-slot joints hold without glue, though a drop of wood glue makes the box permanent.
Finishing and selling
Sand the edges lightly and wipe on clear lacquer or a food-safe oil so damp hands near the sink do not mark the wood. This simple three-lane tray works as a starter kitchen item in an Etsy shop, as a housewarming gift with a few packs of bags inside, or as part of a matching drawer set.
Questions about this file
Will sandwich and quart zip bags fit in one lane?
Each lane is about a third of the 320 mm width and runs the full 220 mm depth, so sandwich and quart bags stand on edge easily. Gallon bags fit once folded in half.
Can I make it wider for a big drawer?
Yes, stretch the outline in your editor, but keep every slot and tab at the real thickness of your plywood. Scaling the whole drawing by a percentage changes the slots too, and the joints stop fitting.
Which plywood thickness suits this tray?
3 mm is light and cuts fastest, which is plenty for bags and clips. Choose 4 mm if the tray will be lifted out of a drawer every day.
Do I have to glue it?
No, the seven parts lock together dry. Add a little wood glue at the corners only if you want the tray to stay assembled for good.
How do I keep it clean near the sink?
Seal it with two thin coats of clear lacquer or a hardwax oil, then just wipe it with a damp cloth. Do not soak or rinse the plywood.
Similar files