 Visualization
Food Bag Storage Organizer SVG, Kitchen Gadget Tray Laser Cut File, Zip Bag and Plastic Wrap Holder DXF
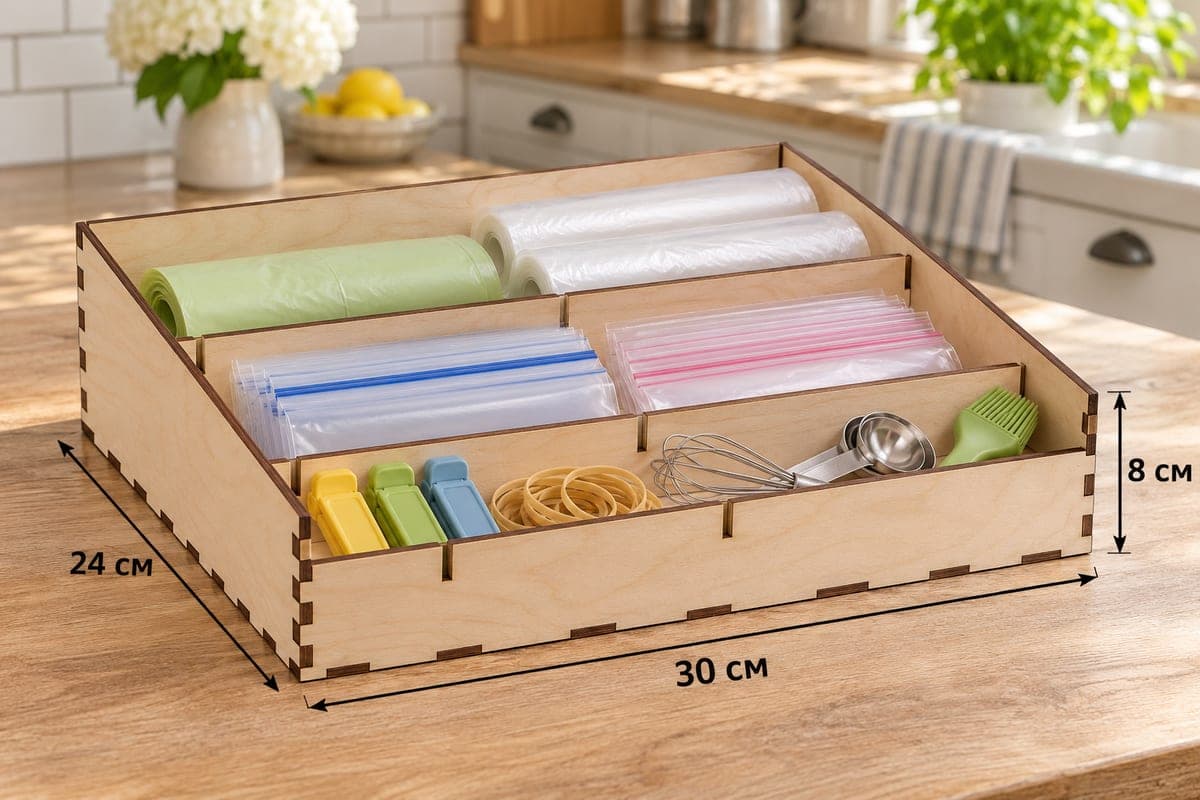
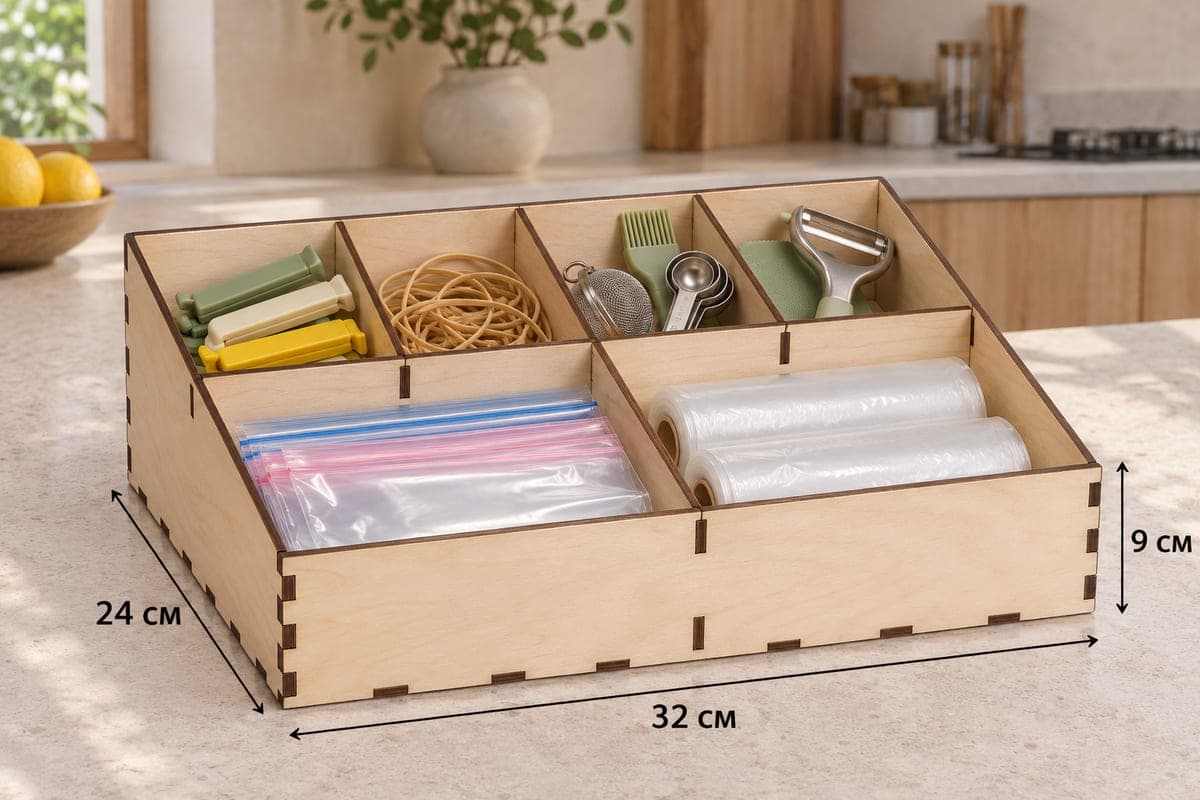
A kitchen organizer with two deep front bays for zip bags and wrap rolls and a back row of four small cells for clips, rubber bands and gadgets. It comes as SVG and DXF in separate versions for 3, 4, 5 and 6 mm plywood, measures 320 × 240 × 90 mm (12.60 × 9.45 × 3.54 in) and is cut from 10 pieces into 6 compartments. The sides slope to a 45 mm front, the joints are tab and slot, and the file is a free download.
- Formats
- SVG, DXF
- Outer size (W × D × H)
- 320 × 240 × 90 mm (12.60 × 9.45 × 3.54 in)
- Parts
- 10
- Material thickness
- 3, 4, 5 or 6 mm plywood (a file for each)
- Layout size (3 mm file)
- 1,140 × 342 mm
- Cut length
- 7.35 m
- Est. time, 10 W diode (3 mm)
- 24 min 29 s
- Est. time, 40 W CO2 (3 mm)
- 10 min 12 s
- Layers
- CUT only, no engraving
Free account required to download
How to make it
- 01Download the file for 3, 4, 5 or 6 mm plywood and cut a back-row divider into a scrap slot to test the fit.
- 02Cut all ten parts, splitting the 1140 mm long layout over two or three sheets on a small laser.
- 03Build the shell from base, sides and back, insert the cross divider, add the three back dividers and the front divider, then the 45 mm front.
- 04Sand, seal with lacquer, and put bags and wrap in the deep front bays and gadgets in the four back cells.
Bags in front, tools behind
Most bag trays put small items up front; this one flips it. The cross divider sits closer to the back wall, leaving two deep front bays about 130 mm from front to back. One bay takes a flat stack of zip bags, the other two rolls of cling film lying side by side. Behind them, three full-height dividers create four small cells along the 90 mm back wall: bag clips, rubber bands, a tea strainer with measuring spoons and a pastry brush, and a peeler with a spatula. The tall back cells keep upright tools from falling forward.
Cutting and assembly
Ten parts make up the file: front, back, two sloped sides, base, one cross divider, one front divider and three back dividers. The 3 mm layout is roughly 1140 × 342 mm; on a 400 × 400 mm bed it splits into three sheets. For the 3 mm file allow about 24 min 29 s on a 10 W diode, about 10 min 12 s on a 40 W CO2 and about 4 min 54 s on a 100 W CO2. A diode handles 3 mm in one or two passes, but 5–6 mm needs CO2 power or many slow passes.
Assemble base, sides and back first, then the cross divider, the three back dividers and the single front divider, and set the front wall last. It holds without glue; a few drops make it permanent.
Finishing and sets
Sand the edges and seal with lacquer or oil, especially if it will live beside the sink. Sell it with a matching grid bag box or a snack organizer as a kitchen set, or offer an engraved family name on the front as a custom upgrade.
Questions about this file
Why are the small cells at the back?
The back wall is 90 mm tall, so tools that stand upright, like a peeler or pastry brush, lean against it safely while flat bags stay within reach in front.
Can I scale the box down for a shallow drawer?
Reduce the height in your editor but keep slot widths equal to your plywood. Scaling the whole drawing shrinks the slots and the parts will not fit.
Will it hold up in acrylic?
Acrylic works if you test the slot fit first and secure the joints with acrylic cement; plywood is more forgiving of small tolerances.
Do I have to glue the dividers?
No. The tabs lock firmly dry, though a drop of wood glue makes the cross divider stiffer if you pull bags out often.
How do I protect it near the sink?
Two coats of water-based polyurethane or hardwax oil keep splashes out. Wipe it dry rather than rinsing it.
Similar files