 Visualization
Snack Bin SVG, 6 Section Snack Organizer Laser File, Wooden Pantry Snack Display, Office Snack Tray DXF
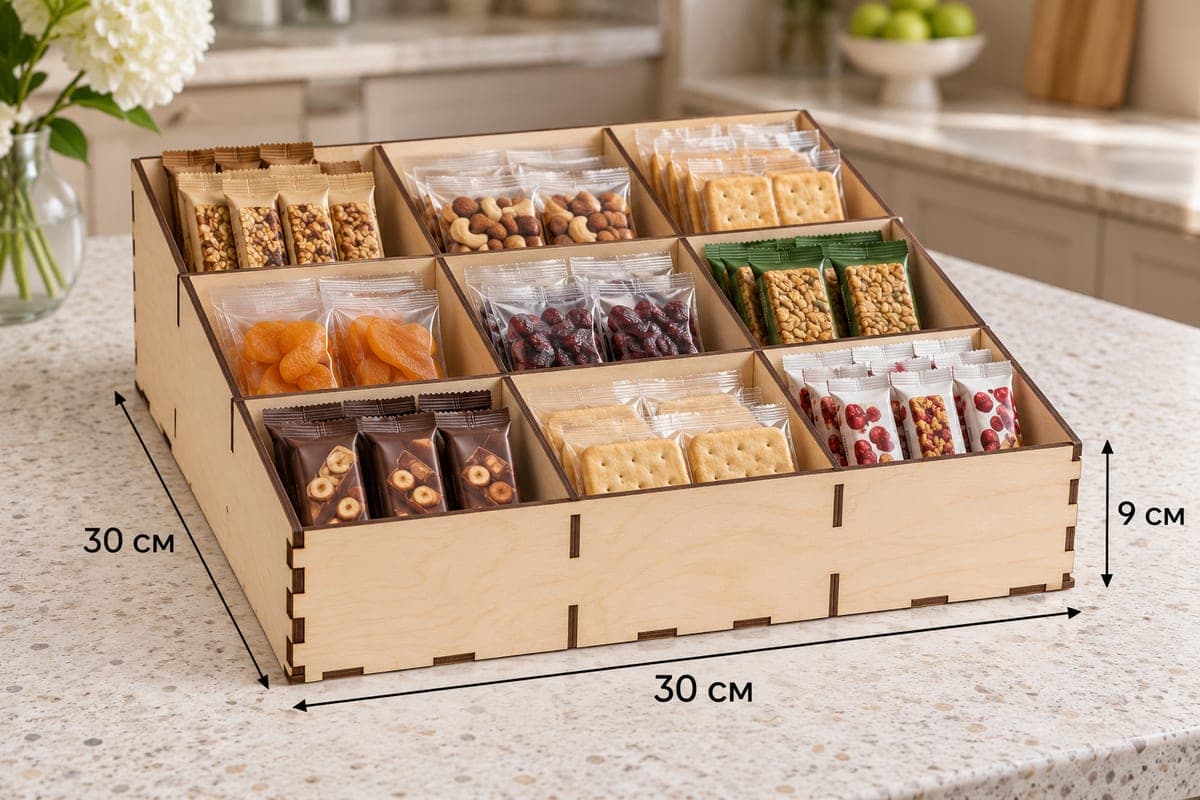
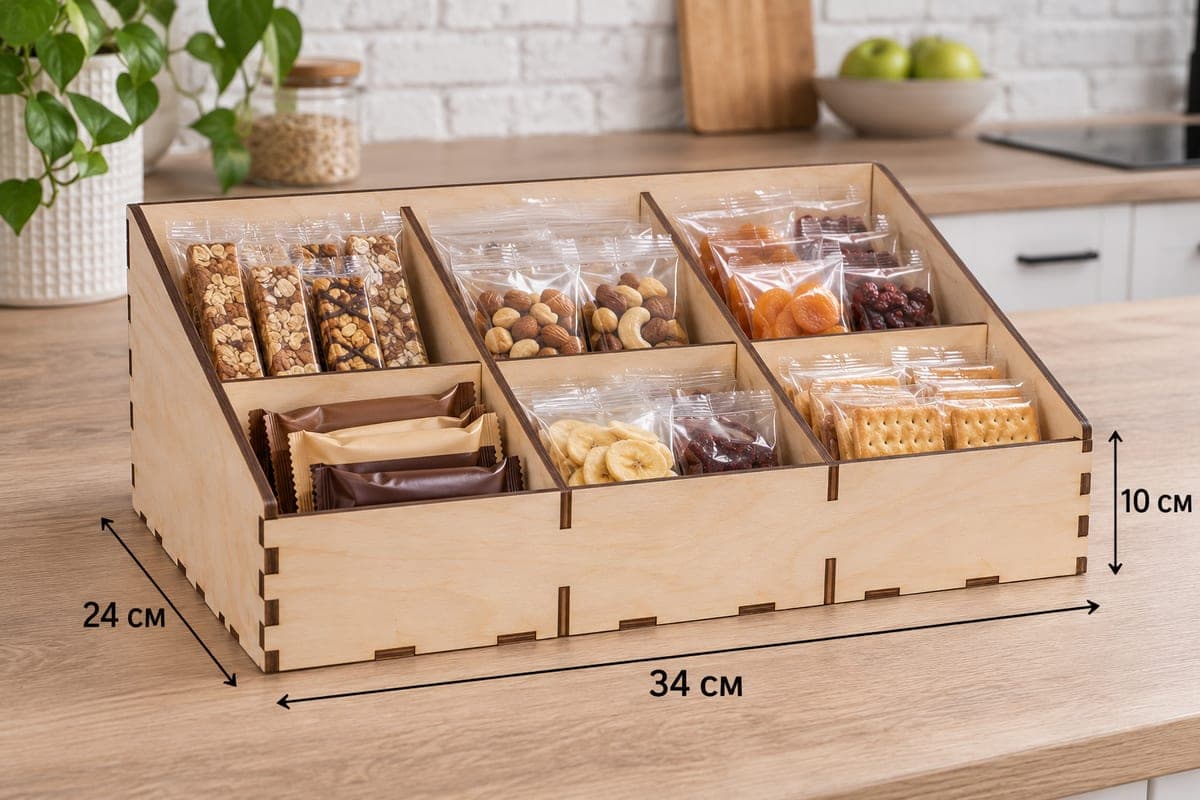
A six-section snack bin built as three columns, each with a taller back cell and a lower front cell, for bars, nuts, dried fruit and crackers. It ships as SVG and DXF with separate files for 3, 4, 5 and 6 mm plywood, measures 340 × 240 × 100 mm (13.39 × 9.45 × 3.94 in), and is cut from 10 pieces into 6 compartments. The sides slope from 100 mm to a 50 mm front, everything joins with tabs and slots, and the file is free to download.
- Formats
- SVG, DXF
- Outer size (W × D × H)
- 340 × 240 × 100 mm (13.39 × 9.45 × 3.94 in)
- Parts
- 10
- Material thickness
- 3, 4, 5 or 6 mm plywood (a file for each)
- Layout size (3 mm file)
- 1,191 × 352 mm
- Cut length
- 7.54 m
- Est. time, 10 W diode (3 mm)
- 25 min 09 s
- Est. time, 40 W CO2 (3 mm)
- 10 min 29 s
- Layers
- CUT only, no engraving
Free account required to download
How to make it
- 01Select the 3, 4, 5 or 6 mm file and cut one cross divider plus a test slot to confirm the joint.
- 02Cut all ten pieces from flat plywood, splitting the 1191 mm layout over two sheets if needed.
- 03Set the sides and back on the base, add the two long dividers, slot in the three cross dividers and close with the 50 mm front.
- 04Sand, seal, and load bars at the back of each column with smaller packs in front.
Three columns, two rows
Two long dividers make three columns across the 340 mm width, and each column gets its own short cross divider. The three cross dividers differ slightly in width and height, so the cells are similar but not identical. In the photo the left column holds granola bars behind chocolate bars, the center column has nut packs behind banana chips and cranberries, and the right column keeps dried apricots behind cracker packs. Six cells let you sort by type, by person, or healthy versus treat.
Laser settings and layout
Ten parts fit on a 3 mm layout of about 1191 × 352 mm, so plan two sheets on a 400 mm wide bed. Cutting the 3 mm file takes about 25 min 09 s on a 10 W diode, about 10 min 29 s on a 40 W CO2 and about 5 min 02 s on a 100 W CO2. The 100 mm tall back and sides are the largest pieces after the base, so check that your plywood lies flat before you start; warped sheets cause partial cuts on a diode. Thicker 5–6 mm plywood is better left to a CO2 or slow multiple passes.
Assemble the base, sides and back, insert the two long dividers, then drop the three cross dividers into their slots and add the front. Glue is optional; use a little if the bin will be carried around full.
Finishing, selling and gifting
Sand the edges, then oil or lacquer the wood. Office kitchens and coworking spaces buy snack displays like this one. Offer an engraved name or logo on the front as an upgrade, sell it filled as a holiday gift box, or list a pair, one for sweet and one for savory.
Questions about this file
What snacks fit best?
Each column is a little over 110 mm wide, so granola bars, chocolate bars, nut packs and cracker packs stand up comfortably.
Can I enlarge it for chip bags?
Yes, scale the outer size in your editor but leave the slots at the thickness of your plywood; otherwise the tabs will not lock.
Will it work in acrylic for a shop counter?
Clear acrylic makes a good counter display. Check the slot fit with a test piece and bond the joints with acrylic cement.
Which thickness should I cut?
4 mm is a good middle ground for a display that gets touched all day. 3 mm cuts faster, and 6 mm looks heavier but needs a CO2.
Can I add a logo to the front?
Add a logo as an engraving layer on the front panel before you cut; the file itself contains only cut lines.
Similar files