 Visualization
Jewelry Tray SVG, Four Slot Ring Roll and Watch Organizer DXF, Sloped Bathroom Jewelry Holder Laser Cut File
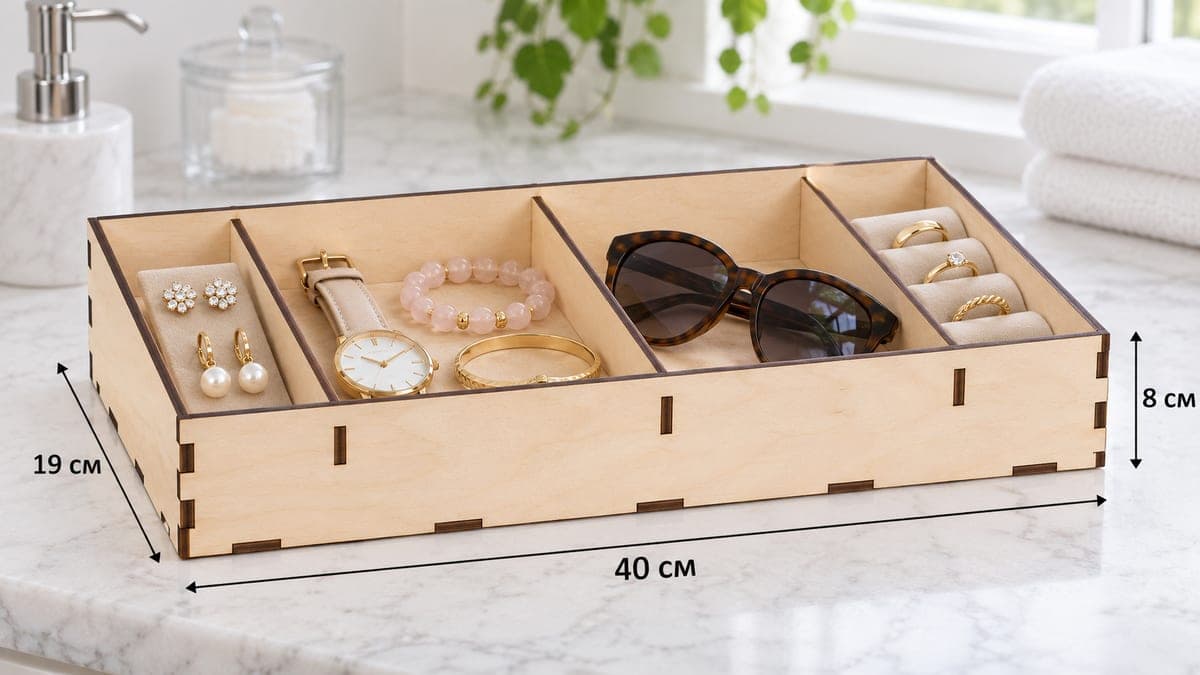
A sloped jewelry tray with four full-depth slots side by side in different widths: a narrow one for earrings, a medium one for a watch and bracelets, a wide one for sunglasses and a narrow one for a ring roll. It measures 400 × 190 × 80 mm (15.75 × 7.48 × 3.15 in), is made of 8 tab-and-slot pieces and comes as a free SVG and DXF download for 3, 4, 5 and 6 mm plywood.
- Formats
- SVG, DXF
- Outer size (W × D × H)
- 400 × 190 × 80 mm (15.75 × 7.48 × 3.15 in)
- Parts
- 8
- Material thickness
- 3, 4, 5 or 6 mm plywood (a file for each)
- Layout size (3 mm file)
- 1,604 × 282 mm
- Cut length
- 6.39 m
- Est. time, 10 W diode (3 mm)
- 21 min 17 s
- Est. time, 40 W CO2 (3 mm)
- 8 min 52 s
- Layers
- CUT only, no engraving
Free account required to download
How to make it
- 01Choose the SVG or DXF for your plywood and cut one divider slot in scrap to test the fit.
- 02Laser the eight parts, using a bed that takes the 400 mm front, back and base.
- 03Seat the three dividers in the base, add the 80 mm back, the sloped sides and the 48 mm front.
- 04Seal for bathroom use, press a felt ring roll into the narrow end slot and fill the rest.
Four slots, four widths
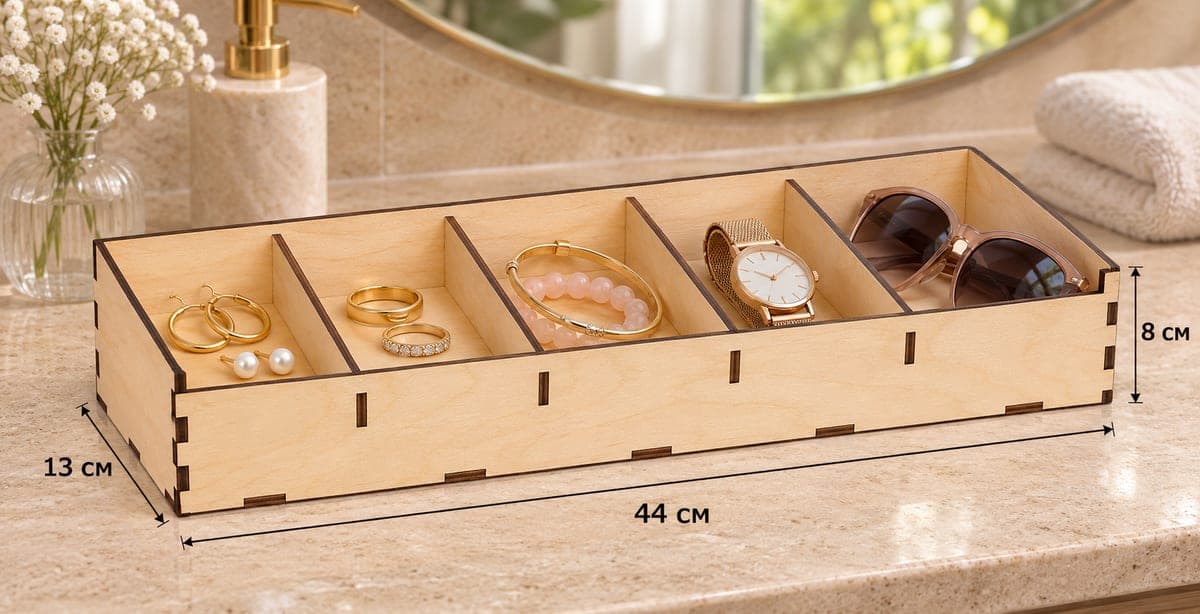
Three dividers run from back to front and split the 400 mm length into four slots, and the slots are not equal. The two at the ends are narrow, about the size of an earring card or a ring roll; the two in the middle are wider for a watch with bracelets and for sunglasses. Every slot goes the full 190 mm depth, so long items like a folded pair of glasses lie straight.
The photo shows that order from left to right: crystal and pearl earrings on a cushion, a watch with a rose quartz bracelet and a bangle, sunglasses, then a ring roll with four rings. The back is 80 mm and the front 48 mm, a clear slope that lets you look into each slot.
Cutting on smaller machines
Eight parts. Allow about 21 min 17 s on a 10 W diode, about 8 min 52 s on a 40 W CO2 and about 4 min 15 s on a 100 W CO2 for the 3 mm file. The layout is 1604 × 282 mm, and the 400 mm long parts mean your bed must take at least 400 mm in one direction. Split the rest over two or three sheets.
Finishing for a bathroom
The photo shows this tray on a marble bathroom counter. If yours goes there too, sand all edges, then apply two coats of polyurethane or hard-wax oil to every face, including under the base. Let it cure for a day before adding jewelry. Assembly is quick: dividers into the base, back on, sides, front. Glue is optional.
The narrow end slot is just right for a homemade ring roll: roll a strip of felt around foam and press it in. Rings stay upright and easy to pick out.
Questions about this file
Why are the four slots different widths?
The narrow end slots suit earrings and a ring roll, while the wider middle slots take a watch with bracelets and a pair of sunglasses.
How do I make a ring roll for the narrow slot?
Wrap felt or velvet around a strip of foam, cut it to the slot length and press it in. Rings slide into the folds.
Will it survive on a bathroom counter?
Yes, if every face is sealed with polyurethane or hard-wax oil. Do not leave it standing in water.
Can I resize the slots?
Move the divider slots in the base and walls in your design software, keeping each slot equal to your plywood thickness.
Which file should I use with 4 mm plywood?
Use the 4 mm version. Measure the sheet first; if it is 3.6 mm, test a slot and add a drop of glue if the tabs are loose.
Similar files