 Visualization
Pad Organizer SVG with Front Step, Tampon and Wipes Tray, Two Level Bathroom Box Laser Cut DXF
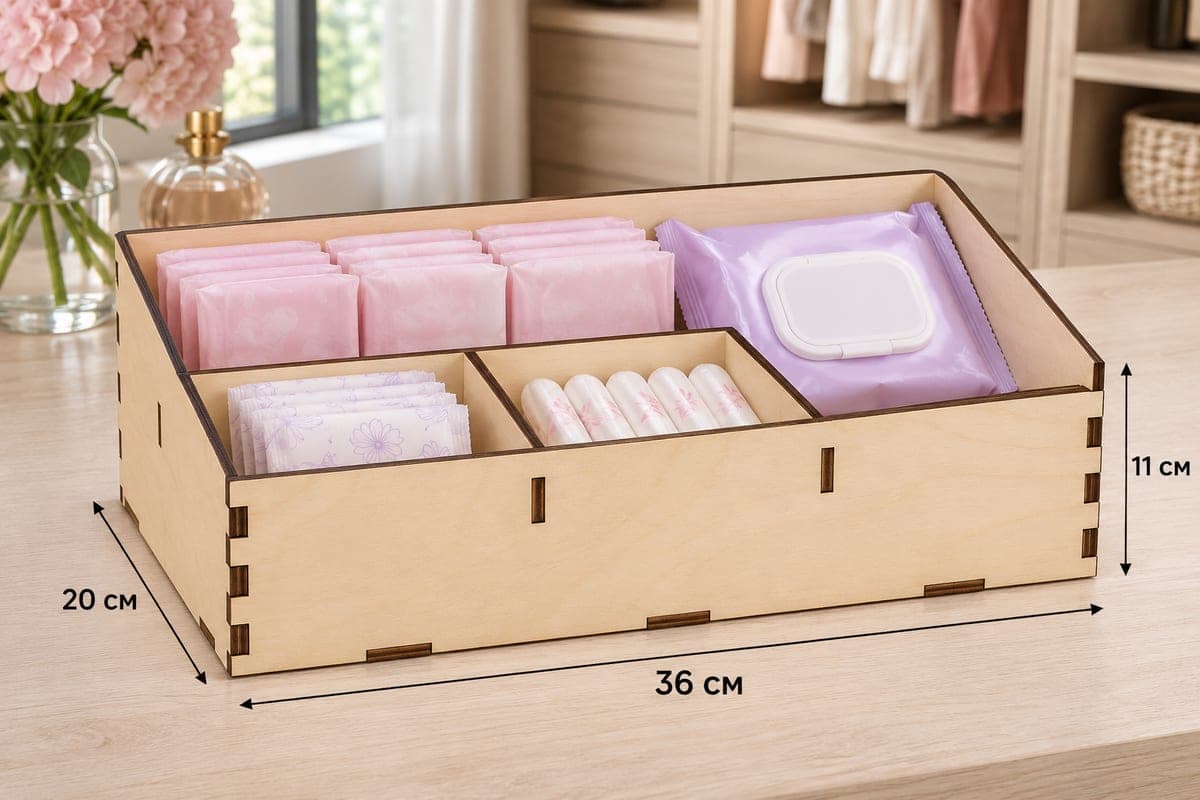
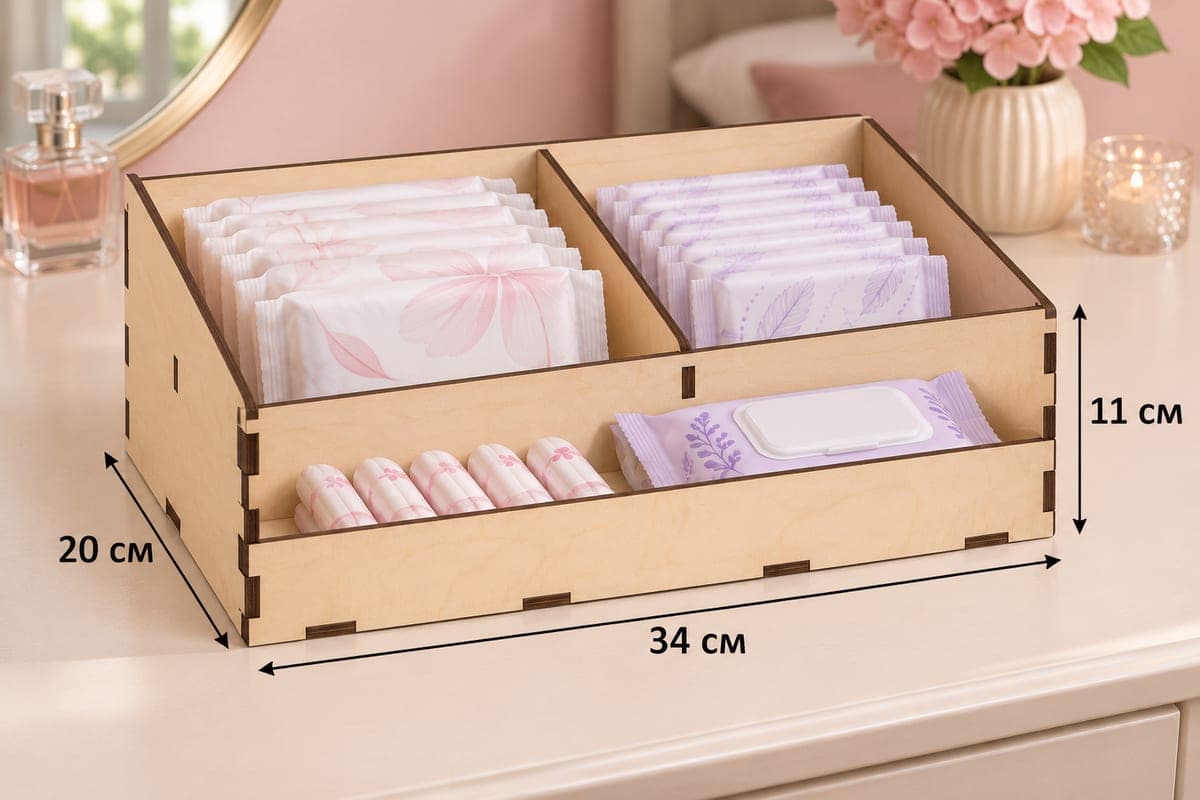
A two-level pad organizer: two tall bays at the back for pads and liners, and a low front step split in two for tampons and wipes. Files are SVG and DXF for 3, 4, 5 and 6 mm plywood; the box is 340 × 200 × 110 mm (13.39 × 7.87 × 4.33 in), built from 8 tab-and-slot parts with a sloped front. The files cost nothing to download.
- Formats
- SVG, DXF
- Outer size (W × D × H)
- 340 × 200 × 110 mm (13.39 × 7.87 × 4.33 in)
- Parts
- 8
- Material thickness
- 3, 4, 5 or 6 mm plywood (a file for each)
- Layout size (3 mm file)
- 1,100 × 322 mm
- Cut length
- 6.38 m
- Est. time, 10 W diode (3 mm)
- 21 min 16 s
- Est. time, 40 W CO2 (3 mm)
- 8 min 52 s
- Layers
- CUT only, no engraving
Free account required to download
How to make it
- 01Pick your plywood file and run a test on one slot before cutting the rest.
- 02Cut the 8 parts and keep the small 72.8 × 49.5 mm divider separate, since it is the only low piece.
- 03Stand the full-height cross divider in the base, add the tall back divider and the small front divider, then fit the back, sides and the 50 mm front.
- 04Sand and seal, fill the back bays with pads and the front step with tampons and wipes.
Two tall bays and a low step
A full-height cross divider (340 × 110 mm) stands across the box, so the back half works as two tall bins and the front half as a low step. The back is split by one divider into two wide bays: in the photo, pink overnight pads on the left and lilac day pads on the right. The front step is only 50 mm high, the lowest wall here, and a small 49.5 mm divider separates it into a narrow bay of tampons lying flat and a longer bay for a pack of wipes. You see everything from above, and the tall cross divider keeps the pad stacks from sliding forward.
Choosing plywood
The four files differ only in slot size, so match the file to your measured sheet. 3 mm keeps this box light and cuts in about 21 min 16 s on a 10 W diode, about 8 min 52 s on a 40 W CO2 and about 4 min 15 s on a 100 W CO2. 4 or 5 mm gives sturdier walls if it stands on a dresser in a shared room. A diode will need several passes for 5 and 6 mm. The 3 mm layout is 1100 × 322 mm, so arrange the 340 mm parts on one sheet and the sides and dividers on another.
Finishing for the bathroom
Sand the cross divider's top edge well, as fingers rest on it when you reach into the back bays. Seal with clear lacquer or oil. For selling, it works stocked as a guest-room bedside basket, a postpartum care station, or a matching piece next to a vanity tray.
Questions about this file
What is the front step for?
It is a shallow row, 50 mm high at the front, split into a small tampon bay and a longer bay for wipes or liners.
How many pads fit in the back bays?
Each back bay is about half the 340 mm length wide, so a full stack of folded pads fits in each one.
Can I scale it up?
Yes, but keep the slot widths equal to your plywood thickness. Scaling the whole drawing changes the slots and the tabs will not fit.
Which finish resists bathroom humidity?
Water-based polyurethane or hardwood oil, applied to all sides including the base, keeps moisture out.
Can I add an engraved label to the front step?
Yes, add a short word or name as an engrave layer. The file itself has only cut lines.
Similar files