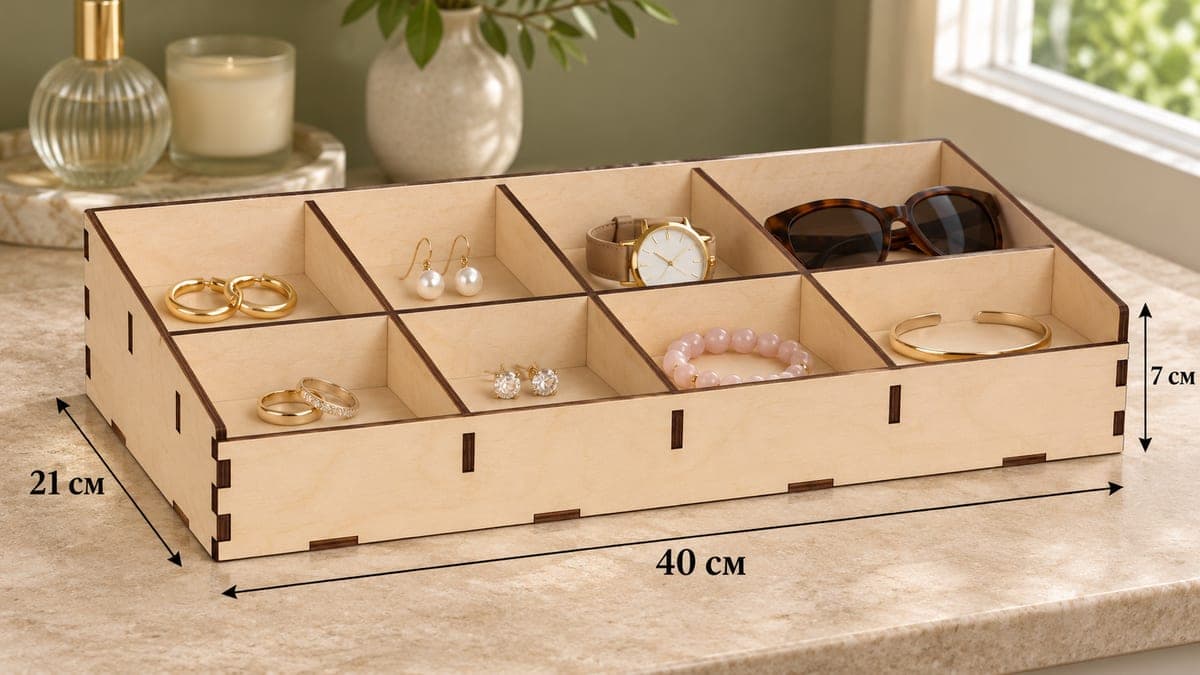
 Visualization
Jewelry Display Tray SVG, Eight Compartment Earring and Ring Organizer DXF, Sloped Jewelry Box Laser File
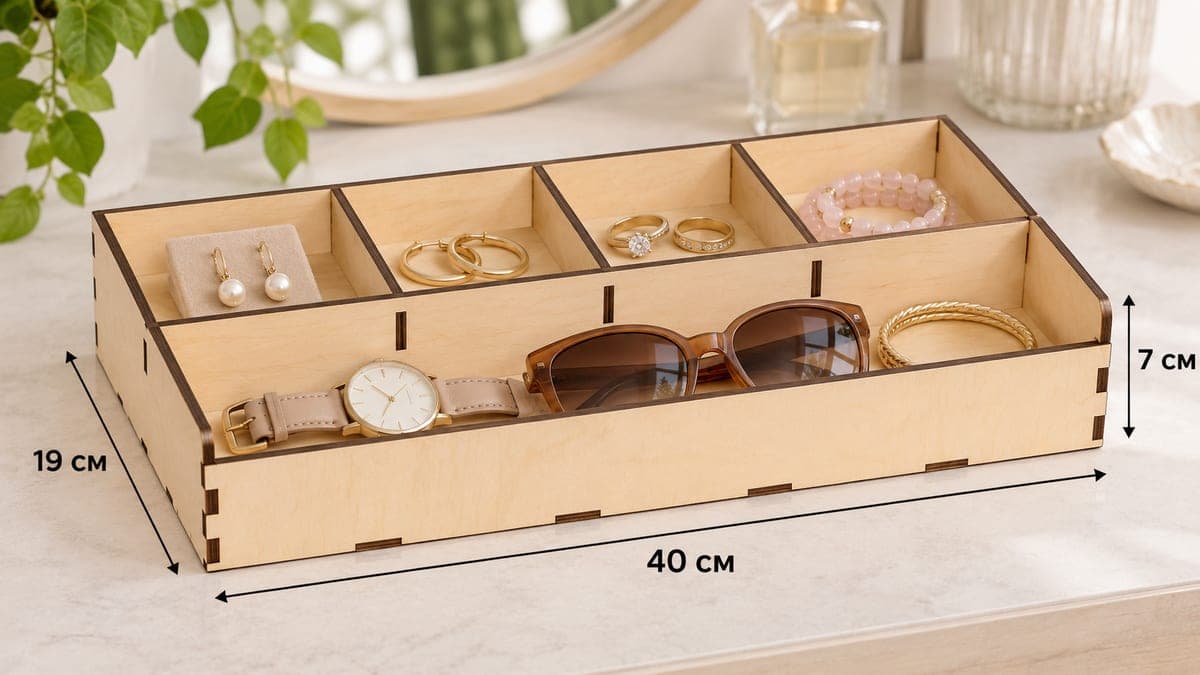
A sloped jewelry display tray with eight compartments arranged as two rows of four, for earrings, rings, a watch, bracelets and sunglasses. The free download contains SVG and DXF for 3, 4, 5 and 6 mm plywood; the tray measures 400 × 210 × 70 mm (15.75 × 8.27 × 2.76 in), uses 12 pieces and assembles with tabs and slots.
- Formats
- SVG, DXF
- Outer size (W × D × H)
- 400 × 210 × 70 mm (15.75 × 8.27 × 2.76 in)
- Parts
- 12
- Material thickness
- 3, 4, 5 or 6 mm plywood (a file for each)
- Layout size (3 mm file)
- 1,466 × 292 mm
- Cut length
- 8.20 m
- Est. time, 10 W diode (3 mm)
- 27 min 19 s
- Est. time, 40 W CO2 (3 mm)
- 11 min 23 s
- Layers
- CUT only, no engraving
Free account required to download
How to make it
- 01Download the version for your sheet thickness and test-cut one short divider with its slot before the full job.
- 02Cut all twelve parts, grouping the seven dividers on their own sheet if your bed is small.
- 03Attach three tall dividers behind and three low dividers in front of the cross divider, set the grid on the base, then add back, sides and the 38 mm front.
- 04Sand the many small edges, seal with lacquer, and give each of the eight compartments one type of jewelry.
Two rows of four
This is the most divided tray in the set. A full-length cross divider separates a back row from a front row, and three short dividers in each row make four sections per row, eight in all. The front dividers are lower (53.8 mm) than the back ones (70 mm), and the front wall drops to just 38 mm. That steep slope makes the tray read like a small shop display: both rows are visible at once.
Eight sections let you sort by type. In the photo the back row holds gold hoops, pearl drops, a watch and sunglasses; the front row has rings, crystal studs, a rose quartz bracelet and a cuff.
Cutting the twelve parts
Twelve pieces means more slots, so a test cut is worth the minute it takes. Estimated time for the 3 mm file: about 27 min 19 s on a 10 W diode, about 11 min 23 s on a 40 W CO2, about 5 min 28 s on a 100 W CO2. The layout is 1466 × 292 mm. On a smaller bed, put the base and back on one sheet, the sides and front on another, and the seven dividers on a third.
A diode laser cuts 3 mm in one or two passes. For 5 or 6 mm, run extra passes at lower speed and check that the narrow divider slots are fully through.
Assembly order
Fit the three tall back dividers and the three low front dividers to the cross divider, then place the whole grid on the base. Add the back wall, the sloped sides and the front. With this many joints the tray is rigid without glue.
Market sellers use trays like this to display earrings on a stall. It also makes a good gift for someone who has started collecting jewelry: one section per piece, with room to grow.
Questions about this file
Why are the front dividers lower than the back ones?
The front wall is only 38 mm, so the front row dividers are 53.8 mm to follow the slope. That keeps both rows visible from above.
Can I use it to display earrings at a market stall?
Yes. Eight sections let you sort by style or price, and the low front lets buyers see everything from the other side of the table.
Will a 10 W diode laser cut the 6 mm file?
It can, with several slow passes and good air assist. For production runs a 40 W or stronger CO2 laser is far quicker.
What if my plywood is 2.8 mm instead of 3 mm?
Use the 3 mm file and test a slot. If the tabs are loose, a small drop of glue fixes it; if you scale anything, keep slots equal to the real thickness.
How do I keep it from sliding on a smooth counter?
Stick four small felt or rubber pads under the corners of the base. They stop the tray sliding and protect the counter.
Similar files