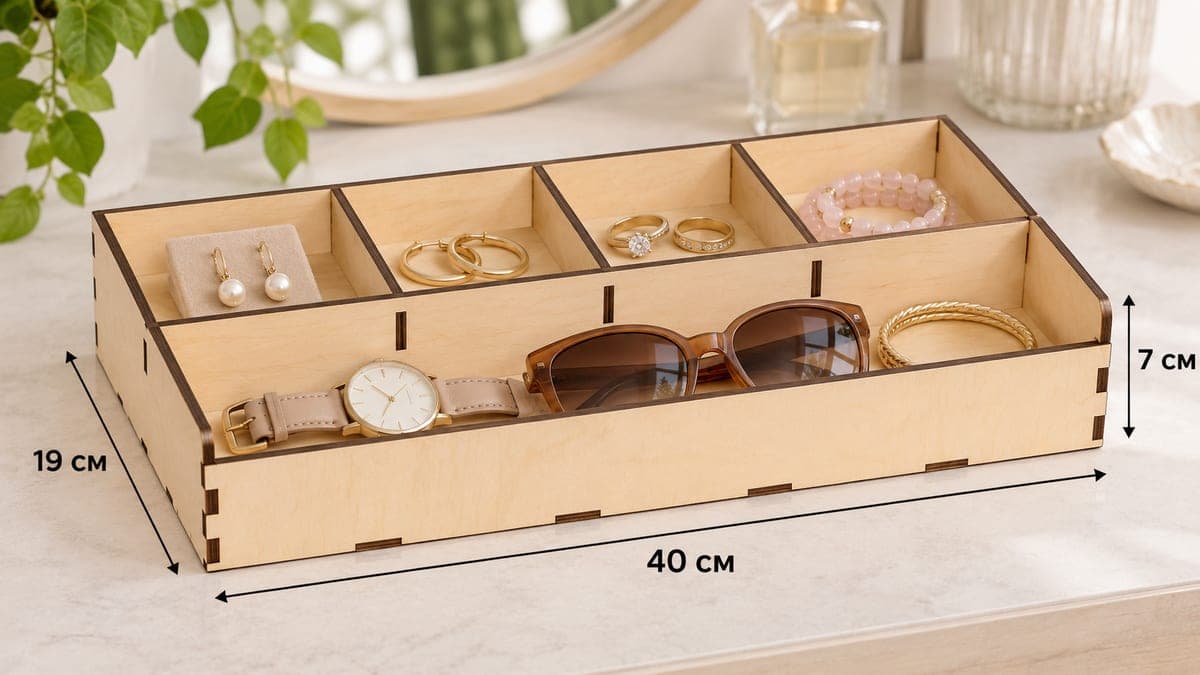
 Visualization
Jewelry Tray SVG, Earring and Ring Cubby Organizer DXF, Long Sunglasses and Watch Tray Laser Cut File
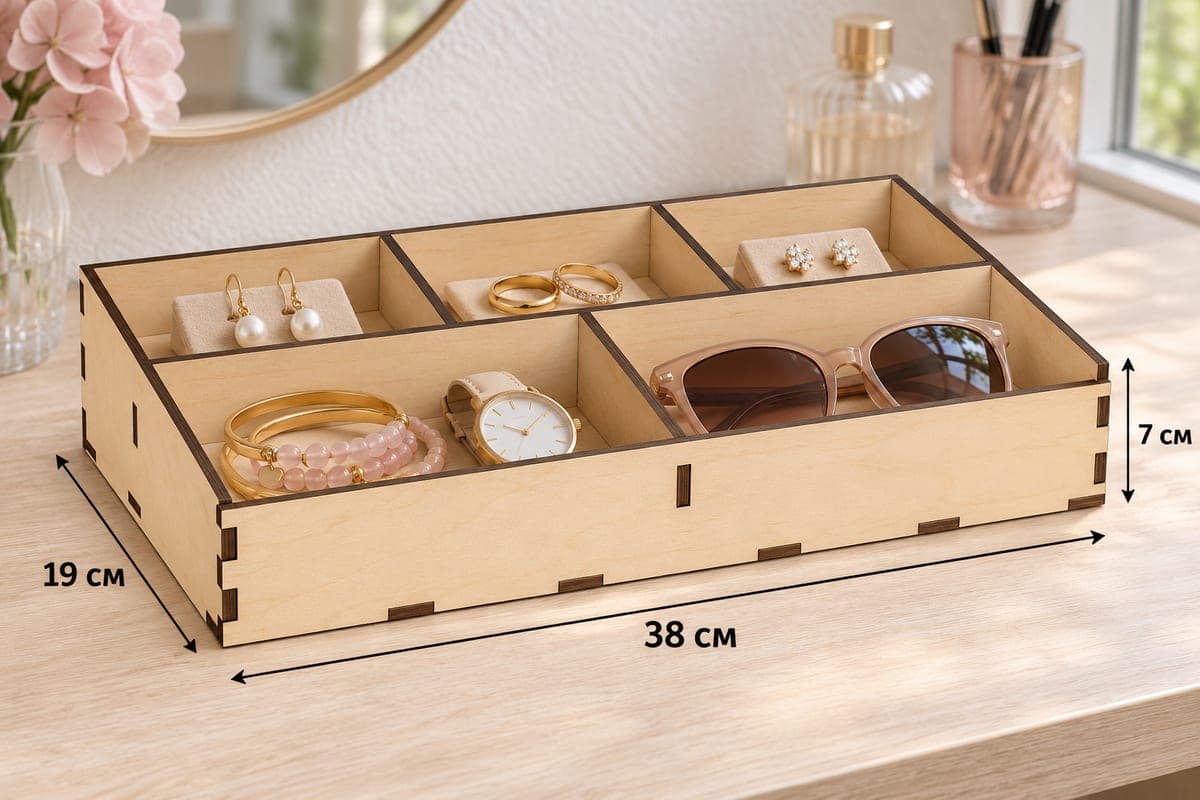
A sloped jewelry tray with four small cubbies along the back for earrings, rings and bracelets and one long front bay that runs the full width for watches and sunglasses. It measures 400 × 190 × 70 mm (15.75 × 7.48 × 2.76 in), is made of 9 tab-and-slot pieces and is supplied as a free SVG and DXF download for 3, 4, 5 and 6 mm plywood.
- Formats
- SVG, DXF
- Outer size (W × D × H)
- 400 × 190 × 70 mm (15.75 × 7.48 × 2.76 in)
- Parts
- 9
- Material thickness
- 3, 4, 5 or 6 mm plywood (a file for each)
- Layout size (3 mm file)
- 1,604 × 272 mm
- Cut length
- 6.85 m
- Est. time, 10 W diode (3 mm)
- 22 min 49 s
- Est. time, 40 W CO2 (3 mm)
- 9 min 30 s
- Layers
- CUT only, no engraving
Free account required to download
How to make it
- 01Download the SVG or DXF for your plywood thickness and cut a slot sample to make sure the tabs seat fully.
- 02Cut the nine parts, keeping the 400 mm front, back and base on a sheet long enough to hold them.
- 03Push the three short dividers into the cross divider, place it on the base, then fit the back, the sloped sides and the 49 mm front.
- 04Smooth the edges, apply oil or lacquer, and sort small pieces into the four back cubbies with daily items in the long front bay.
Small cubbies at the back, one long bay in front
This layout is built around a single open front bay. A cross divider runs the full 400 mm length; three short dividers behind it make four even cubbies in the back row, and nothing interrupts the front. That front bay is long enough to lay a watch, a pair of sunglasses and a bangle side by side, which is handy for things you pick up every morning.
The back cubbies suit one item type each: pearl drops, hoops, rings and a beaded bracelet in the photo. The back wall stands 70 mm, the front 49 mm, and the side panels slope between them.
Cutting it on a hobby laser
Nine pieces: front, back, two sloped sides, base, cross divider and three short dividers. Cutting time for the 3 mm file is about 22 min 49 s on a 10 W diode, about 9 min 30 s on a 40 W CO2 and about 4 min 34 s on a 100 W CO2. The layout is long at 1604 × 272 mm, so on a hobby machine you will split it over several sheets. The front, back and base are each 400 mm long, which means your bed has to be at least that long.
A 10 W diode handles 3 mm cleanly; for 5 or 6 mm, slow down and run extra passes, and check that the slots are cut through before popping parts out.
Assembly
Fit the three short dividers into the cross divider, set it on the base and add the walls, back first. The joints are snug enough without glue. Sand the long top edge of the front, the part your fingers touch most, and finish with oil or lacquer.
Questions about this file
Will the front bay hold a watch and sunglasses together?
Yes. It runs the full 400 mm width without dividers, so a watch, folded sunglasses and a bangle lie side by side.
My laser bed is shorter than 400 mm. Can I still make it?
Not at this size, because the front, back and base are 400 mm long. You can scale the design down, but then set every slot back to your real plywood thickness.
What should I seal it with?
A clear water-based lacquer keeps birch pale, while Danish or tung oil warms the color. Either protects against skin oils and perfume drips.
Would 6 mm plywood be too heavy?
It makes a very sturdy tray but adds weight and cutting time. For a dresser tray, 3 or 4 mm is usually plenty.
Can I line the back cubbies with felt?
Yes. Cut felt squares slightly smaller than each cubby and glue them to the base, so rings and studs do not slide or scratch.
Similar files