 Visualization
Hair Accessory Tray SVG, Headband Organizer With Clip Pockets, Low Front Laser Cut Vanity Box DXF
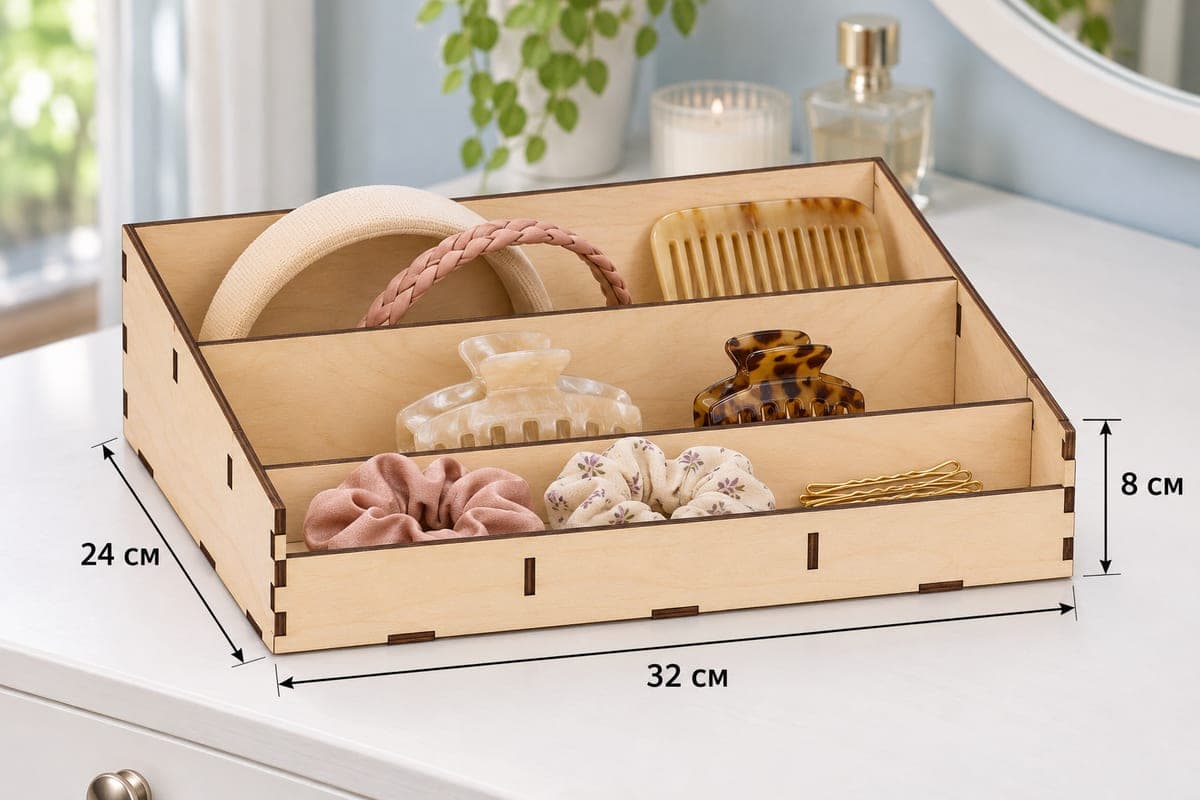
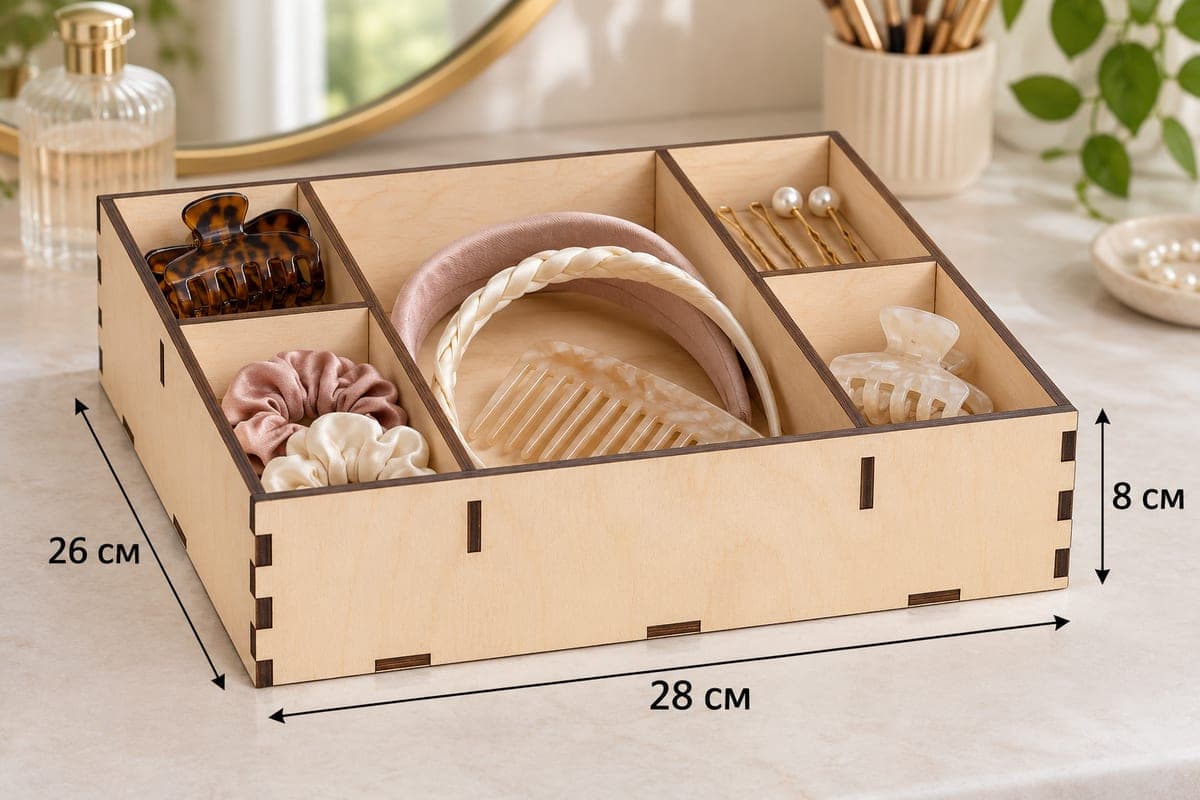
A nearly square plywood tray for hair accessories, 280 × 260 × 80 mm (11.02 × 10.24 × 3.15 in), with a wide center bay for headbands and two pockets on each side for clips and pins; the front drops to just 40 mm. The free SVG and DXF files come in 3, 4, 5 and 6 mm plywood versions with 9 tab-and-slot parts.
- Formats
- SVG, DXF
- Outer size (W × D × H)
- 280 × 260 × 80 mm (11.02 × 10.24 × 3.15 in)
- Parts
- 9
- Material thickness
- 3, 4, 5 or 6 mm plywood (a file for each)
- Layout size (3 mm file)
- 1,100 × 352 mm
- Cut length
- 6.56 m
- Est. time, 10 W diode (3 mm)
- 21 min 51 s
- Est. time, 40 W CO2 (3 mm)
- 9 min 06 s
- Layers
- CUT only, no engraving
Free account required to download
How to make it
- 01Select the 3, 4, 5 or 6 mm file and cut a sample slot to make sure the long divider tab fits your sheet.
- 02Cut the 9 parts; the nearly square base can go on a sheet of its own.
- 03Build the shell, add the two long dividers, place a short cross divider in each side column and fit the 40 mm front.
- 04Finish with wax or oil and put headbands in the center bay and clips and pins in the four side pockets.
A symmetric layout
Two long dividers split the 280 mm width into three columns, and the side columns are each cut in half by a short cross divider. The result is a big center bay with two small pockets on either side, five spaces in total. The center bay is where headbands live: a padded one and a braided one stand easily, with a comb tucked in front. The four side pockets take a tortoiseshell claw clip, a pile of scrunchies, pearl hair pins and a clear claw clip.
The front is only 40 mm high against an 80 mm back, a steep slope that leaves the front of the box wide open. That suits a vanity where you reach in from above, and it makes the tray look lighter than its 260 mm depth suggests.
Cutting and building the tray
The 3 mm file takes about 21 min 51 s on a 10 W diode, about 9 min 06 s on a 40 W CO2 and about 4 min 22 s on a 100 W CO2. On a diode, keep to 3 or 4 mm for clean edges; a 6 mm sheet can work but expect several passes and some charring to sand off. The layout is 1100 mm long; the nearly square 280 × 260 mm base fits a 300 mm bed on its own.
Assemble the base, sloped sides and back, then the two long dividers, then the two short cross dividers in the side columns. Front wall last. The tabs hold without glue.
Finishing and gift ideas
A soft white wax or clear oil keeps the birch light. Sold filled with pearl pins and two headbands, it makes a nice wedding-morning gift. It also works as a jewellery tray if you swap the hair accessories for bracelets and rings.
Questions about this file
Why is the front so low?
The 40 mm front leaves the tray open at the front, so you can see and grab clips without lifting anything over a high wall.
Do padded headbands fit in the center bay?
Yes, the center bay is the widest space and holds two or three padded or braided headbands upright.
Can I scale this tray down?
Yes, but correct the slot width to your plywood thickness after scaling. A scaled slot that is thinner than the sheet will not accept the tab.
Should I glue it?
It is not needed for daily vanity use. Add wood glue if you plan to sell it shipped and want zero rattle.
Could I use it for jewellery instead?
Yes, the four side pockets suit rings and earrings and the center bay holds bracelets or a watch.
Similar files