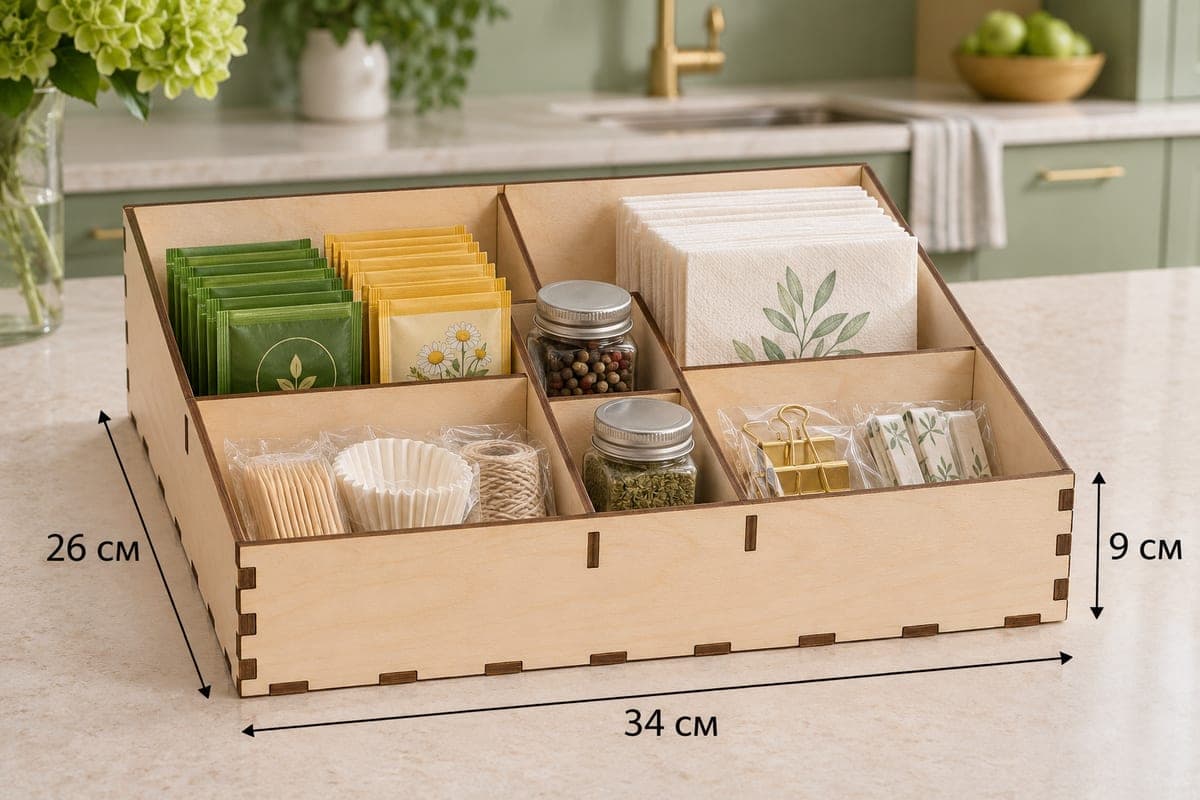
 Visualization
Pantry Organizer SVG, Three Column Kitchen Storage Box DXF, Laser Cut Tea and Spice Caddy, Deep Countertop Bin
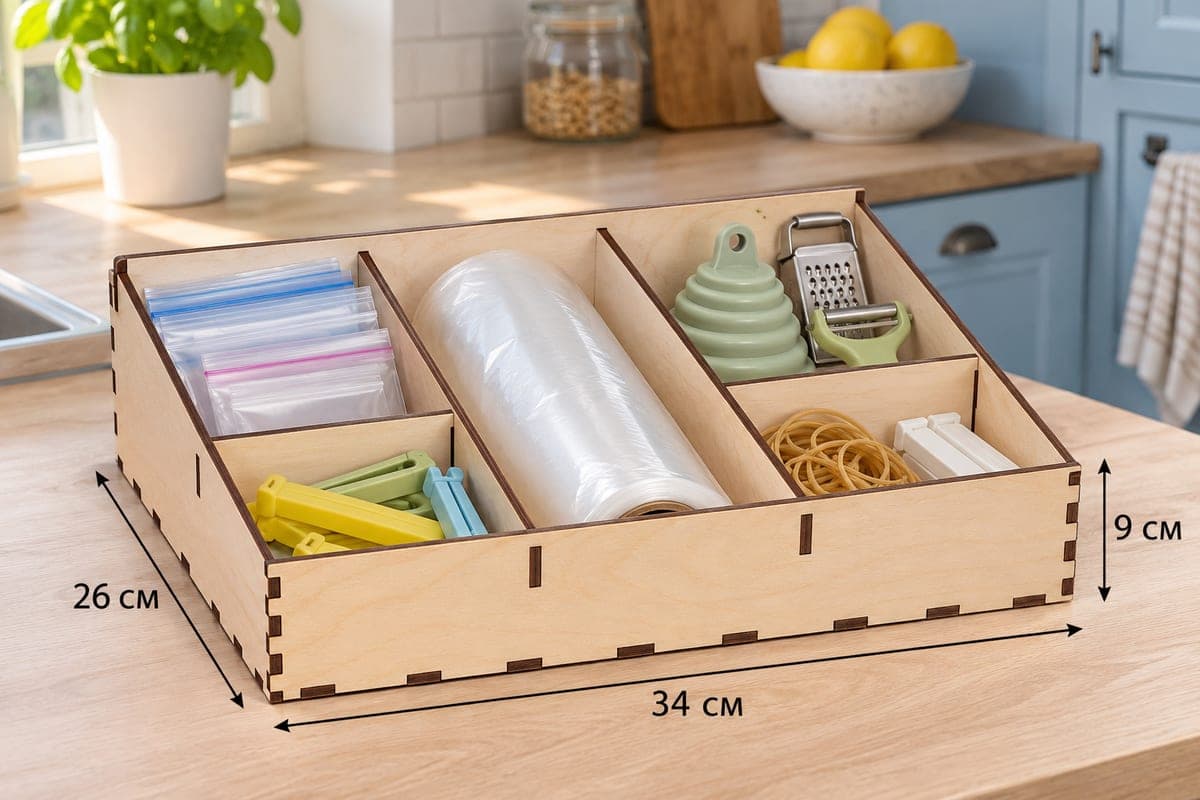
This laser cut file makes a three-column pantry organizer with a sloped front, where each column is split into a back and a front bay, six compartments in all, including a narrow middle column for spice jars. It comes as SVG and DXF for 3, 4, 5 and 6 mm plywood, measures 340 × 260 × 90 mm (13.39 × 10.24 × 3.54 in) and is 10 pieces joined with tabs and slots. You can get all eight files for this organizer free.
- Formats
- SVG, DXF
- Outer size (W × D × H)
- 340 × 260 × 90 mm (13.39 × 10.24 × 3.54 in)
- Parts
- 10
- Material thickness
- 3, 4, 5 or 6 mm plywood (a file for each)
- Layout size (3 mm file)
- 1,231 × 362 mm
- Cut length
- 7.78 m
- Est. time, 10 W diode (3 mm)
- 25 min 56 s
- Est. time, 40 W CO2 (3 mm)
- 10 min 48 s
- Layers
- CUT only, no engraving
Free account required to download
How to make it
- 01Choose the SVG or DXF for your plywood and cut one slot on scrap to check that a tab fits tightly.
- 02Cut all ten parts: front, back, two sloped sides, base, two long dividers and three cross dividers of different lengths.
- 03Assemble the walls on the base, insert the two long dividers, then match each cross divider to its column, the shortest one going in the middle.
- 04Sand, finish with lacquer or oil, and sort tea, jars, napkins and small supplies into the six bays.
Six bays across three columns
Two long dividers make three columns: a wide one on each side and a narrow one in the middle. Each column then gets its own cross divider, at slightly different positions, so the box has six bays. In the photo the left column keeps green and yellow tea bags at the back and a pack of toothpicks, paper baking cups and a little roll of twine in front. The narrow middle column takes one spice jar behind another. On the right, napkins stand at the back, and the front bay holds a couple of bag clips and a few sugar sachets. At 260 mm, this is the deepest pantry box in the set; the walls run from 90 mm at the back to 50 mm at the front.
Thickness, time and layout
For the 3 mm file it takes about 25 min 56 s on a 10 W diode, about 10 min 48 s on a 40 W CO2 and about 5 min 11 s on a 100 W CO2. A diode cuts 3 mm in one or two passes; for 5–6 mm sheets you need a CO2 or several passes. The 3 mm layout is 1231 × 362 mm, so smaller beds need two or three sheets.
Assembly
The three cross dividers are all different lengths, one for each column: the shortest goes into the narrow middle column. Lay them out by size before you start. Tabs hold without glue; wood glue is there if you want it permanent. Sand and finish with lacquer or food-safe oil.
Ideas: sell it as a tea and spice caddy, a desk organizer in an office kitchen, or a gift box with tea, jars and napkins in the six bays.
Questions about this file
What fits in the narrow middle column?
Small round spice jars, one behind the other, as in the photo. It also suits salt and pepper shakers or a cup of stirrers.
Is it too deep for a normal counter?
At 260 mm it is deeper than the other pantry boxes but still leaves room on a standard 600 mm counter.
Can I cut it in acrylic?
Yes, use the 3 mm file with 3 mm acrylic and bond the joints with acrylic cement rather than forcing the tabs.
Which thickness do you recommend?
Three millimeter is light and quick for pantry items. Choose 4 mm for a heavier, more solid box.
Can I add names to the bays?
The file contains cut lines only, but you can add engraved labels to the front panel or dividers before cutting.
Similar files