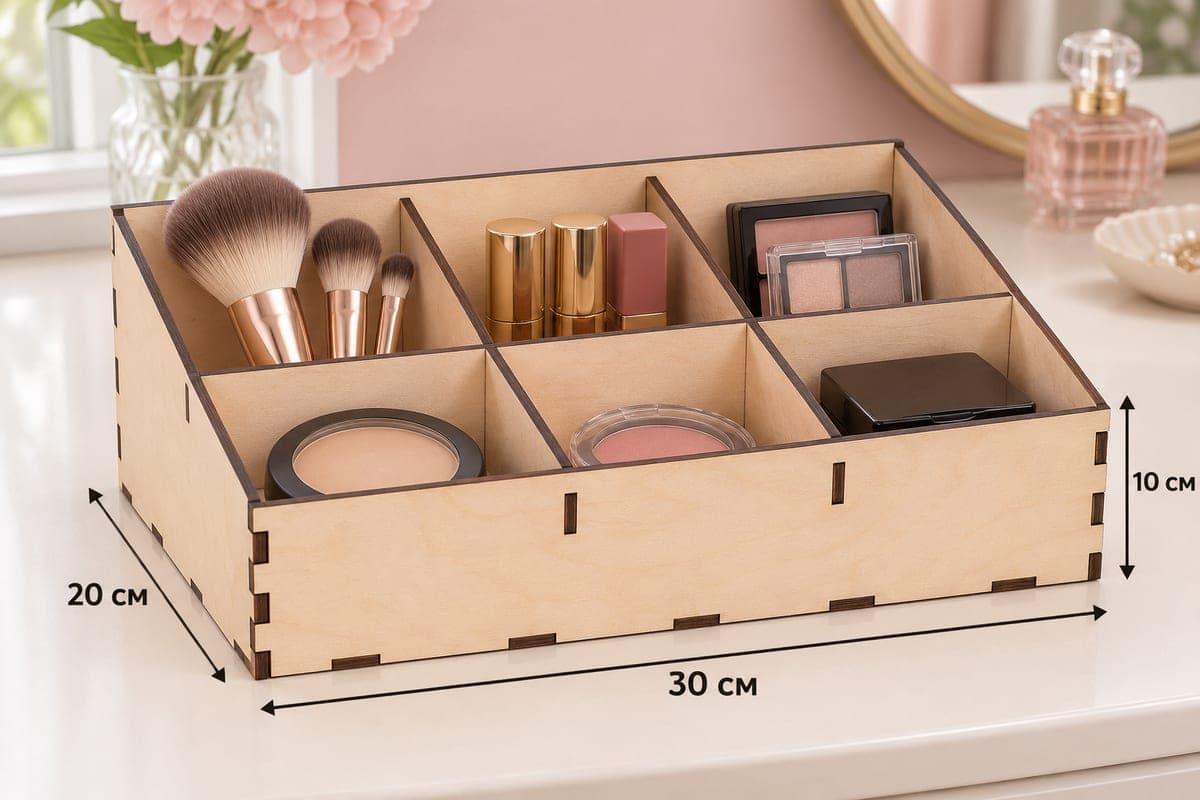
 Visualization
Cosmetic Organizer SVG, Six Cell Makeup Storage Box Laser File, Tall Back Vanity Organizer DXF
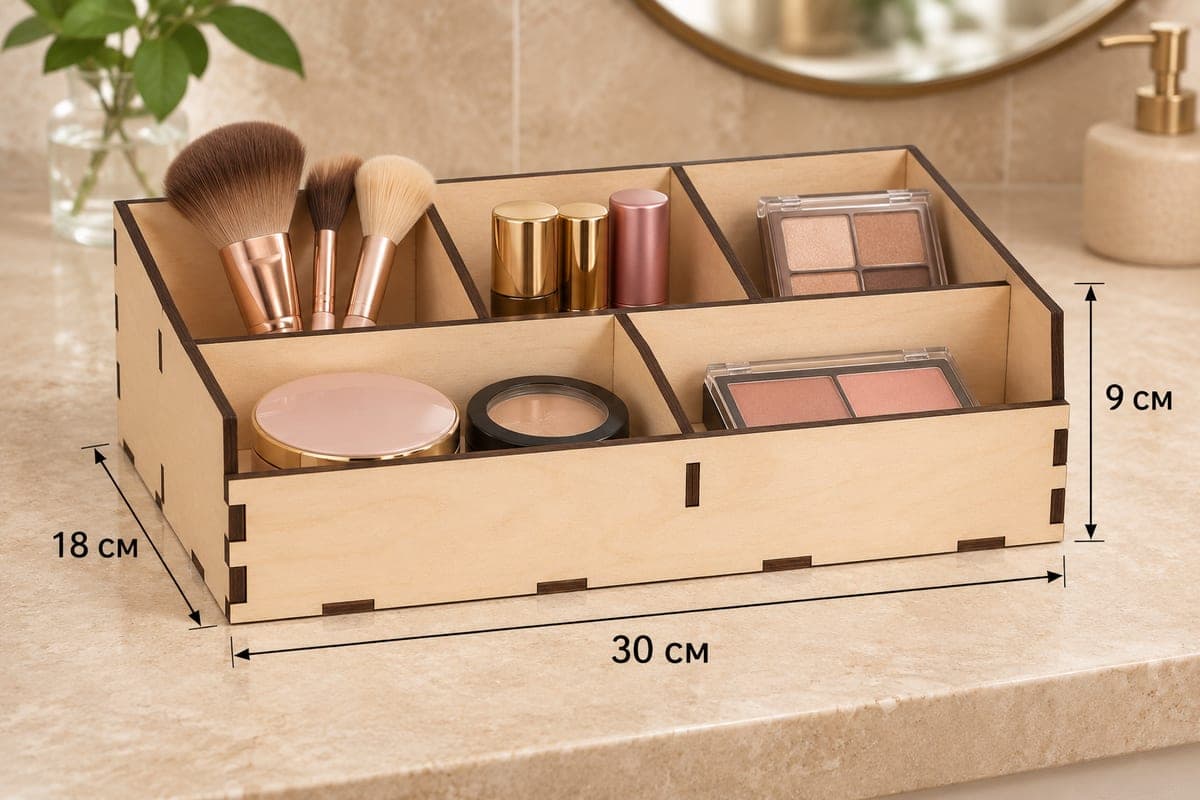
A free laser cut cosmetic organizer with six cells in two rows of three, 300 × 200 × 100 mm (11.81 × 7.87 × 3.94 in) outside. The download has SVG and DXF for 3, 4, 5 and 6 mm plywood; 10 pieces join by tabs and slots, and the sides slope from a 100 mm back to a 55 mm front. Downloading it is free.
- Formats
- SVG, DXF
- Outer size (W × D × H)
- 300 × 200 × 100 mm (11.81 × 7.87 × 3.94 in)
- Parts
- 10
- Material thickness
- 3, 4, 5 or 6 mm plywood (a file for each)
- Layout size (3 mm file)
- 1,028 × 312 mm
- Cut length
- 6.77 m
- Est. time, 10 W diode (3 mm)
- 22 min 35 s
- Est. time, 40 W CO2 (3 mm)
- 9 min 25 s
- Layers
- CUT only, no engraving
Free account required to download
How to make it
- 01Download the version for your plywood and test-fit one of the shorter front dividers in a scrap slot.
- 02Cut the ten parts across two sheets if your bed is under 1028 mm, labelling the 77.2 mm and 100 mm dividers.
- 03Assemble the cross divider with its four dividers, tall pair at the back, place it in the base, then add back, sides and the 55 mm front.
- 04Seal with matte lacquer, then sort brushes and lipsticks into the back cells and compacts into the front ones.
Six cells under a tall back wall
This is the taller version of the two-row layout: the back wall is 100 mm, so long brush handles and lip gloss tubes stay hidden behind it. A cross divider 77.2 mm high runs the full 300 mm length. Two dividers split the back row into three cells and two more do the same in front, so each cell is roughly 10 cm wide. In the photo the back row holds brushes, lipsticks and palettes; the front row keeps a powder compact, a blush and a cream compact apart.
Cutting notes
Ten pieces fit a 1028 × 312 mm layout, which is longer than many desktop beds, so plan on two sheets. The 3 mm file runs about 22 min 35 s on a 10 W diode, about 9 min 25 s on a 40 W CO2 and about 4 min 31 s on a 100 W CO2. The front-row dividers are shorter (77.2 mm) than the back-row ones (100 mm), so mark them with a pencil as they come off the bed.
Building and finishing it
Slide the four short dividers onto the cross divider, check that the taller pair is at the back, then lower the grid into the base. Fit the back, both sides and finally the 55 mm front. Glue is not required; for a box that will be sold or shipped, a touch of PVA on the base joints is worth it.
A clear matte lacquer keeps the light birch look and resists powder stains. Shops on Etsy often list this kind of box as a personalized vanity organizer with a name engraved on the front, or bundle it with a matching brush cup.
Questions about this file
What is the difference between this and the lower six-cell tray?
This one has a 100 mm back and a 55 mm front, so tall brushes and gloss tubes are hidden behind the wall. The 90 mm version is better under a low shelf or mirror.
Which thickness should I pick for a gift?
4 mm plywood gives a solid feel without making the slots hard to cut on a diode. 6 mm looks premium but needs a CO2 laser or many passes.
Can I cut it in acrylic or MDF?
Both work with the file that matches the sheet thickness. Acrylic shows the cells nicely in clear or frosted sheet; MDF should be painted.
Does a 10 W diode cut the 6 mm version?
Usually not in one pass. Expect several slow passes and some charring, or switch to the 3 or 4 mm file.
How should I finish it so powder does not stain the wood?
Two thin coats of matte water-based lacquer close the grain, so loose powder and blush wipe off with a damp cloth. Lightly sand between coats for a smooth feel.
Similar files