 Visualization
Quilt Block Ornament SVG, Patchwork Star Laser Cut File DXF, Quilter Gift and Barn Quilt Christmas Decoration
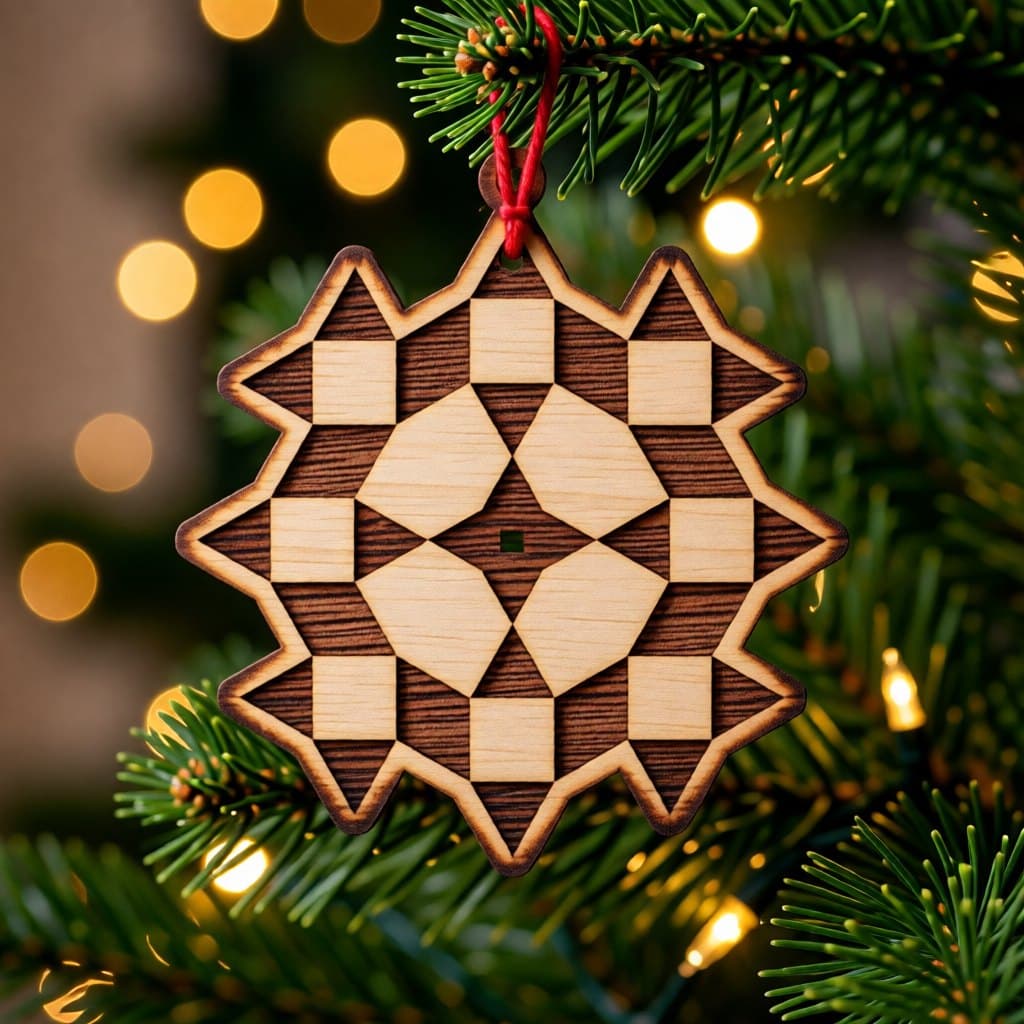
A geometric ornament laid out like a pieced quilt block: dark engraved triangles and diamonds alternate with light wooden squares and large panels, around a small square at the centre. The cut outline has twelve triangular points. The block is 90 mm wide and 97.5 mm tall (3.54 × 3.84 in), and a 4 mm hole pierces its top point.
- Formats
- SVG, DXF
- Size
- 90 × 98 mm (3.54 × 3.84 in)
- Parts
- 1
- Hanging hole
- 4 mm
- Cut length
- 0.40 m
- Engraving area
- 19.3 cm²
- Material
- 3 mm plywood, MDF or acrylic
- Est. time, 10 W diode
- 4 min 33 s
- Est. time, 40 W CO2
- 1 min 38 s
- Est. time, 100 W CO2
- 1 min 04 s
- Per 300 × 400 mm sheet
- 9 pcs
- Per 600 × 400 mm sheet
- 18 pcs
- Layers
- CUT (red), ENGRAVE (black)
- License
- CC0 1.0: free for personal and commercial use
Free account required to download
How to make it
- 01Cover 3 mm plywood with masking tape if you plan to paint, then bring in the SVG or DXF at 90 × 97.5 mm.
- 02Run the fill engraving for the triangles, diamonds and centre cross. Every edge is straight, so any wobble in your belts will show here first.
- 03Cut the twelve-point outline and watch the sharp V corners for overburn.
- 04Paint the engraved areas through the tape, peel, colour the light squares if you like, and add a hanger at the top point.
Drawn like a pieced block
Quilters will recognise the layout straight away. Eight light squares form a ring, each flanked by dark triangles that push out to make the twelve points of the outline. Inside the ring, four broad light panels with clipped corners frame a dark four-pointed cross, and a tiny light square marks the very centre. Every edge is straight, so the pattern looks crisp and graphic, a lot like a painted barn quilt on a farm building.
Painting by area
This is the best file in the collection for colouring. Each light square and panel is a closed shape, so you can fill them with paint pens or a small brush in reds, greens and creams the way a quilter picks fabrics. Engrave through masking tape, paint the dark areas while the tape is on, then peel it and colour the light shapes by hand. If you want the light and dark swapped, most laser programs can invert the fill.
Cutting notes
The cut is short, about 400 mm, but every point is a sharp V. Check that your laser does not slow down and overburn at each corner; a little extra soot on the points sands off easily. Timing, estimated for 3 mm plywood, runs from 4 min 33 s (10 W diode) through 1 min 38 s (40 W CO2) down to 1 min 4 s (100 W CO2).
Who buys quilt ornaments
- Quilt guilds, as a Christmas exchange gift or a raffle prize.
- Fabric and craft shops, hung by the till as an impulse buy.
- Barn quilt trail visitors and farmhouse decor fans.
- Grandmothers who quilt: paint it in the colours of a quilt they made.
Questions about this file
Can I paint it like a real barn quilt?
Yes. Every square, triangle and panel is a closed shape, so you can colour each one separately with paint pens or a fine brush.
Can I swap the dark and light areas?
Most laser programs let you invert the fill or swap the engrave shapes. The cut outline stays the same, so nothing else changes.
Will the twelve sharp points break off?
The points have a wooden margin of about 3 mm around the triangles, so they are firm in plywood. Sand them lightly rather than filing them.
Can I scale it up for a wall sign?
It is a vector file, so it scales cleanly. At 200 mm or more it makes a nice small barn quilt plaque; adjust the hole or skip it for wall use.
Is it only a Christmas ornament?
No. In autumn colours or blue and white it works year-round as a quilt-themed gift, magnet or keyring.
Similar files