 Visualization
Cutlery Tray With Front Compartment SVG, Silverware Drawer Insert Laser File, Teaspoon Organizer DXF
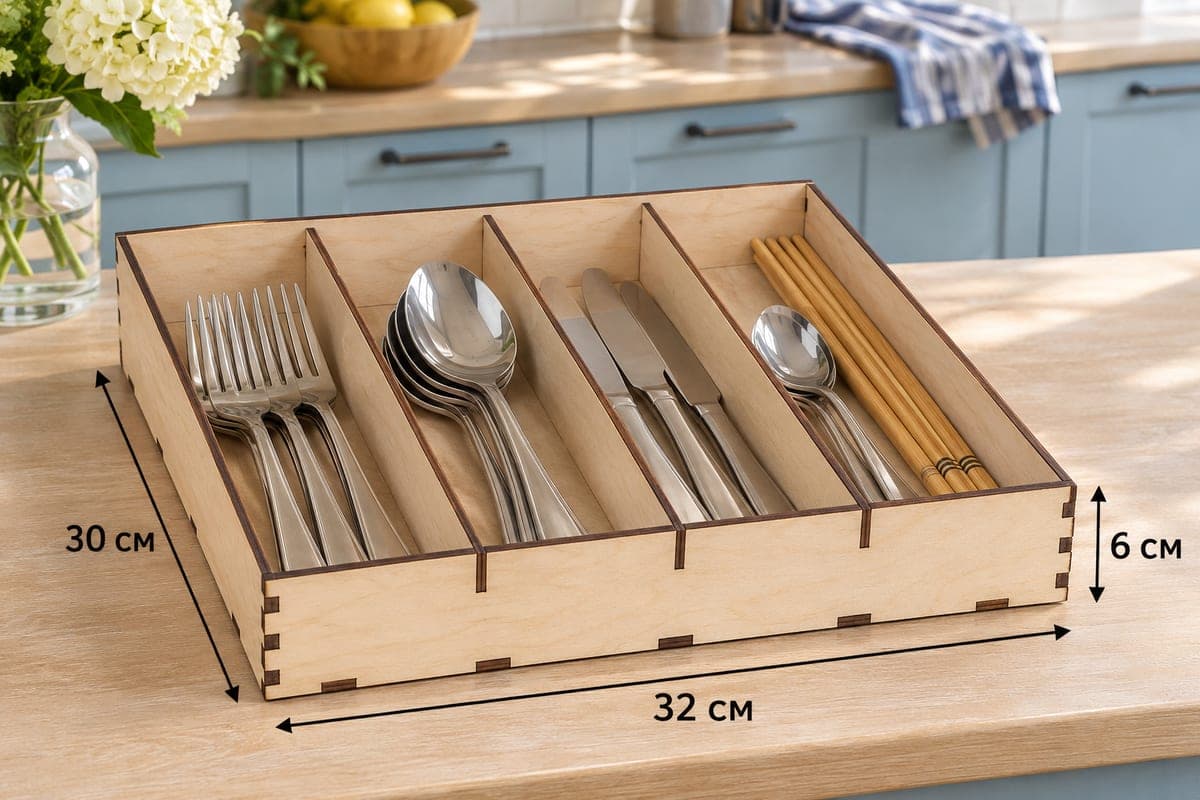
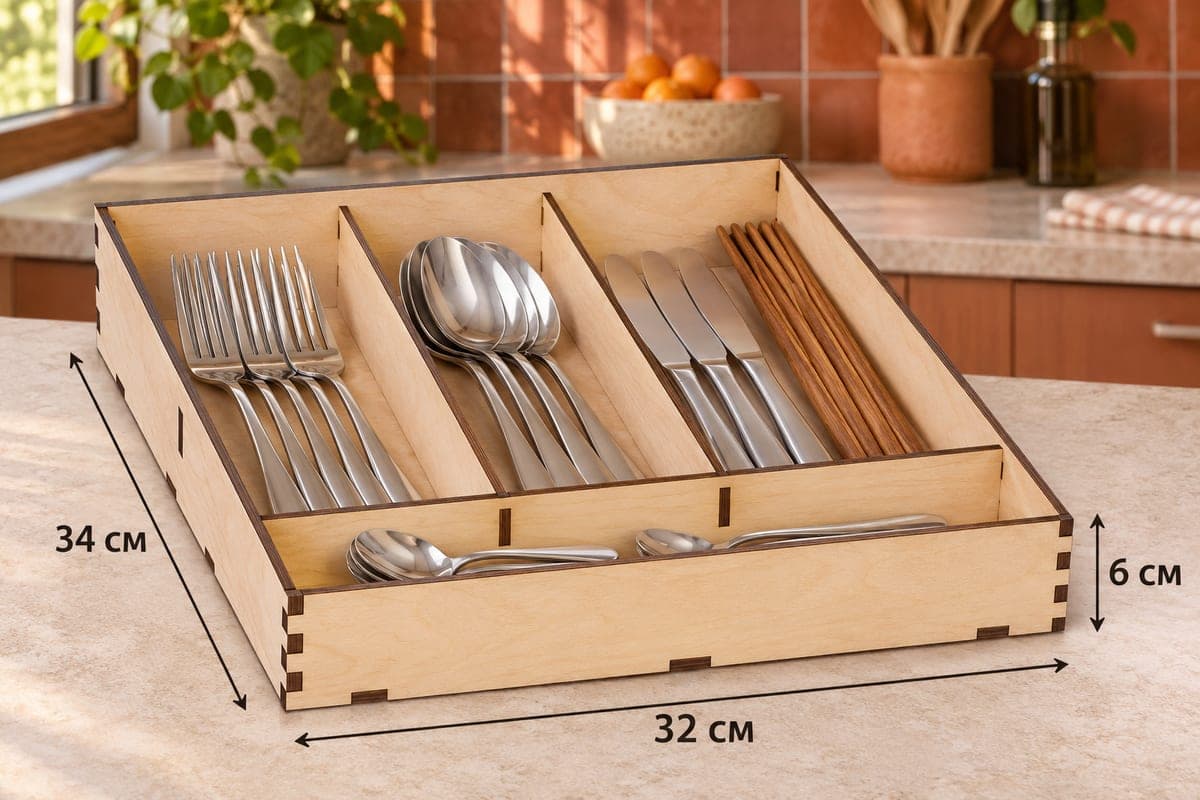
A cutlery drawer tray with three long lanes at the back and one full-width strip across the front for teaspoons, delivered as SVG and DXF in separate versions for 3, 4, 5 and 6 mm plywood. Outer size 320 × 340 × 60 mm (12.60 × 13.39 × 2.36 in), 8 pieces, four compartments, tab-and-slot assembly with no hardware. Free to download.
- Formats
- SVG, DXF
- Outer size (W × D × H)
- 320 × 340 × 60 mm (12.60 × 13.39 × 2.36 in)
- Parts
- 8
- Material thickness
- 3, 4, 5 or 6 mm plywood (a file for each)
- Layout size (3 mm file)
- 1,340 × 412 mm
- Cut length
- 7.42 m
- Est. time, 10 W diode (3 mm)
- 24 min 44 s
- Est. time, 40 W CO2 (3 mm)
- 10 min 19 s
- Layers
- CUT only, no engraving
Free account required to download
How to make it
- 01Open the folder for your sheet thickness and test one tab in a scrap slot; adjust kerf only if the fit is loose.
- 02Cut the base, four walls, the 320 mm cross divider and the two shorter lane dividers.
- 03Seat the cross divider near the front edge of the base, slot the two lane dividers in behind it, then close the box with the sides, front and back.
- 04Sand, apply lacquer or oil, and place teaspoons in the front strip and forks, spoons and knives in the three rear lanes.
A layout that keeps teaspoons apart
Most trays drop teaspoons in with the big spoons, and they end up buried. Here a cross divider runs the full 320 mm width close to the front, leaving a shallow strip where teaspoons lie side by side. Behind it, two dividers split the remaining space into three lanes just under 240 mm long: forks, dinner spoons, and knives with chopsticks in the photo. The tray is 340 mm deep, a bit deeper than it is wide, so it fits drawers that run back further than usual.
Cutting and assembly order
All 8 pieces sit on a 1340 × 412 mm layout for the 3 mm version. If your bed is around 400 mm, cut the base on its own and gather the walls and dividers onto one or two more sheets. The 3 mm file takes about 24 min 44 s on a 10 W diode, about 10 min 19 s on a 40 W CO2 and roughly 4 min 57 s on a 100 W CO2. Thicker 5 and 6 mm sheets need a stronger tube or extra passes on a diode.
Fit the long cross divider into the base first, then slide the two short lane dividers into it so they lock against each other. Add the sides, then the front and back. The joints hold dry; a little wood glue makes them permanent.
Ideas for selling
Teaspoon strips are a detail buyers notice in listing photos, so shoot the tray from above with the front row filled. It also works as a gift for new homeowners when finished in a warm oil and tied with twine.
Questions about this file
How long can the cutlery in the back lanes be?
The rear lanes are just under 240 mm long, which suits most forks, dinner spoons and table knives; very long serving pieces will not lie flat.
Can I move the teaspoon strip to the back of the drawer?
Yes, just turn the tray around before placing it; the box is symmetrical apart from where the cross divider sits.
Is MDF a good choice instead of plywood?
MDF cuts cleanly but swells if water gets in, so seal it well or choose birch plywood for a cutlery drawer.
Do I need clamps while the glue dries?
Usually not, because the tabs pull the joints tight; a strip of masking tape across each corner is enough if you glue.
Can the tray go in the dishwasher?
No. Plywood warps and the joints loosen in a dishwasher; wipe it with a damp cloth and let it dry instead.
Similar files