 Visualization
Utensil Caddy SVG, Stepped Cutlery Organizer Laser Cut File, Countertop Silverware Station DXF
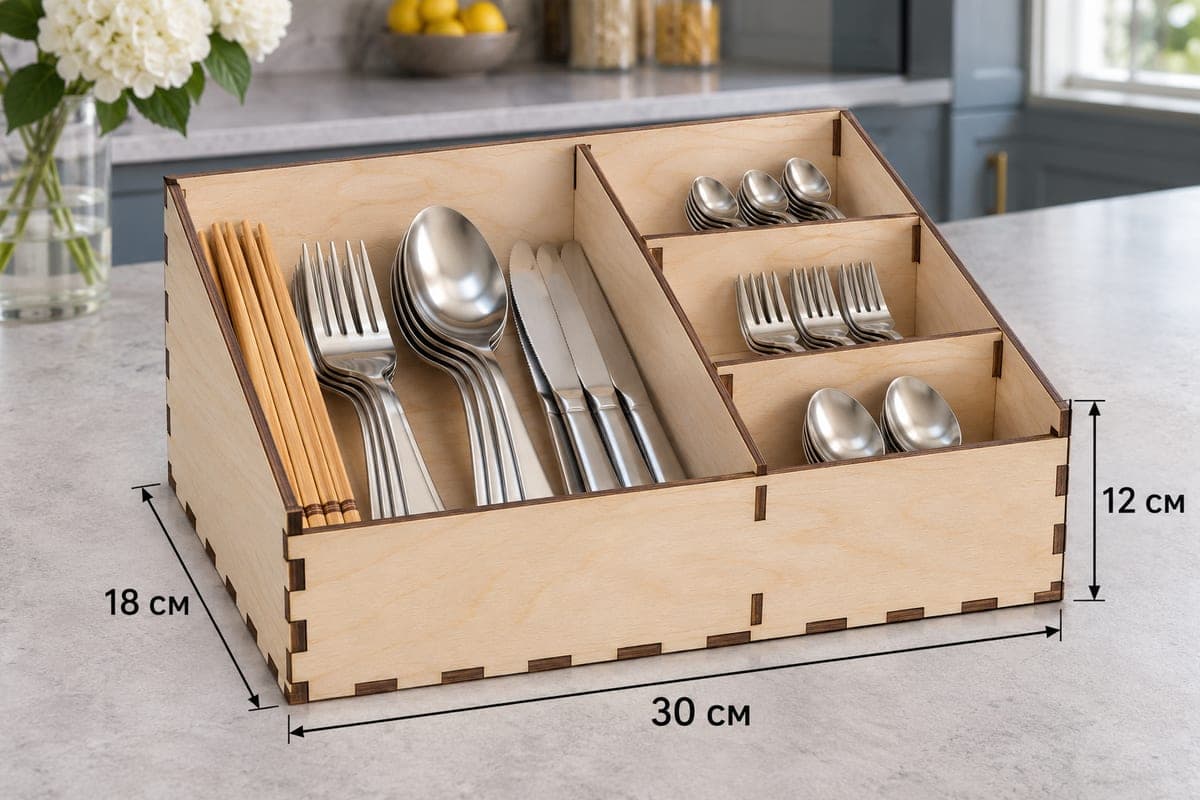
A countertop utensil caddy with one large bay for long cutlery and a column of three stepped tiers for teaspoons, dessert forks and spoons, four compartments in total. Supplied as SVG and DXF with separate files for 3, 4, 5 and 6 mm plywood, it measures 300 × 180 × 120 mm (11.81 × 7.09 × 4.72 in), uses 8 pieces, has a front lower than the back, and assembles with tabs and slots. Free download.
- Formats
- SVG, DXF
- Outer size (W × D × H)
- 300 × 180 × 120 mm (11.81 × 7.09 × 4.72 in)
- Parts
- 8
- Material thickness
- 3, 4, 5 or 6 mm plywood (a file for each)
- Layout size (3 mm file)
- 980 × 312 mm
- Cut length
- 5.70 m
- Est. time, 10 W diode (3 mm)
- 19 min 00 s
- Est. time, 40 W CO2 (3 mm)
- 7 min 55 s
- Layers
- CUT only, no engraving
Free account required to download
How to make it
- 01Choose the 3, 4, 5 or 6 mm file and test one slot; mark the two cross dividers after cutting because their heights differ.
- 02Cut the base, tall back, low front, two sloped sides, the long divider and both cross dividers.
- 03Fit the long divider, then the lower cross divider at the front of the side column and the taller one behind it, and close with the sides, back and front.
- 04Sand, seal, and stand long cutlery in the big bay with teaspoons, dessert forks and spoons on the three steps.
One big bay, three small steps
A full-depth divider splits the 300 mm length into two parts. The left part is one open bay where the photo shows chopsticks, dinner forks, spoons and table knives standing together. The right part is a narrow column divided by two short cross dividers of different heights, giving three tiers that rise toward the back: teaspoons on the top step, dessert forks in the middle and soup spoons at the front. The back is 120 mm tall and the sides slope down to a 72 mm front.
The stepped column keeps small pieces visible and separate, which is handy on a coffee bar, at a dessert buffet, or anywhere guests help themselves. The large bay takes everything else.
Cutting and assembling the tiers
The 3 mm layout is 980 × 312 mm. For the 3 mm file, expect about 19 min 00 s on a 10 W diode, about 7 min 55 s on a 40 W CO2 and about 3 min 48 s on a 100 W CO2. Diodes handle 3 mm in one or two passes; for 5 or 6 mm, plan several or use a CO2. Note that the two cross dividers have different heights, so keep them labelled after cutting.
Set the long divider in the base, then fit the lower cross divider at the front of the right column and the taller one behind it. Add the sides, back and front. Glue is optional; sand the sloped edges and seal with oil or lacquer.
Selling to coffee bars
Market it as a coffee station or dessert table organizer and show it filled with small spoons and forks. A version engraved with a cafe name makes a good small-business order.
Questions about this file
What fits on the stepped tiers?
Each tier is about 108 mm wide, a good size for teaspoons, dessert forks, cocktail forks or sugar spoons.
Can I put the tiers on the left instead?
Mirror the parts in your laser software before cutting; the joints work the same on either side.
Will it hold serving utensils?
The large bay takes salad servers and ladles standing upright, leaning on the 120 mm back wall.
How should I seal it for a coffee bar?
Use a water-based polyurethane or hard wax oil so coffee drips and spoon water wipe off without staining.
Could a cafe version be cut in acrylic?
Yes, in a matching thickness; clear or frosted acrylic suits a modern cafe counter.
Similar files