 Visualization
Bathroom Skincare Caddy SVG, Sink Counter Organizer Laser Cut File, Sheet Mask and Serum Box DXF
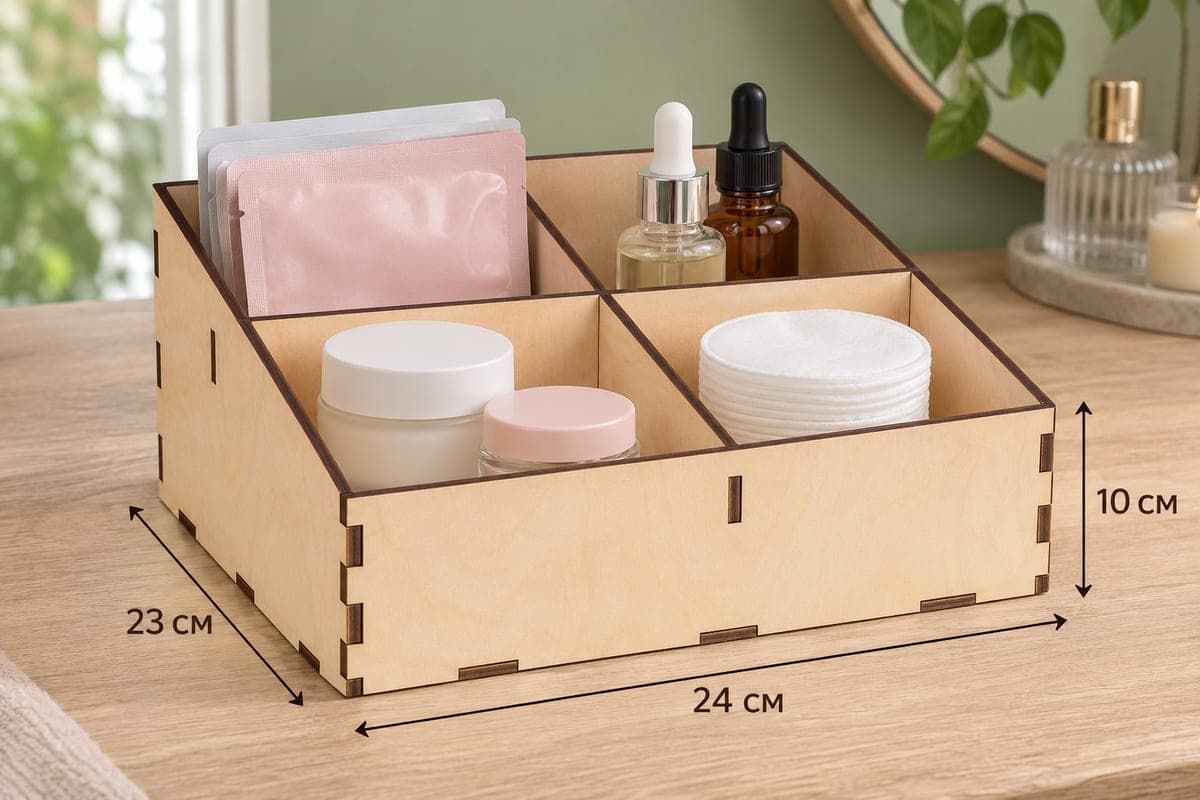
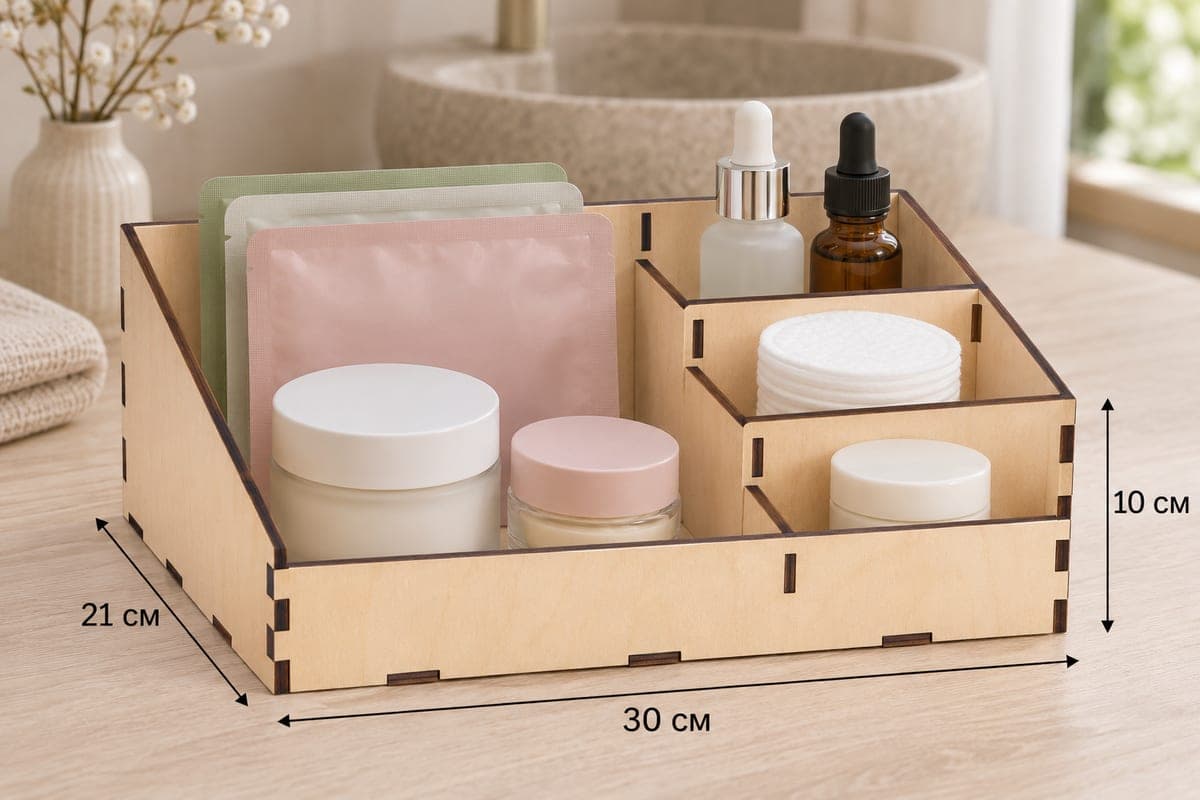
A bathroom skincare caddy with one wide bay and a side column of three smaller cells, available as SVG and DXF in separate versions for 3, 4, 5 and 6 mm plywood. It measures 300 × 210 × 100 mm (11.81 × 8.27 × 3.94 in), consists of 8 pieces, and slopes from a 100 mm back to a 55 mm front. It assembles with tabs and slots and can be downloaded for free.
- Formats
- SVG, DXF
- Outer size (W × D × H)
- 300 × 210 × 100 mm (11.81 × 8.27 × 3.94 in)
- Parts
- 8
- Material thickness
- 3, 4, 5 or 6 mm plywood (a file for each)
- Layout size (3 mm file)
- 1,040 × 322 mm
- Cut length
- 5.97 m
- Est. time, 10 W diode (3 mm)
- 19 min 54 s
- Est. time, 40 W CO2 (3 mm)
- 8 min 18 s
- Layers
- CUT only, no engraving
Free account required to download
How to make it
- 01Choose the SVG or DXF for your plywood and cut a test slot to make sure the dividers will hold firmly.
- 02Cut the 8 parts: front, back, two sloped sides, base, the long divider and two short cross dividers.
- 03Fit the long divider into the base, slot the two short cross dividers into the side column, then add the back, the sides and the front.
- 04Seal every face with water-resistant varnish, let it cure, then place masks and jars in the wide bay and serums, pads and a small pot in the side cells.
One big bay, three small cells
Instead of rows, this caddy uses a single long divider to make a wide left bay that runs the full depth of the box. To the right of it, two short cross dividers split a narrow column into three cells that step down from back to front.
The photo shows it beside a stone vessel sink. The wide bay keeps a stack of sheet masks upright against the back wall, with a large and a small cream jar in front. The side column holds two dropper serums at the back, cotton pads in the middle cell and a small cream pot at the front. Four compartments in total, with plenty of room for bulky items on the left.
Cutting it
There is an SVG and a DXF for each thickness from 3 to 6 mm, with slots that match the sheet. The 3 mm layout is 1040 × 322 mm; on a 300 or 400 mm bed, cut the base on a separate sheet. The 3 mm file takes about 19 min 54 s on a 10 W diode, about 8 min 18 s on a 40 W CO2 and about 3 min 59 s on a 100 W CO2. Thicker plywood needs more laser power or repeated passes on a diode.
Start assembly with the long divider in the base, slide the two short cross dividers into it, then close the box with the back, sides and front.
Protecting it from water
A caddy next to a sink gets splashed every day. Seal it all over, base included, with two thin coats of water-based polyurethane or marine varnish, and let it cure before loading. A drop of wood glue in the short cross divider slots keeps those small parts from lifting when wet.
Questions about this file
What fits in the wide bay?
It runs the full depth of the caddy, so a stack of sheet masks fits upright at the back with one or two cream jars in front.
How do I waterproof it for a bathroom?
Coat all faces, including the underside and the cut edges, with water-based polyurethane or marine varnish, and let it cure fully before use.
Which thickness should I use?
4 mm is a good middle ground for a bathroom caddy: stiffer than 3 mm but still easy to cut. The 3 mm file suits low-power diode lasers.
Can I swap sides so the column is on the left?
Yes, mirror the base and divider parts in your software before cutting so the slots line up.
Can I add a family name to it?
Engrave a name on the front panel by adding text in your laser software; the file itself contains only cut lines.
Similar files