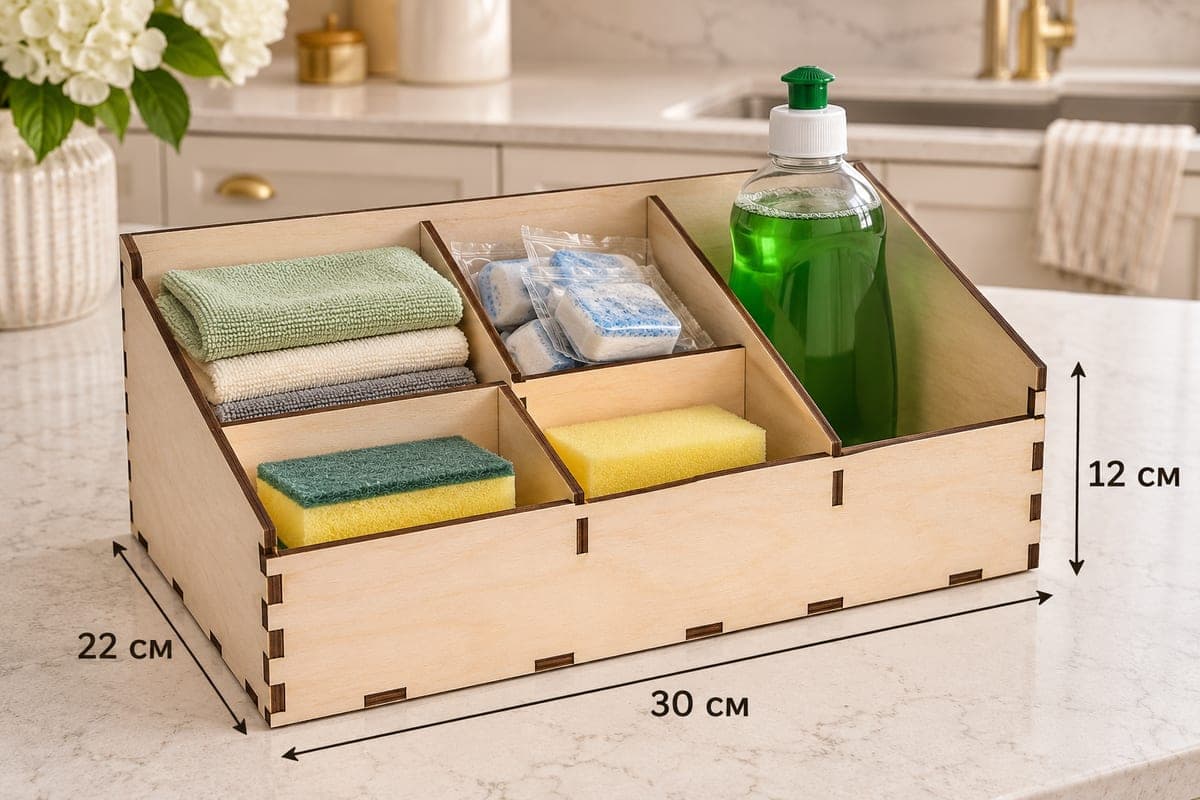
 Visualization
Dish Soap Caddy SVG, Tall Sink Organizer Laser Cut File, Sponge and Cloth Holder DXF, Wooden Kitchen Caddy
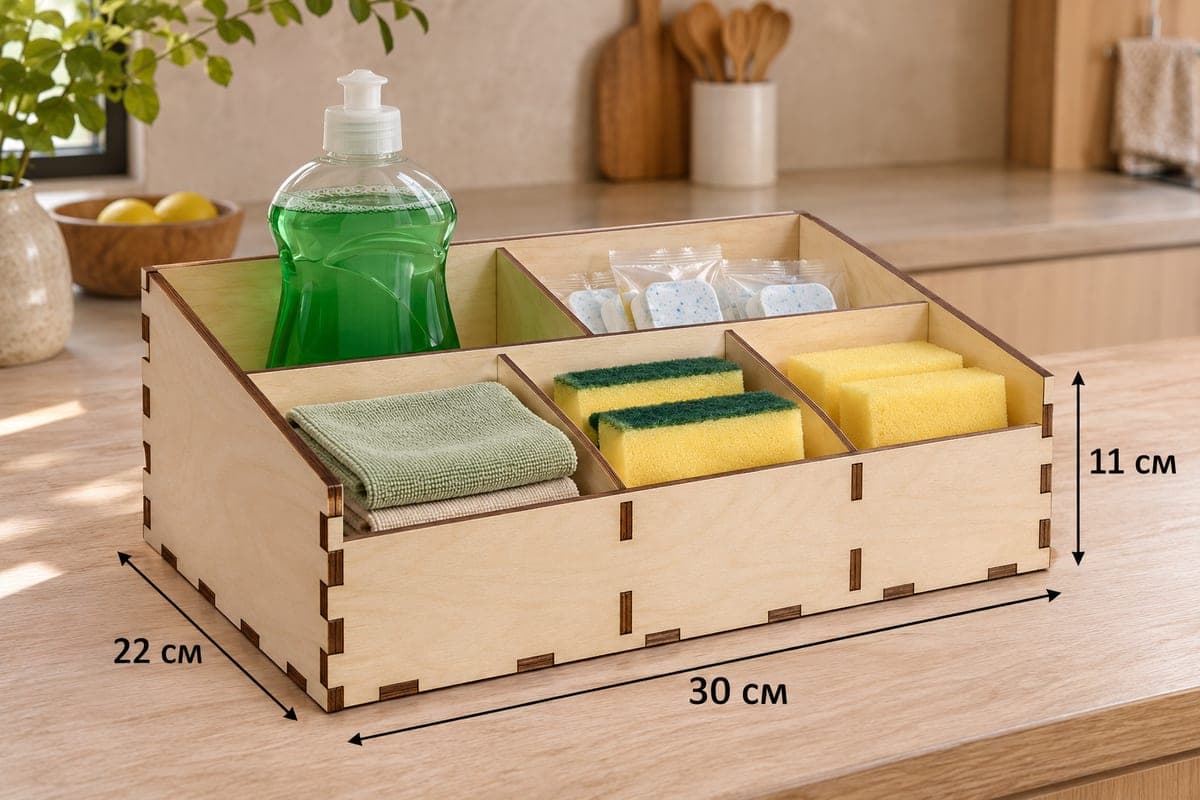
This is a laser cut file for a tall dish soap and sponge caddy with a full-depth bottle bay on one side and four small bays on the other, all behind a sloped front. It comes in SVG and DXF with separate versions for 3, 4, 5 and 6 mm plywood, measures 300 × 220 × 120 mm (11.81 × 8.66 × 4.72 in) and has 9 pieces joined with tabs and slots. This tall caddy is offered as a free download.
- Formats
- SVG, DXF
- Outer size (W × D × H)
- 300 × 220 × 120 mm (11.81 × 8.66 × 4.72 in)
- Parts
- 9
- Material thickness
- 3, 4, 5 or 6 mm plywood (a file for each)
- Layout size (3 mm file)
- 1,060 × 352 mm
- Cut length
- 6.84 m
- Est. time, 10 W diode (3 mm)
- 22 min 48 s
- Est. time, 40 W CO2 (3 mm)
- 9 min 30 s
- Layers
- CUT only, no engraving
Free account required to download
How to make it
- 01Select the SVG or DXF for your plywood thickness and cut a test slot from scrap; adjust power if the tab does not seat fully.
- 02Cut the nine pieces: front, back, two tall sloped sides, base, two long dividers and two short cross dividers.
- 03Put the back and sides onto the base, then the front, slide in both long dividers, and finish with the two cross dividers in the left section.
- 04Sand and seal with a waterproof finish, then stand the soap bottle in the deep right bay and fill the four small bays.
Built around the bottle
At 120 mm, the back wall of this caddy is the tallest in the sink set, and the front drops to 60 mm. Two long dividers create a full-depth bay on the right that gives a dish soap bottle support on three sides, even a tall one. The left part is split into four smaller bays by two short cross dividers: in the photo the back two hold folded cloths and wrapped dishwasher tablets, and the front two hold a scrub sponge and a plain yellow sponge.
Thickness, time and layout
The 3 mm file needs about 22 min 48 s on a 10 W diode, about 9 min 30 s on a 40 W CO2 and about 4 min 34 s on a 100 W CO2. Diode lasers handle 3 mm in one or two passes; 5 and 6 mm plywood is better suited to a CO2 tube. The 3 mm layout is 1060 × 352 mm. If your bed is smaller, split the parts onto two sheets, with the base and back on one and the sides and dividers on the other.
Finishing for wet hands
A soap bottle drips, and the sponge bays get water every day. Sand off burnt edges, then seal with polyurethane, spar varnish or hard wax oil, giving the base and the slot joints an extra coat. The tabs hold well dry; a spot of waterproof wood glue in each joint keeps the tall walls from loosening.
Selling and gifting: a tall caddy reads as a premium version next to lower ones, so offer it as the larger size in a listing. It also makes a good gift for someone who buys big refill bottles, or as part of a matched sink and bath set.
Questions about this file
Will a large refill bottle stand up in it?
The right bay runs the full depth of the box and the back wall is 120 mm tall, so it supports bigger bottles better than the lower caddies. Very tall bottles will still rise above the walls.
Can I make the bottle bay wider?
Not by scaling, because that also changes the slots. Move the dividers in your design software and keep every slot equal to your plywood thickness.
Should I use 3 mm or 6 mm plywood?
Three millimeter is fine for normal use. Pick 5 or 6 mm if you want the tall walls to feel very solid, and expect slower cuts.
Is it safe to leave wet sponges in it?
Only after the plywood is sealed. A waterproof lacquer or oil on every face and edge keeps the wood from swelling.
How do I keep the tall walls from wobbling?
Make sure each tab is fully seated, then run a little waterproof wood glue along the base slots. Thicker 4 or 5 mm plywood also stiffens the 120 mm walls.
Similar files